
A simple method to make the pilot fit the finished model
Painting figures is always a challenge. Experienced figure painters can work superbly with light, shading, and color modulation, achieving very realistic results. For aircraft modelers who usually build and weather airplanes, a figure—especially a pilot—often becomes the weak point. Colors are easy to smudge, the lack of clear shading makes the figure look stiff, and next to a well-finished aircraft model the figure often looks noticeably worse.
So how do you paint a pilot in a way that preserves sculpted detail, avoids complicated figure-painting techniques, and results in a coherent visual effect?
In this guide, we show a simple and effective method that delivers clear shading and a natural-looking figure—without requiring extensive experience in figure painting.
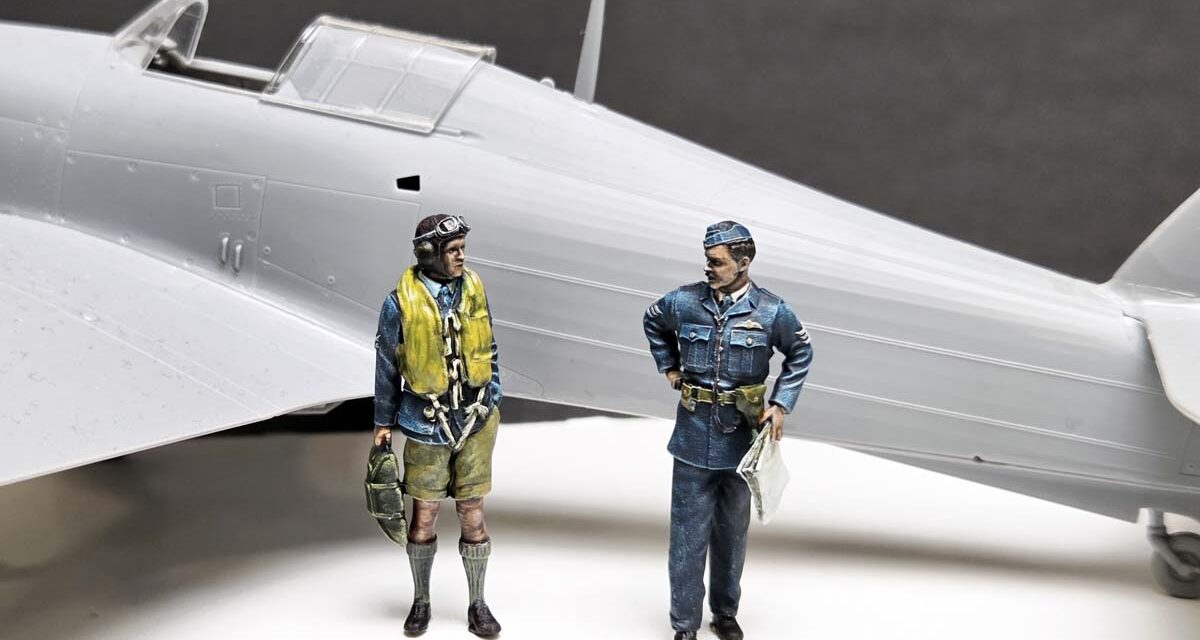
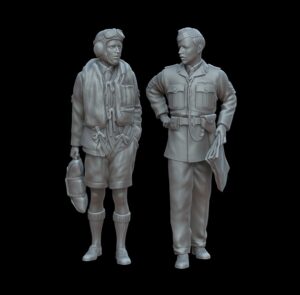
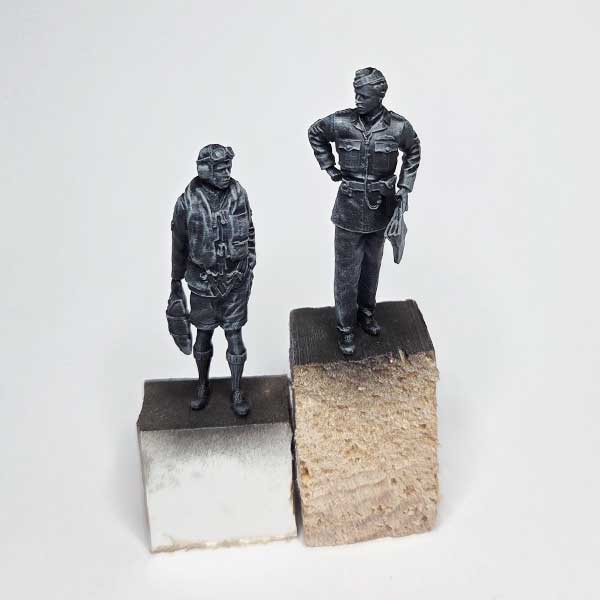
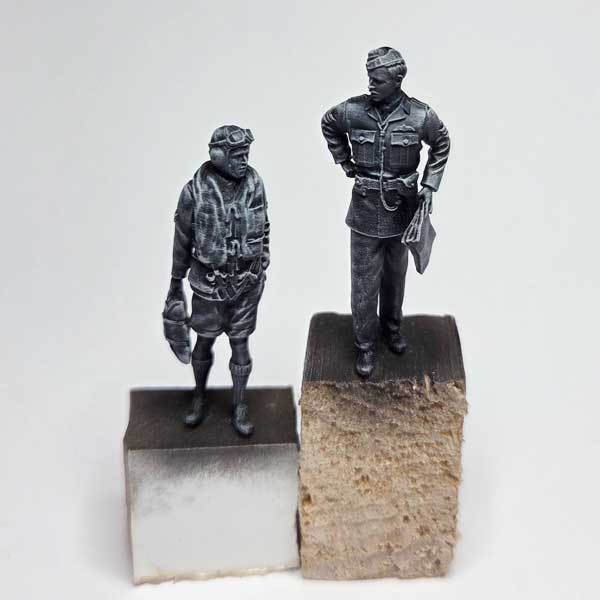
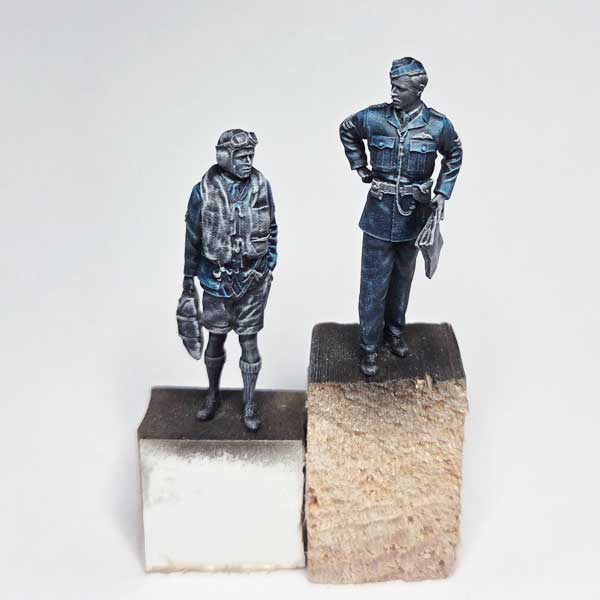
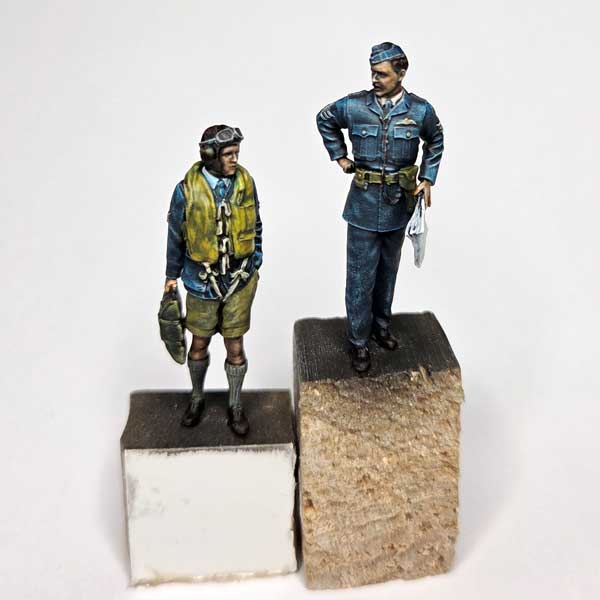
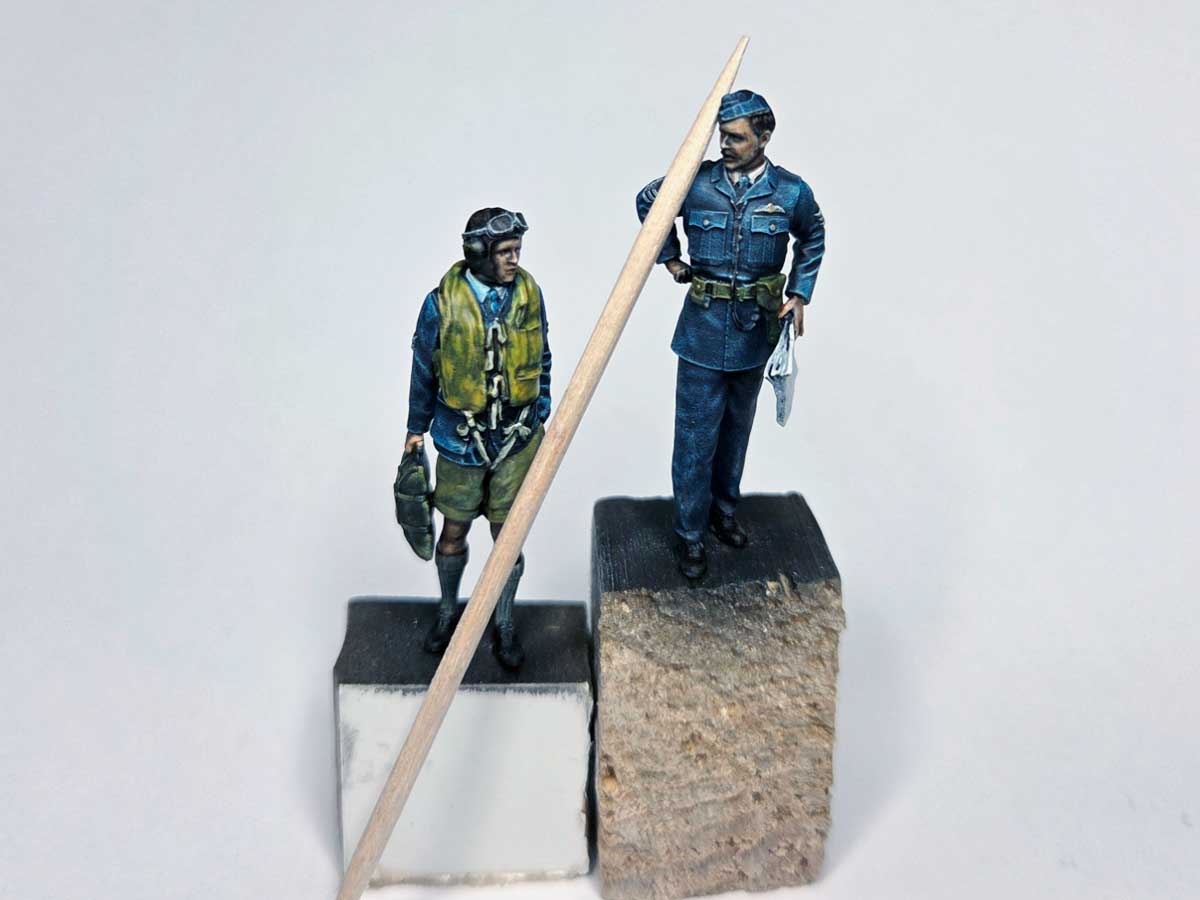
As an example, we used RAF pilots from Malta, 1942 (shop link), designed for Arma Hobby Hurricane 1/48 kits and produced by White Stork Miniatures. This set includes two 3D-printed figures, pre-cleaned by the manufacturer, featuring high-quality sculpting, crisp details, and natural poses—an essential advantage when using this painting method.
Before you start
Figure quality matters.
A figure with sharp details, clearly defined folds, and a natural pose is much easier to paint. Good sculpting “guides” the brush and allows solid results even with simple techniques.
Shading is essential.
A figure is a very small object that reflects little light. Without shading, details disappear and surfaces look flat and lifeless. Shading here is not an artistic flourish—it is a practical way to restore scale readability.
The “slap chop” method – what is it?
This technique originates from wargaming, where speed and repeatability are crucial when painting large numbers of figures. A few years ago, it became popular under the name “slap chop”.
Its core idea is simple:
- first, you build light and shadow without using color,
- then you apply semi-transparent paints that naturally settle over the prepared surface.
A similar approach is used by the well-known armor modeler Martin Kovacs on the “Night Shift” channel, although on a larger scale and using an airbrush with standard acrylics. For aircraft modelers, the method presented here is a natural bridge between aircraft painting and figure painting.
Getting started
Preparing the figure
The figure should be mounted securely so it can be handled freely during painting without touching it with your fingers.
It is best to use two pins in the figure’s feet. This prevents the figure from flexing while you work and ensures full stability. Steel or brass pins can be fixed into a small block of wood or cork and stabilized with Blue Tack. This solution is simple, reliable, and easy to remove after painting.
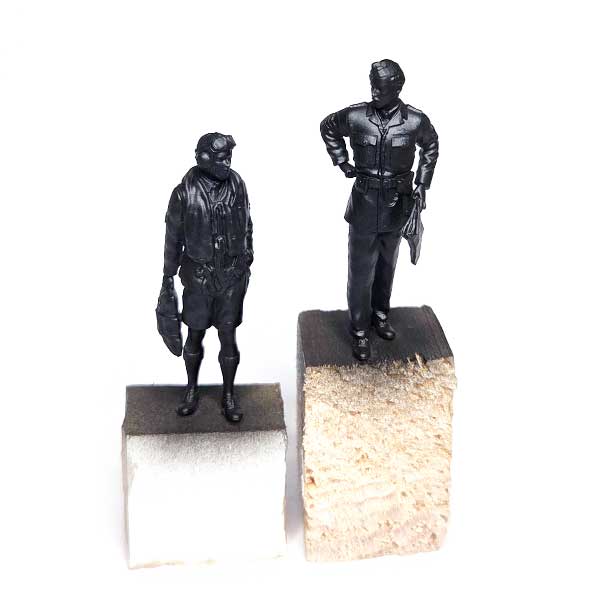
Priming and building the light
The entire figure is primed with black Surfacer 1500. Once dry, inspect the surface for any remaining 3D-print support marks and carefully remove them if needed.
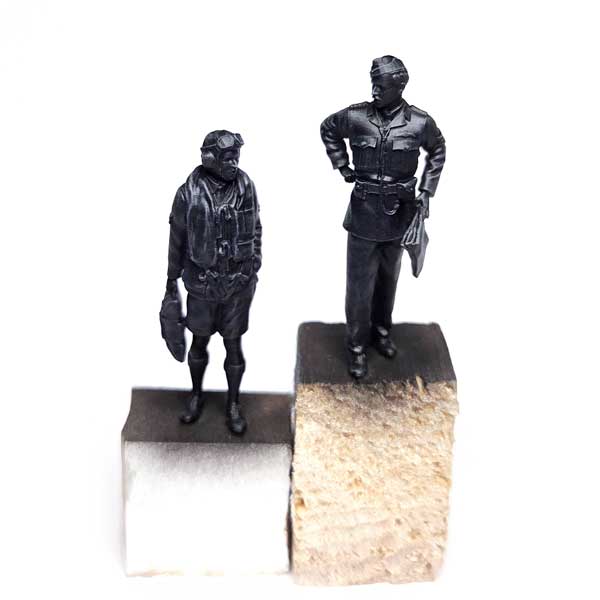
Next, apply drybrushing in three stages:
- dark grey,
- light grey,
- white or ivory.
The goal is to gradually bring out the details—uniform folds, straps, and equipment edges—and to create a complete light-and-shadow map before adding any color.
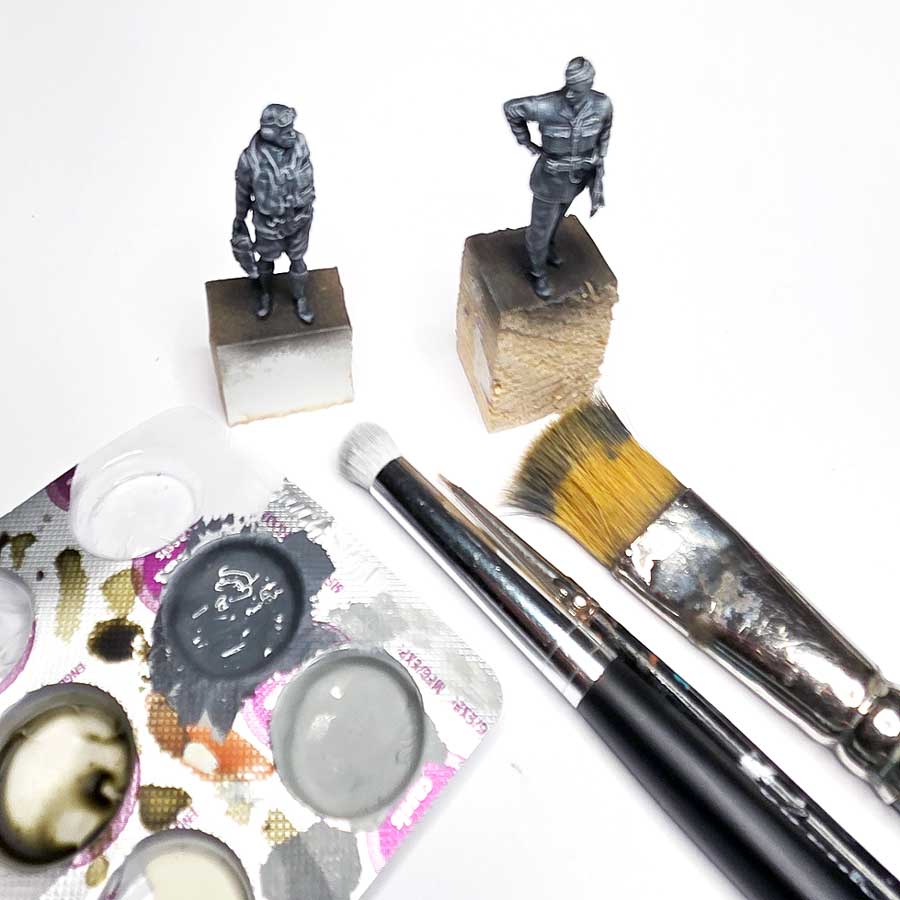
For drybrushing, it is worth using a soft brush. The shape can vary, but a short brush works best—an example with white bristles is shown in the photo. It is also helpful to prepare a sequence of colors in advance, for example on a palette or in a blister pack.
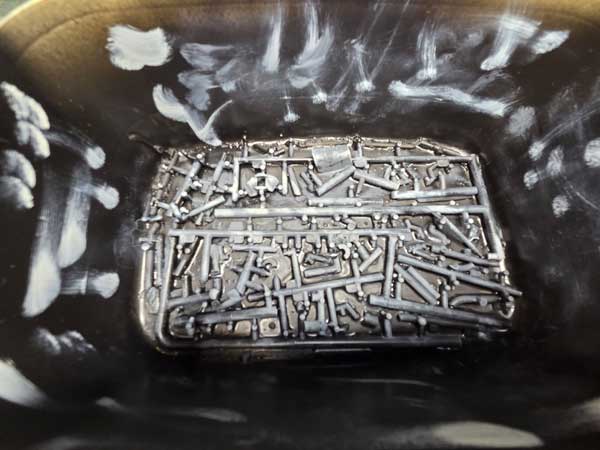
Dry palette: plastic sprue offcuts glued inside an ice-cream container and painted with black primer. Later, fine modeling gravel was added to increase surface roughness.
Drybrushing – a few practical notes
The term “drybrush” can be misleading. The brush should not be dry, but should contain a very small amount of paint.
- The paint can be acrylic, oil, or even lacquer.
- Do not remove excess paint on a paper towel—this pulls out the thinner and thickens the paint.
- It is best to use a rough “dry palette” (shown above), which mechanically removes excess paint from the bristles.
This way, brush strokes leave subtle and controlled highlights.

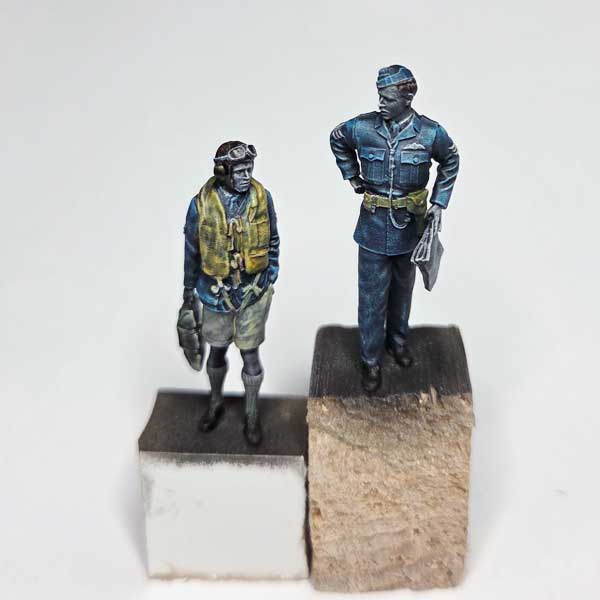
Applying color – contrast-type paints
To add color, we used AK Interactive Quick Gen paints. These are semi-transparent paints that flow into recesses, enhance the pre-built shading, and deliver results in one or several coats. It is best to apply them with a dedicated AK Interactive Quick Gen brush, which has a large paint capacity and a sharp tip. This allows you to cover larger areas in one pass while still maintaining control over small details. Apply Quick Gen so that each part of the figure is covered in one go, without leaving tide marks.
We used colors intended for US Army uniforms, as well as acrylic flesh tones and supplementary colors such as blue, yellow, and ivory instead of pure white (AK / Vallejo / Lifecolor), with the addition of Quick Gen medium.
A well-sculpted figure makes this stage much easier—the brush naturally follows the shape, and the paint settles into the details on its own.
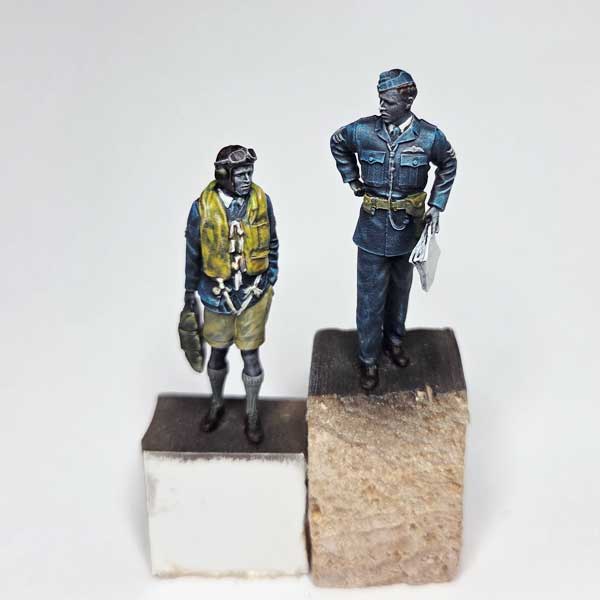
Light colors and the face
As with most figure painting, light colors and flesh tones require the most attention. In the case of the face, drybrushed shading alone proved insufficient and required additional corrections using flesh paint and Quick Gen Human Flesh.
The best solution is to paint exposed skin areas white or ivory first, then apply a delicate flesh-tone wash. In selected areas, a very restrained dark grey wash can be used to separate elements.
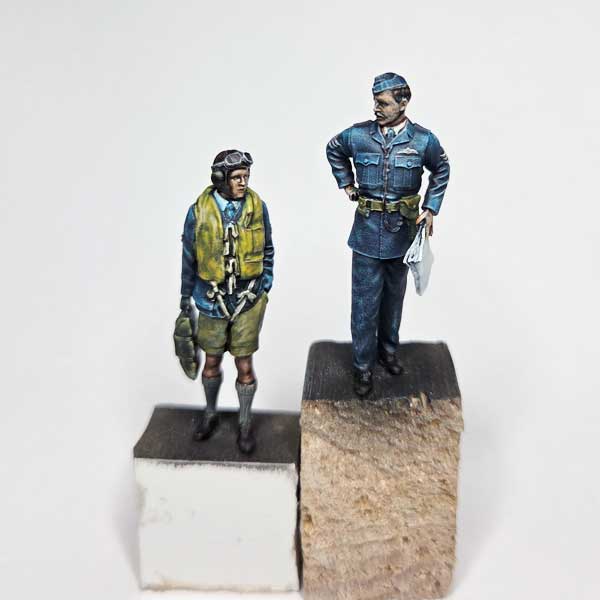
Summary
This method is fast, repeatable, and intuitive for aircraft modelers. It allows you to achieve a figure that looks right next to a well-finished aircraft model, without resorting to advanced figure-painting techniques.
Please let us know in the comments whether you like this method, what you think could be improved, or simply ask if something wasn’t explained clearly enough.
Modeller happy enough to work in his hobby. Seems to be a quiet Aspie but you were warned. Enjoys talking about modelling, conspiracy theories, Grand Duchy of Lithuania and internet marketing. Co-founder of Arma Hobby. Builds and paints figurines, aeroplane and armour kits, mostly Polish subject and naval aviation.
This post is also available in:
 polski
