

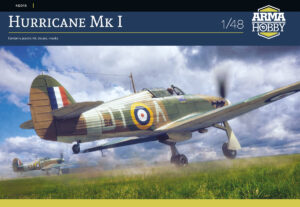
Hurricane Mk I HC-452 – built by Marcin Stróżański
Editor’s note
Sometimes a single sentence posted on a forum can set off a chain reaction of good things. That’s exactly what happened here — after a discussion on britmodeller.com we received a photo gallery of Marcin Stróżański’s Hurricane Mk I in Finnish markings, along with a short build write-up.
The model depicts aircraft HC-452 from autumn 1941 and was built from the 1/48 kit, enhanced with 3D-printed accessories that were available during the pre-order period. The code to download the file for self-printing can be found in the kit instructions. Enjoy the author’s story.
A few words of introduction
The story covers the build of the Hawker Hurricane Mk I 1/48 as the pre-order edition, i.e. supplemented with a set of accessories produced using 3D printing technology.
The Hawker Hurricane, the much-loved “hunchback”, has always been of special interest to me. I’ve already tackled it a few times in Arma Hobby’s 1:72 releases and have very fond memories of those projects (see: link).
But it’s the 1:48 kit that truly unlocks the full potential of this aircraft. Superb detail reproduction (including raised rivets), excellent fit, and clever engineering meant I built it quickly and essentially without a speck of filler (except, of course, where I deliberately wanted to hide something).


Finnish version differences
Finnish Hurricanes came from an earlier production batch than the aircraft included in the boxed version, so they differ slightly. Luckily, the key changes you need to make can be found, for example, in the instructions for the smaller siblings (“Hawker Hurricane Mk I Eastern Front”).
These include, among others:
- different wheel hubs,
- a different propeller spinner,
- the aerial mast,
- and one panel missing on the right side of the fuselage.
In addition to these necessary modifications, I added brake lines, a reflector gunsight, canopy handles, and “replaced” the upper and rear lights with drops of clear epoxy resin.


The chosen aircraft – HC-452, autumn 1941
The model represents Finnish aircraft HC-452 from autumn 1941, i.e. shortly after the outbreak of the so-called Continuation War.
The aircraft still wears the early RAF Temperate Land Scheme camouflage, with yellow recognition markings typical of the Eastern Front applied on top. The original stencilling was retained as well.


Cockpit and 3D prints
The cockpit interior looks impressive straight out of the box. I only added a few small details, plus the alternative 3D-printed pilot’s seat included in the set.
To make it easier to see the cockpit details, I “removed” the emergency panel and placed it on a barrel next to the aircraft.
As for the 3D prints — every single one did an excellent job, from larger parts like the exhaust stacks to tiny details such as the wheel hub caps.


Painting
The model was primed with Mr Surfacer 1500 Black and then painted mostly with acrylics, in particular:
- camouflage: Vallejo 70894 (Dark Green) and 71323 (Dark Earth)
- undersides: Vallejo 71279 (Insignia White), Ammo Atom 20163 (Black), Mr Color C8 (Silver)
- yellow recognition bands: Ammo Atom 20020 (Gold Yellow)
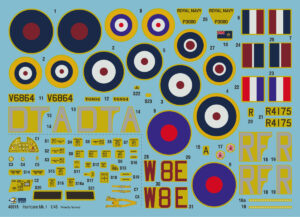
After the main colours and shading, it was time to paint the Finnish roundels and the fuselage codes. I cut the masks for the roundels and codes myself using a plotter.
Next came a gloss coat of Mr Color (GX112), which seals and protects the rather delicate water-based paints before further work. After that, I applied the remaining decals and sealed everything with a satin coat of Mr Color (GX112 + GX113).


Weathering and final touches
In the “ageing” process, the main role was played by Ammo acrylic washes and Shader paints — easy to adjust with water, and in critical moments with Vallejo thinner.
Then came another clear coat (this time matt GX113), chipping (hand-painted with a fine brush), and final tweaks with oil paints (including an oil stain on the underside).
The raised wing rivets were perfect for highlighting with oils using a dry-brushing technique.
Exhaust staining was painted with heavily thinned Tamiya paints — first XF-69, then XF-2. I used a similar method for the gun staining from the machine guns.
Finally, the small parts were installed, including the aerial wire (the ever-reliable Uschi 0.03 mm) — and it was done.


Figure
The aircraft was complemented by a Finnish pilot figure from MiniArt.
Many thanks to Marcin for sharing the photo gallery and build notes. If you have any questions for the author, feel free to leave them in the comments.
See also:
👉 Check the Hurricane Mk I kit in our store: link
Hurricane Mk I 1/48 w 24 godziny? Josef Choreň podjął wyzwanie
Virtual Editor, guest post publisher. When blog authors fall asleep he works unnoticed to improve website content quality.
This post is also available in:
 polski