

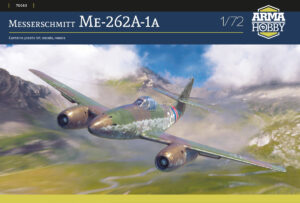
I had been looking forward to this kit ever since it was first announced, and I should start by saying it fully lived up to my expectations. I genuinely enjoyed building it. In fact, the project moved surprisingly quickly, and I managed to complete the main assembly phase in just a couple of days. While the kit doesn’t present any major difficulties, there are a few areas that deserve a little extra care and shouldn’t be rushed.
Assembling the nose section
I first dry-fitted the parts without glue to check the fit, including fuselage parts A23, B2, B3 and the nose cone A24. Although the part numbers for the wheel bay side panels (A8L and A8R) are reversed in the instructions, there’s really no risk of mixing them up (or at least I hope so 😊).

Everything fitted together very well, so I simply followed the instructions for both assembly and painting. Next, I installed the steel ball weights, whose mass is perfectly calculated and entirely sufficient for balancing the model. I came across an opinion online claiming that the model is tail-heavy, but in my opinion the builder must have made a mistake somewhere during assembly.


While gluing the nose section together, I also checked the fit against the fuselage halves, which was equally impressive. After the glue had dried, all I needed was a light sanding and polishing session — no putty was required. The cannon muzzles were a little too shallow for my taste, though, so I drilled them out and carefully deepened them using fine taper reamers.
The cockpit section
The cockpit interior is designed as a sandwich structure made up of three sub-assemblies, so precise alignment of all parts is essential for a flawless fit inside the fuselage.


This is where I made a small mistake: I didn’t perfectly align the upper cockpit decking (part B39) with the assembled cockpit tub, which caused slight warping along the edges. Since these edges also form the visible upper cockpit sides, to which the centre canopy section is attached, I eventually had to straighten them using a bit of force and some superglue.

I added Eduard Steel seatbelts and then painted everything according to the instructions. The only step where I intentionally deviated from the assembly sequence was installing the completed cockpit tub directly into the already joined fuselage halves.
Me 262 3D Cockpit Module Painted Step by Step – New Video by R-Miniatures
Final assembly hints
I glued the assembled engine nacelles into the wing only after the wing had already been attached to the fuselage. This approach felt more logical to me and made handling the large wing-fuselage assembly much easier.

Fitting the nacelles into the wing is then almost trouble-free. Don’t be surprised, however, by the slight step where the upper nacelle sections meet the rear wing extensions — these pronounced joints are accurate on the real aircraft. On the intake side, however, the gap where the nacelle joins the wing leading edge turned out slightly too wide on my build, so I filled it with a strip of 0.12 mm Evergreen plastic sheet, sanded it smooth and rescribed the panel line.

For easier handling, I also recommend leaving the leading-edge slats off until the very end of the build. This greatly reduces the risk of accidentally breaking them off during painting and weathering.

Finally, I replaced the main landing gear wheels after losing part of the tread pattern while cleaning up the seams. I used resin replacements from Eduard originally intended for the Airfix kit — although I suspect dedicated aftermarket sets for the Arma kit will appear very soon.

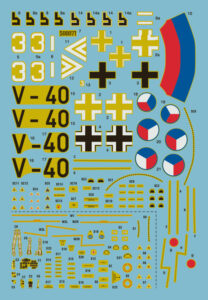
Despite the attractive marking options included in the box — which I’ll definitely use on future builds — I decided to finish my model as Heinz Bär’s “Red 13” from III./EJG 2, mainly because I’d had these excellent Propagteam decals waiting in the stash for years and could finally put them to good use.
This kit turned out to be exactly the kind of project I enjoy most: detailed enough to stay interesting, but engineered so well that the build remains smooth and enjoyable throughout. I’m already looking forward to future Arma Hobby Me 262 releases — and I suspect I’ll be building more than one.
You may be interested also:
- Buy now: In Arma Hobby Store


Me 262 and Late-War RLM Colours – An Attempt to Bring Order to the Subject


Three Messerschmitts – A Review of the Marking Options in the Premiere Me 262 A-1a 1/72 Kit


Aviation fan with degree in aeronautical engineering. 1/72 scale modeler with preference on WWII, but occasionally dealing with modern stuff as well. Contributor to modelling magazines and book publishers.
This post is also available in:
 polski
