
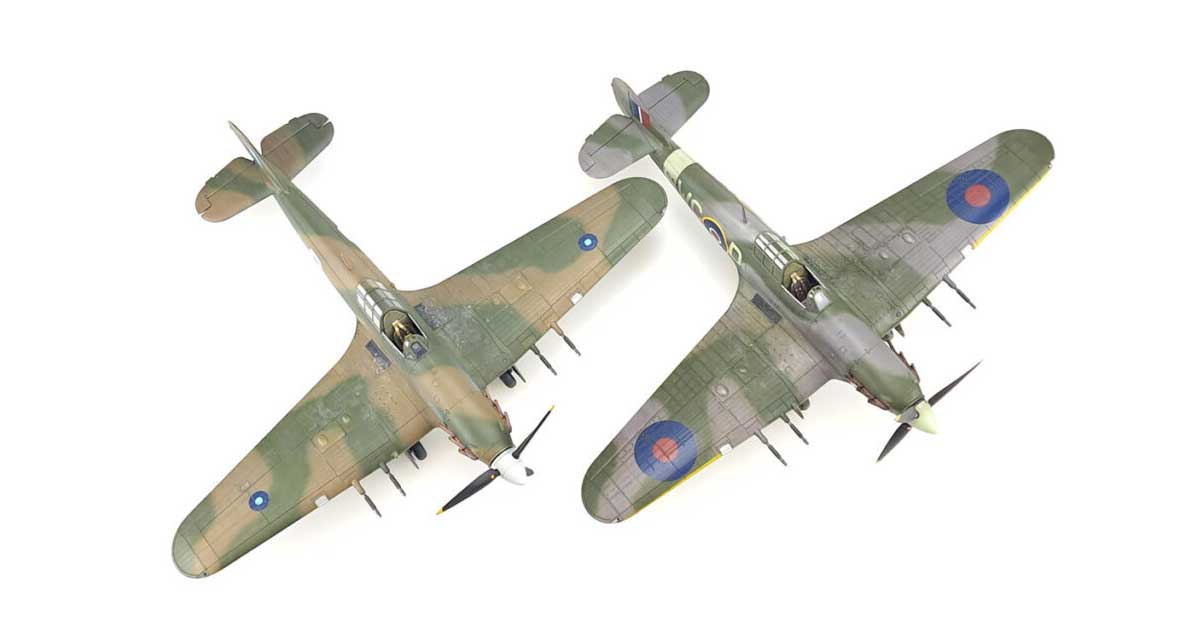
The Hurricane 1/48 model from Arma Hobby offers a very high level of interior and surface detail straight out of the box. When designing this kit, we paid special attention to correct geometry, sharp trailing edges, and fidelity to original documentation.
If you want to extract even more realism from the model, there is no need to invest in expensive aftermarket accessories. A few simple techniques, basic materials, and a little time are all it takes. Below you will find proven, low-cost methods that work equally well on both the Hurricane Mk I and Hurricane Mk II in 1/48 scale.
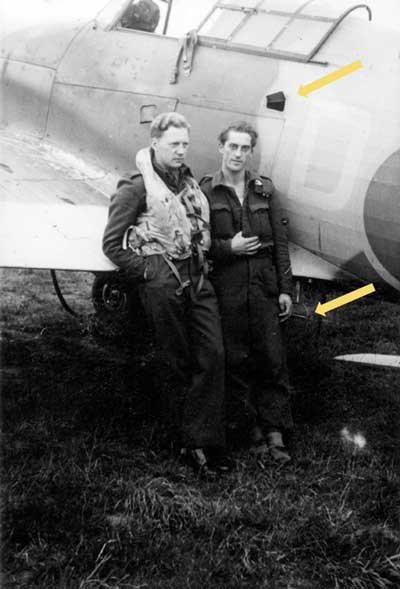
Details on the engine cowling spine
Along the spine of the Hurricane’s engine cowling you can replicate the characteristic Dzus fasteners, positioned precisely on the aircraft’s centerline. For technological reasons, these could not be molded as ready-made parts – including them would have required a more complex parts breakdown and could have negatively affected overall fit.

In practice, these details are very easy to add yourself. Simply press a sharpened brass tube or a cut medical needle of the correct diameter into the plastic to form the Dzus socket. Then, using a needle or a smaller tube, gently mark a small circle in the center to represent the locking mechanism.
Between the fuselage skin panels you can also add the gunsight bead. The simplest method is to use thin wire or a plastic rod. Reference photos can be found in this thread:
link.
Lights and landing lamps
The model includes correctly shaped landing light recesses and wing navigation lights. However, a few simple modifications can significantly improve their realism.
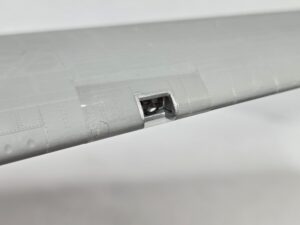
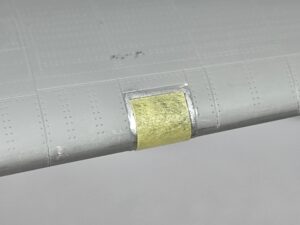
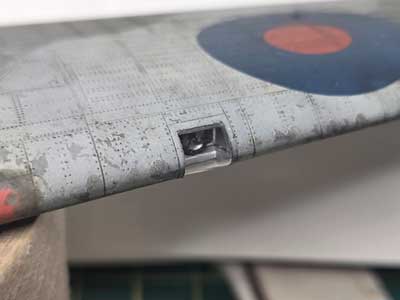
Wing landing lights
Instead of the kit-supplied clear covers, you can use ordinary self-adhesive tape (such as Scotch tape). Apply a piece of tape over the landing light opening, then trim it carefully along the panel lines using a sharp hobby knife. After applying the kit masks and painting the model, removing the masks will reveal a very convincing view into the landing light bay.
The same method works well for the orange identification light on the underside of the fuselage, near the trailing edge of the wing just behind the radiator.
Small identification lights
The small lights on the fuselage spine and rudder are molded in grey plastic – a transparent part would simply be too small to cut and clean up safely. The easiest solution is to paint these parts silver and then apply several coats of clear gloss varnish.
If you want full transparency, you can cut the parts off and replace them with a drop of clear UV resin (for example, Green Stuff World). This produces a very convincing “glass” effect.
Brake lines
Brake lines are very easy to add using thin wire. Copper wire works best – lead wire of a similar diameter can be too fragile and may crack when bent over longer distances.
Glue the wire to the landing gear leg and wheel cover using thin CA glue. Try to choose attachment points that will be less visible after assembly. Once the glue has set, reinforcing the joint with a thin layer of paint, primer, or varnish will prevent the wire from coming loose due to handling stress.
Pilot’s step and handhold flap
On the left side of the Hurricane’s fuselage there was a retractable step to assist the pilot when climbing into the cockpit. When the step was extended, a small handhold flap automatically opened on the fuselage side, allowing the pilot to grip it while stepping onto the wing.
The kit includes an opening for the handhold, which can be closed with the appropriate part if you choose the retracted-step configuration. If you want to depict the aircraft with the step extended, it is worth adding the characteristic flap in the open position as well.
This is very easy to do. Simply cut a small rectangle from thin plastic card, metal foil, or even stiff, smooth paper. Glue the finished piece perpendicular to the fuselage surface in the correct location. It’s a tiny detail, but a very visible one and instantly recognizable on a Hurricane.
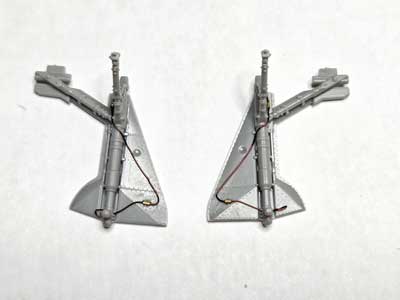
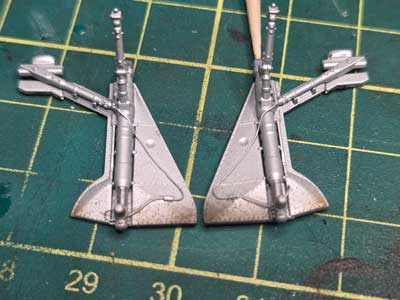
Radiator
The Hurricane radiator features characteristic bracing rods and actuators, which can easily be added using thin wire or stretched plastic.
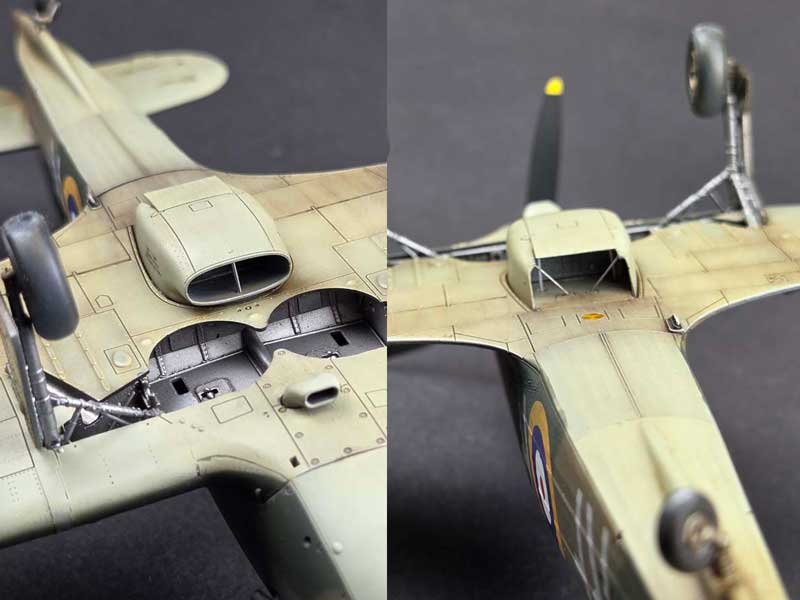
- The rod at the radiator intake is easiest to install by drilling small holes in the upper part, threading the wire through, and trimming the excess.
- Glue the bracing rods and actuators around the radiator exit flap, using reference photos of the real aircraft.
This is a small detail that reads very clearly on the finished model.
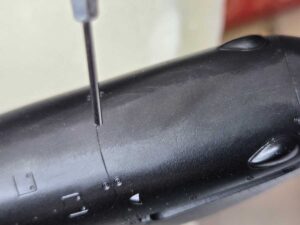
Drilling out openings
On the engine cowling you will find two protruding pipes. Carefully drilling them out significantly improves their appearance. You can use the tip of a hobby knife or a fine hand drill.
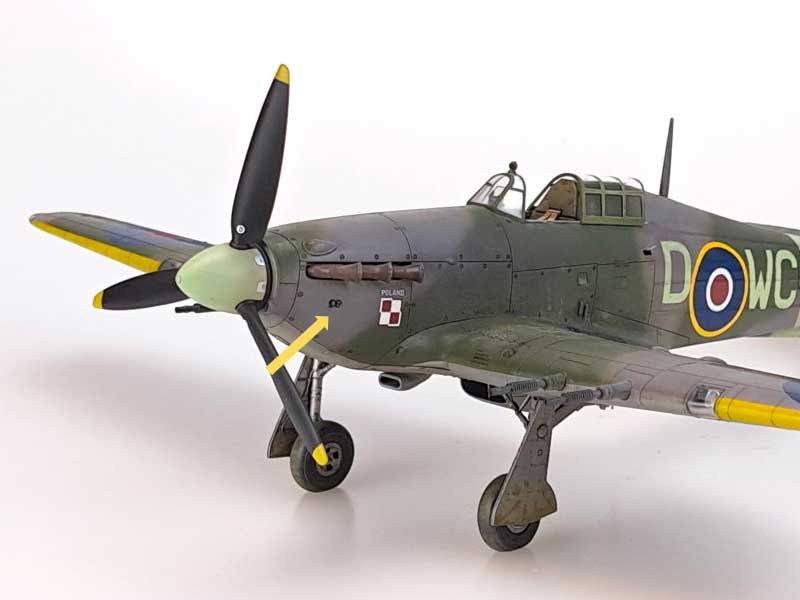
On both sides of the fuselage, just behind the propeller, there are characteristic bulges with forward-facing air intakes:
- on the Hurricane Mk I, the intake is open as molded,
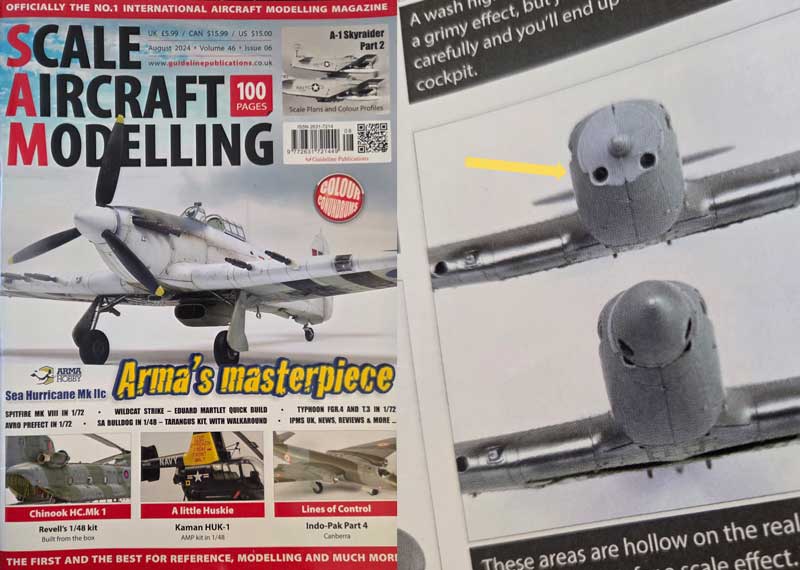
- on the Hurricane Mk II, you can easily open it yourself by drilling the appropriate spot with a larger drill bit – an idea by Jamie Haggo, shown in SAM magazine.
Final touches
Finally, a few small but very noticeable details that really “finish” the model:
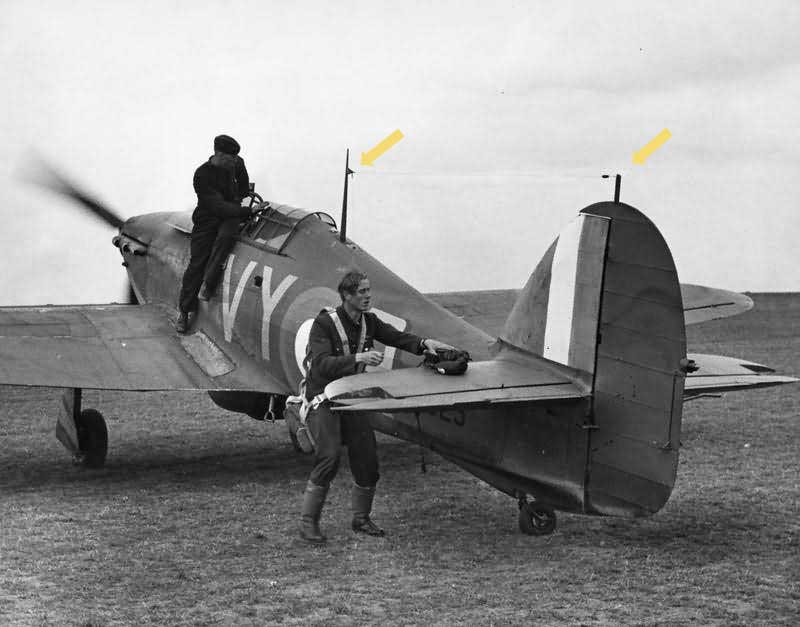
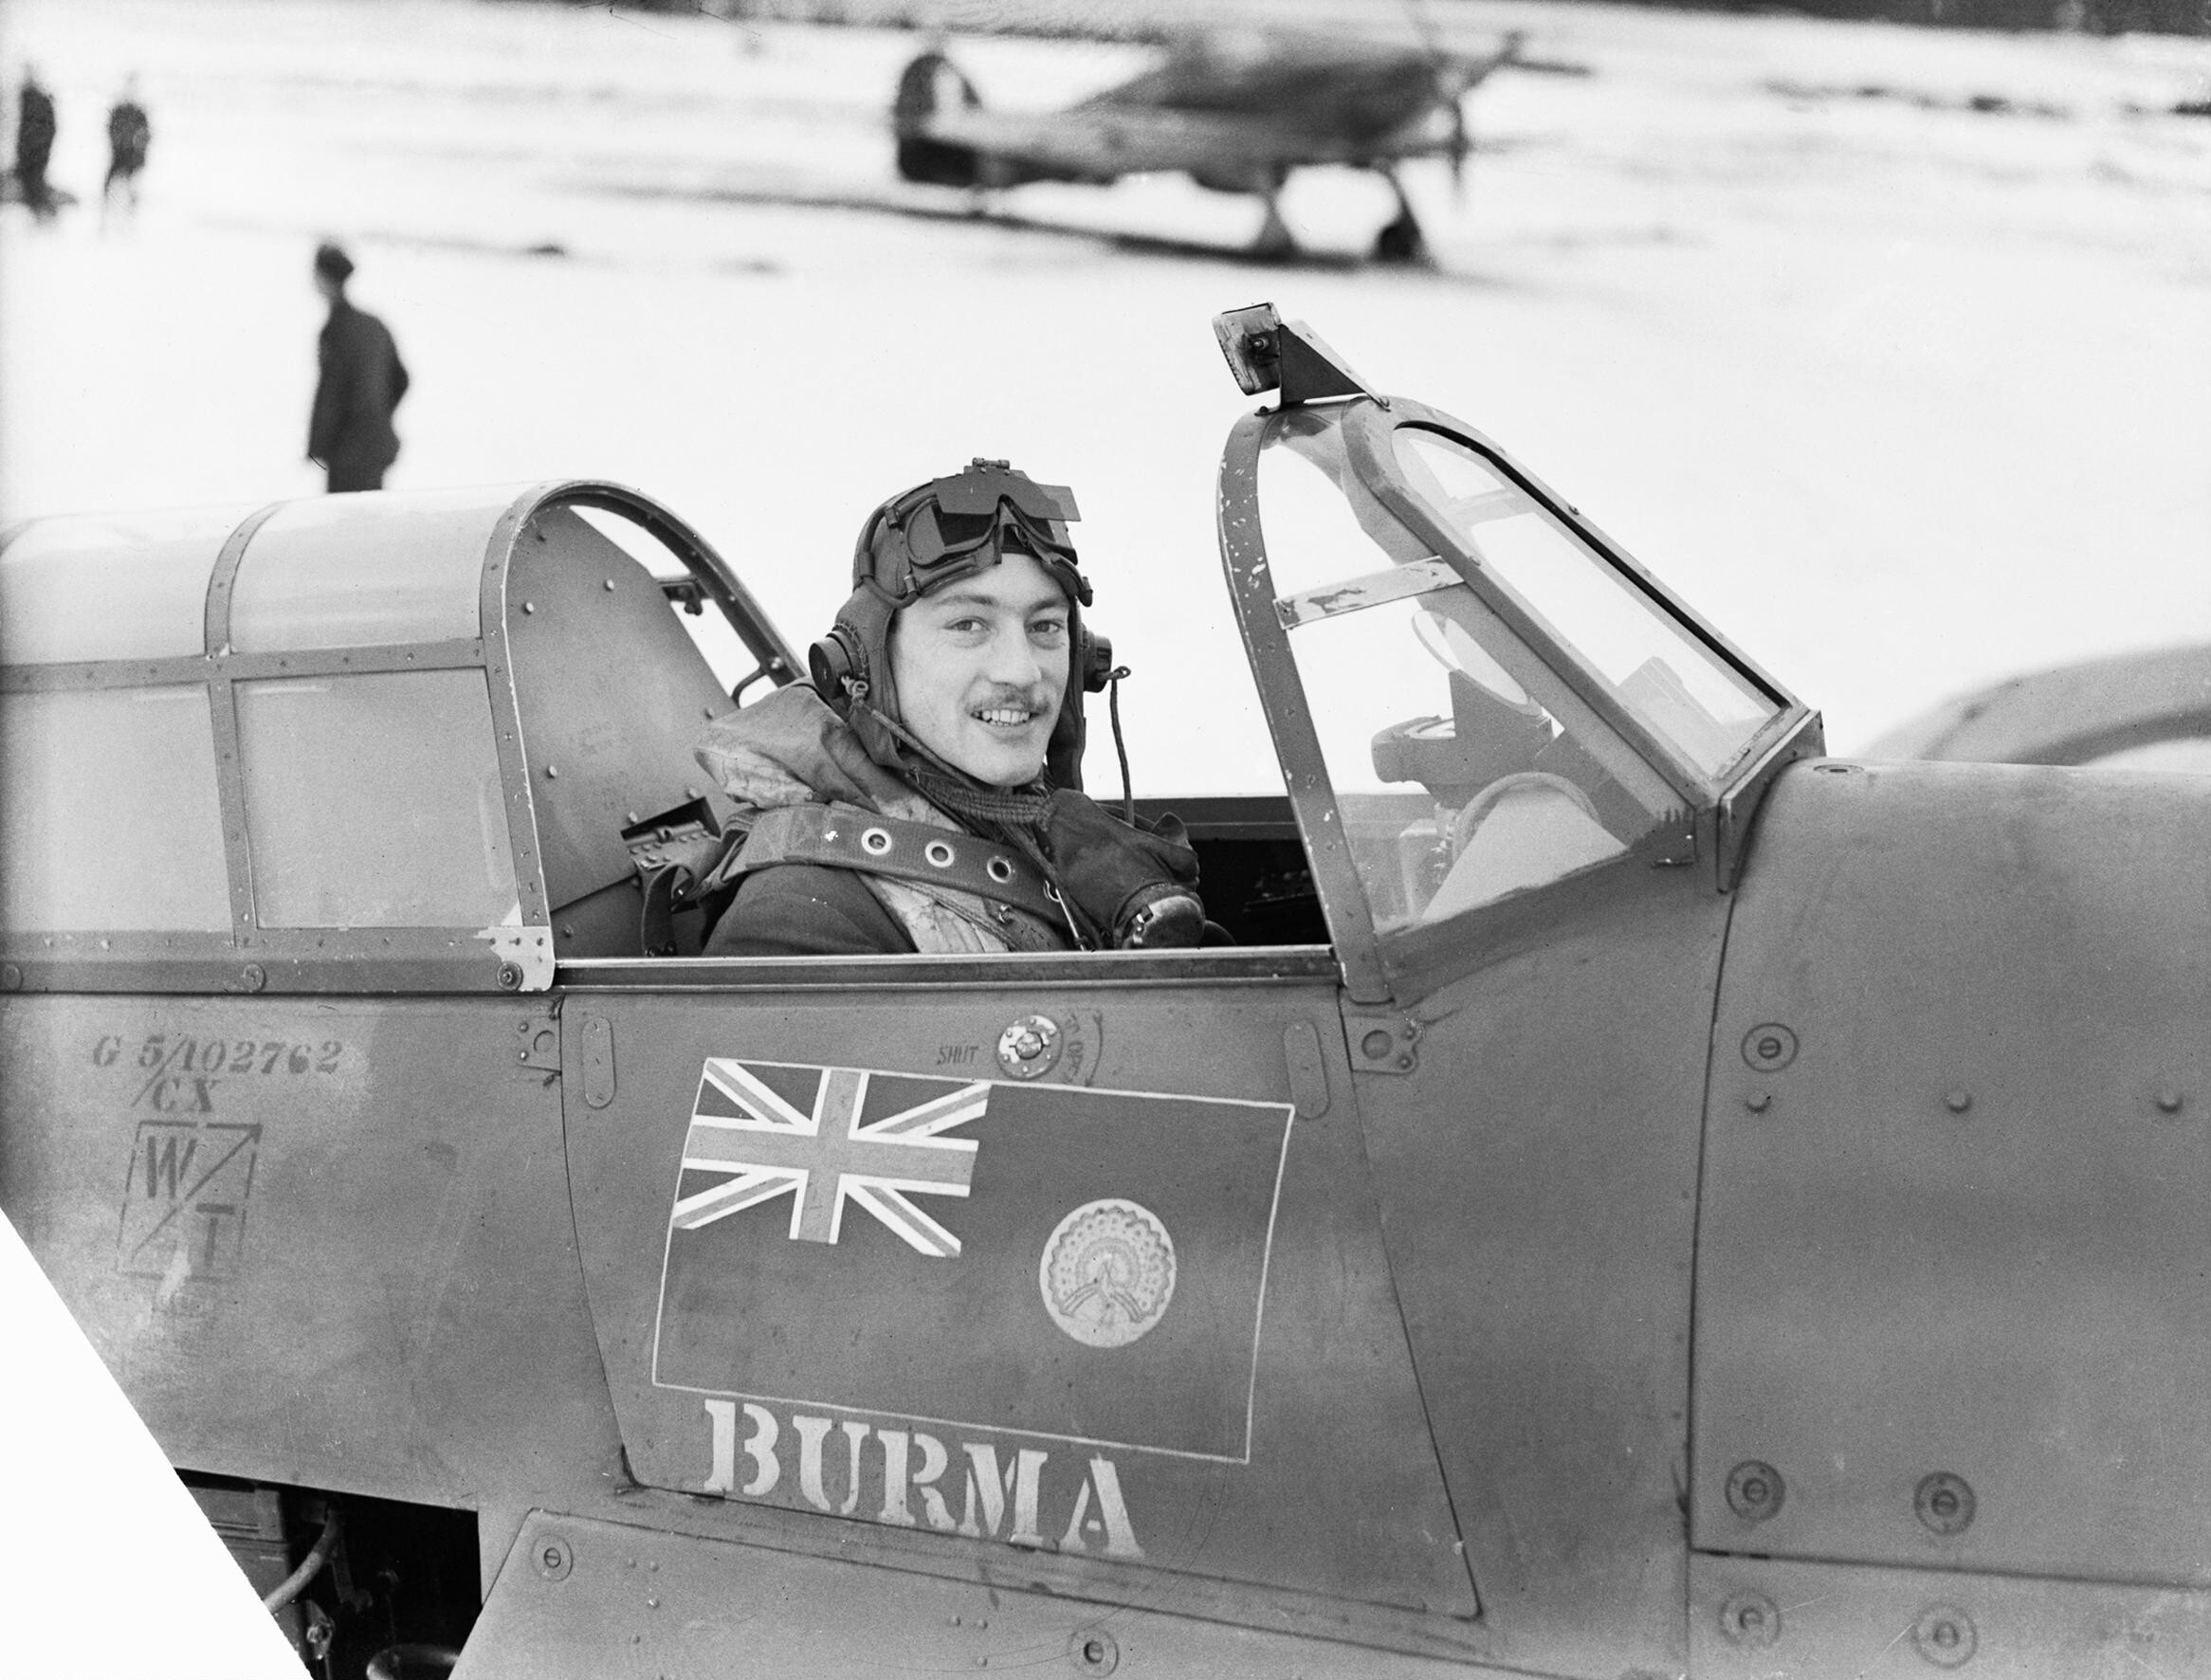
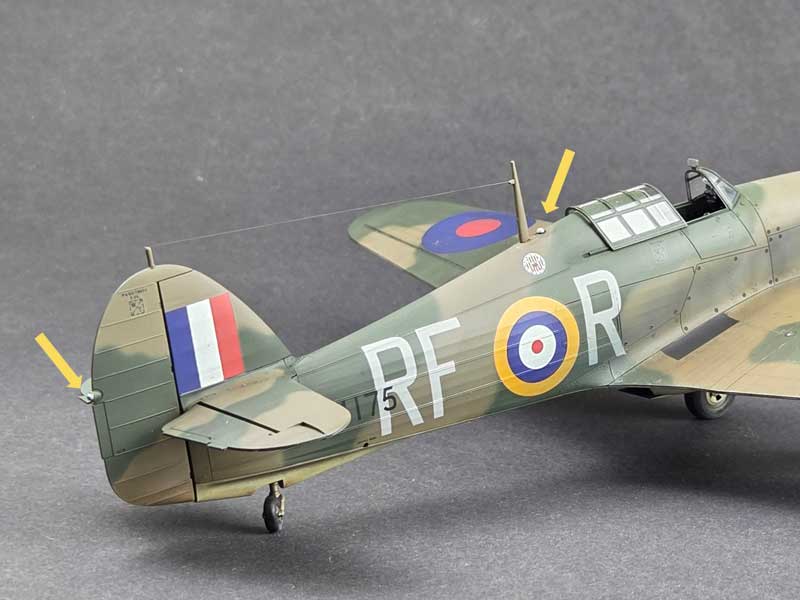
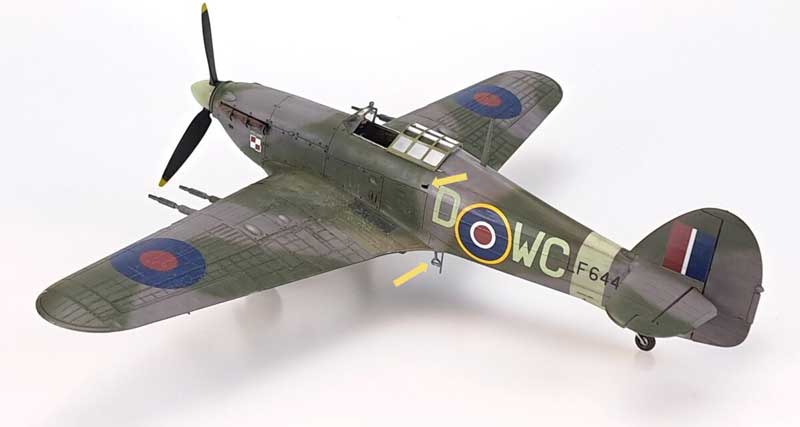
- Antenna wire – stretch the wire between the fuselage mast and the fin post (if the aircraft was fitted with one). If there is no post or mast extension, there was no antenna. Always check photos of the specific aircraft, for example on armahobbynews. Insulators can be represented with a small drop of white paint. See this thread: link.
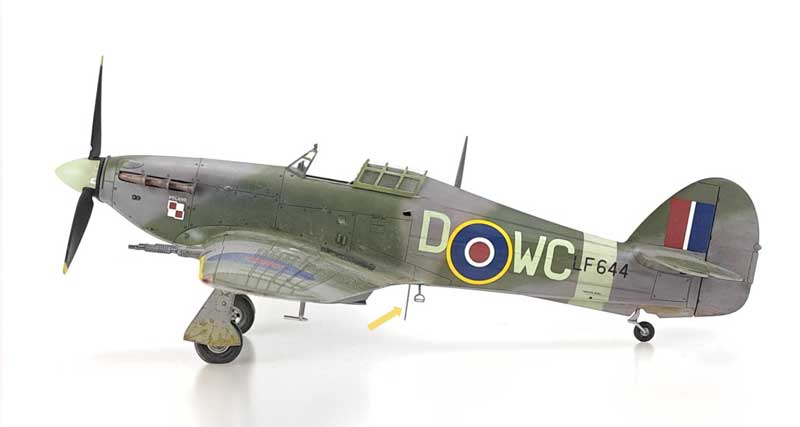
- IFF antenna – later Hurricane versions could be fitted with an IFF antenna behind the radiator. A thin wire or stretched plastic rod is all you need.
As you can see, a few simple techniques and a bit of wire can dramatically improve the realism of a finished Hurricane 1/48 model. It’s an effective way to upgrade the kit without increasing the budget – and exactly the kind of modeling “extras” that bring the most satisfaction.
See also:
👉 Hurricane kits in the shop: link
Akcesoria 3D do Hurricane Mk I 1/48 – więcej detalu, w prosty sposób
Modeller happy enough to work in his hobby. Seems to be a quiet Aspie but you were warned. Enjoys talking about modelling, conspiracy theories, Grand Duchy of Lithuania and internet marketing. Co-founder of Arma Hobby. Builds and paints figurines, aeroplane and armour kits, mostly Polish subject and naval aviation.
This post is also available in:
 polski

