
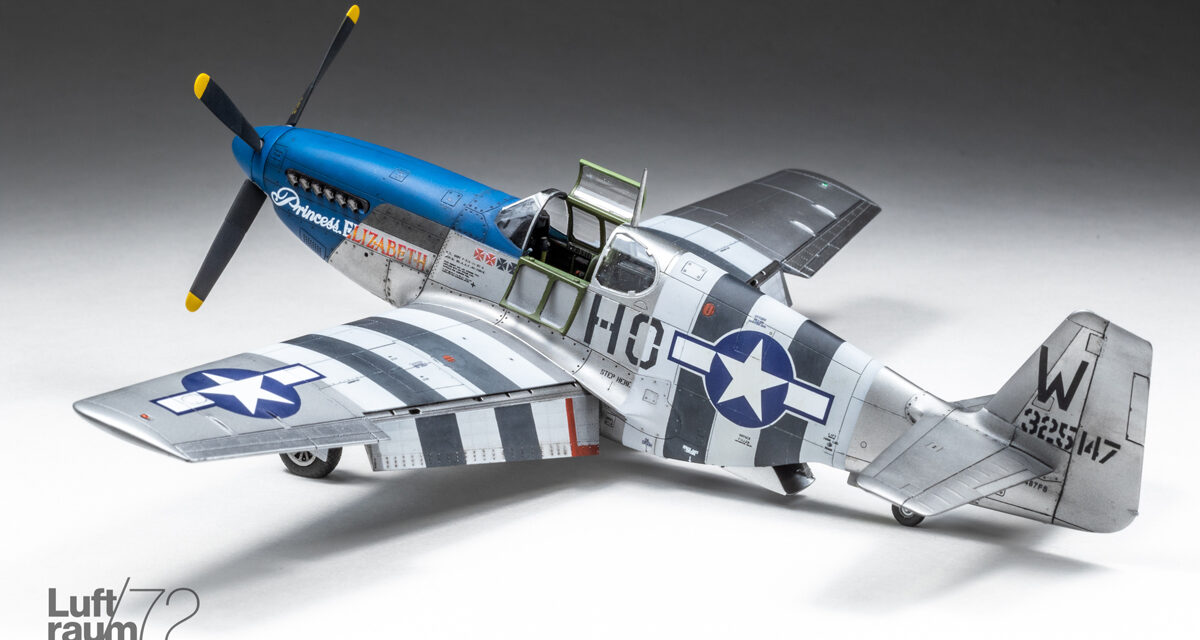
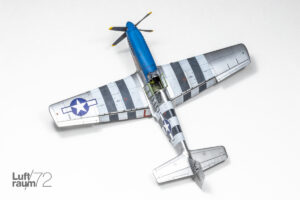
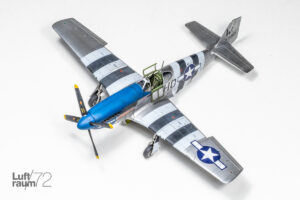
Kris Sieber (@Luftraum72), excellent modeller and bloger from Canada, has built a stunningly beautiful model of P-51C Mustang ‘Princess Elizabeth’ – using the 1/72 Arma Hobby kit. Kris’ model already caused justified delight on the Internet worldwide, but now we have the pleasure to show it in the Armahobbynews Gallery, with exclusive builder’s comments written for our visitors! Enjoy!
Kris ‘Luftraum72’ wrote:
Arma Hobby’s P-51 Mustang is the most enjoyable 1/72 build I’ve experienced. I know, usually one would build up to the big defining statement in a review, however, this sentiment hit me early and carried through through the entire build process.
This kit hits all the right notes at all the right times, from the beautiful box art through to final assembly. What few little glitches the kit has — many of which Arma Hobby pro-actively makes builders aware of through build articles on their blog — are minor and do little to diminish the positives of this kit.
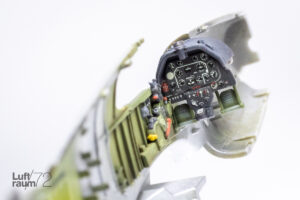
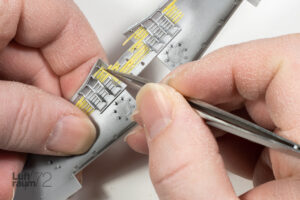
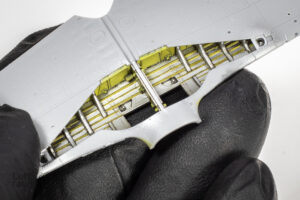
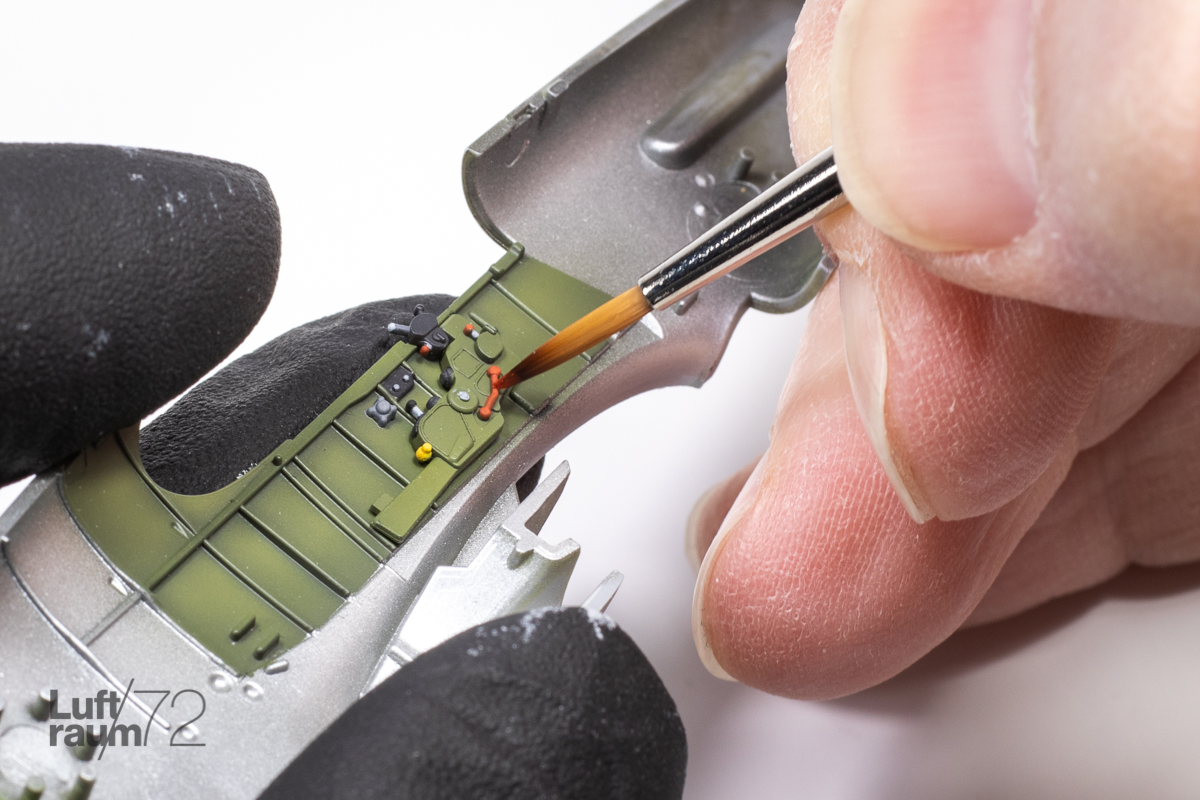
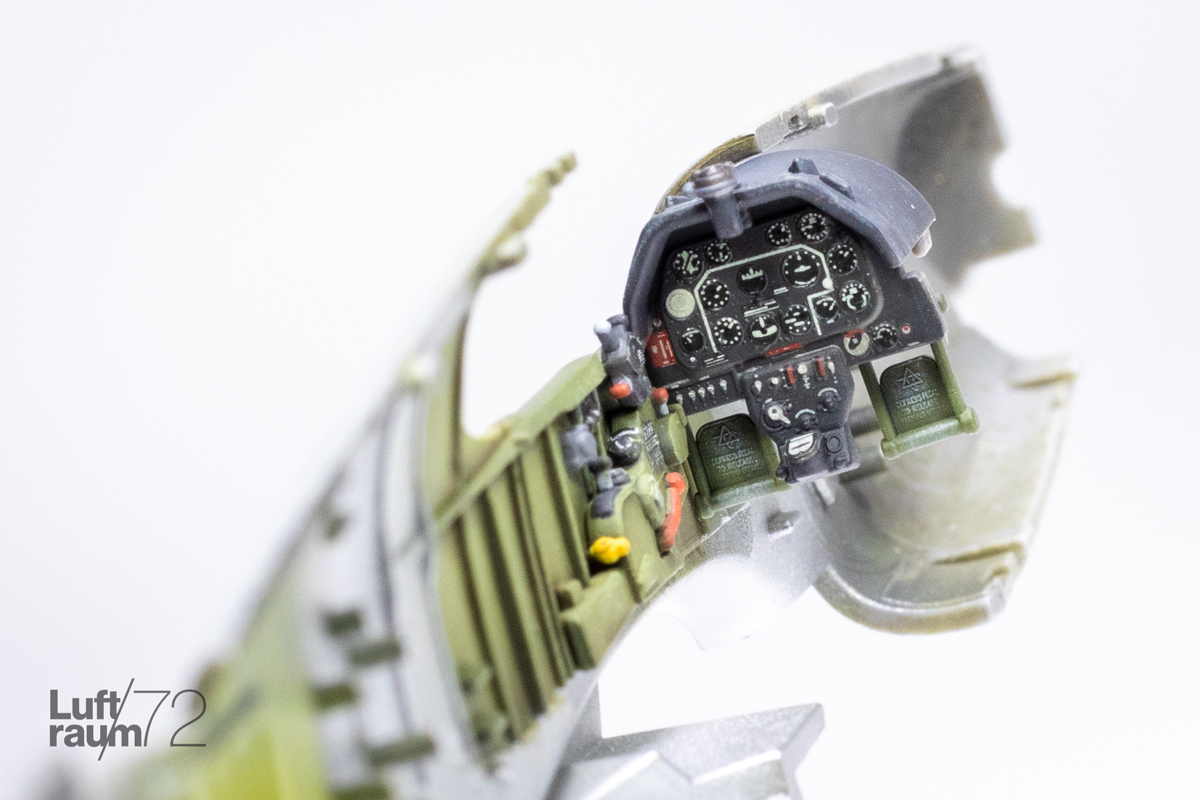
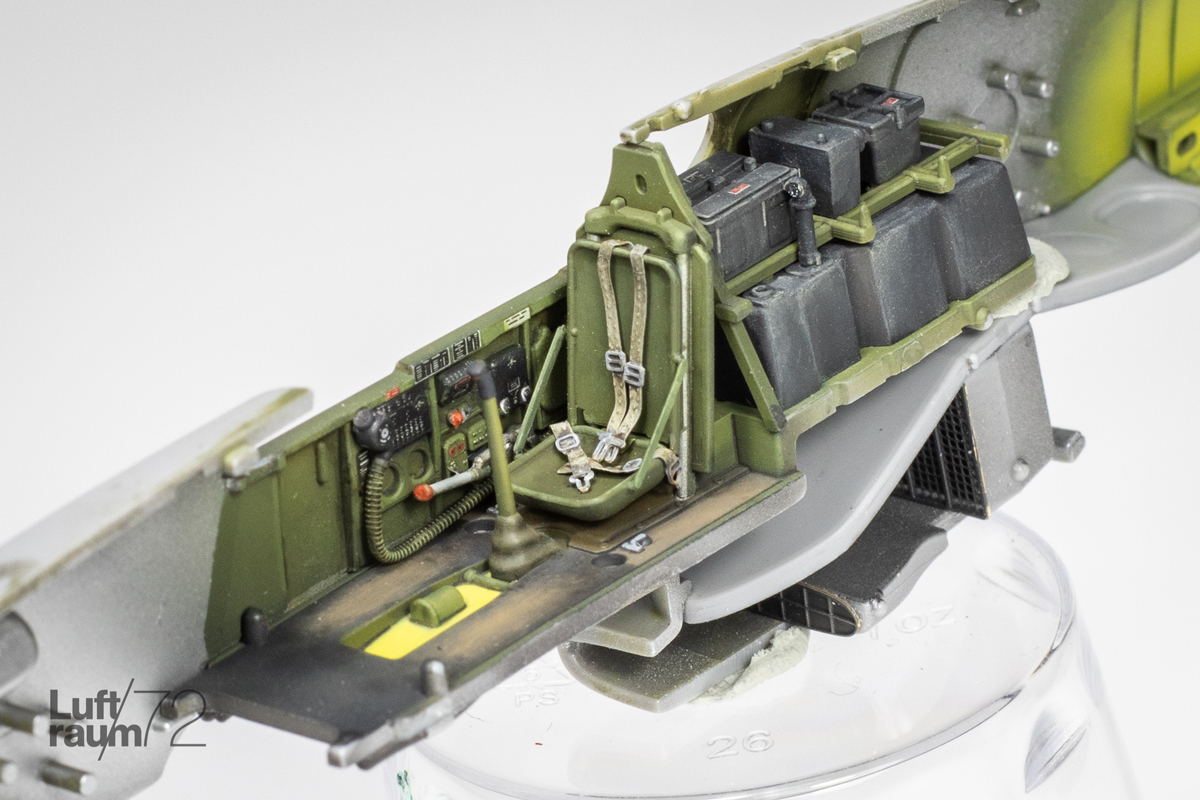
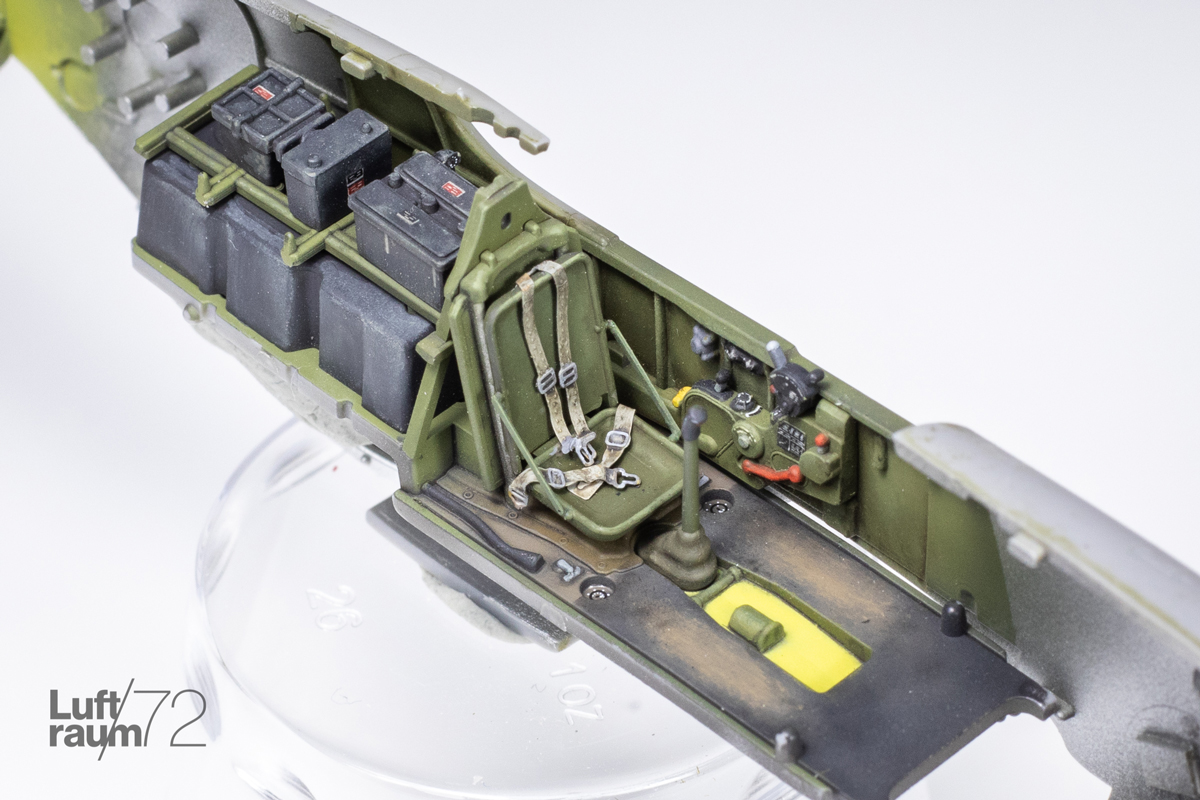
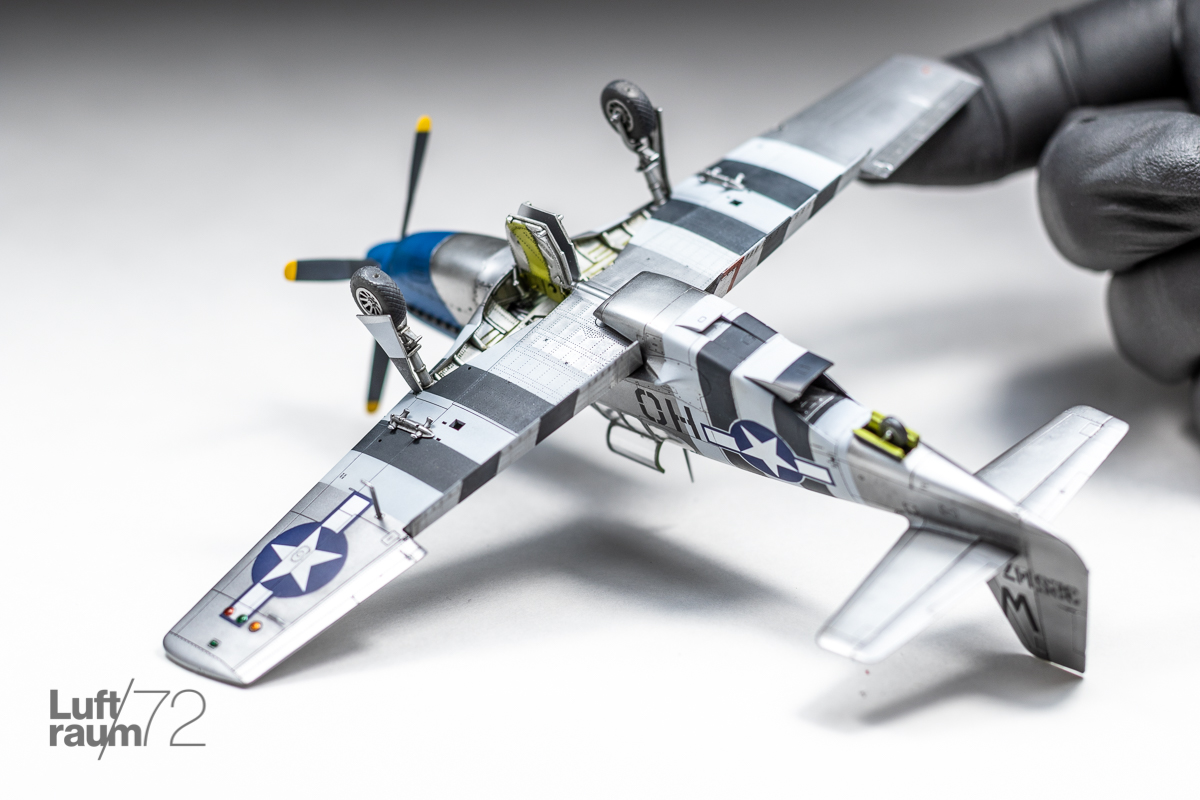
A few notes and thoughts about my build:In many respects, this kit feels much like a 1/48 scale kit shrunk to 1/72 with fine rivet and panel detail, and even some stressed-skin effect, everywhere. Nowhere is the sense more evident though, than the jewel of a cockpit where a parts count of 25 is superseded only by the number of decals at 28! The finished cockpit is well-detailed without being overwhelming in its construction, and the various placard decals in particular lending a delicate realism that more companies should consider emulating.


Parallel to building up the cockpit, a dry fit of the main airframe components made it became obvious that with some careful work in assembly, little to no filler would be needed. Sure enough, once each mating surface was lightly sanded and glued with Tamiya Extra Thin cement, the small amount of melted plastic squeezed out from the joins was sufficient to fill most seams. In the end, the only seam-filler used were small dabs of CA or Mr. Surfacer where this technique failed to produce enough “overflow”.
The other aspect of this build that quickly became obvious, was the opportunity to build, paint, decal, and pinwash the airframe in two sub-assemblies. The design of the Mustang, in concert with the parts breakdown and fit quality of the kit, meant only one small seam per side would have to be filled, where it crossed a small panel. I outlined the benefits of this approach in a video shared elsewhere on the Arma Hobby Blog, and I’m pleased to say the experiment was a resounding success. It was much easier and efficient to work on the two sections separately, and it really created no extra work as the panel would have required the seam to be filled all the same.
Wideo: Budowa modelu w dwóch częściach? Eksperyment Krisa „Luftraum/72” Siebera
Construction throughout is a straight-forward process, the only real tricky parts being the masking of the main gear well ribs — if that is the case for your specific aircraft/references; a couple delicate sprue gates to snip and clean up, and some small sink marks to fill. While the plastic is not as hard as Tamiya or Hasegawa, it has a nice resilience, and will not snap easily. This saved me on the small main gear door actuators that protrude from the gear wells, which I caught on numerous times, yet they never broke off.
For my natural metal finish, I ended up using a few shades of Gunze Super Metallics and Tamiya LP-11, which sprayed easily when thinned with Mr. Rapid Thinner and provide a bullet-proof finish. These were overcoated with a light coat of flat varnish, tinted with light grey, and sprayed through mottle masks to achieve a mild oxidation/wear effect. The blue was a mix of Mr. Color 65 Bright Blue, darkened and desaturated with a touch of JASDF Deep Ocean Blue 375.
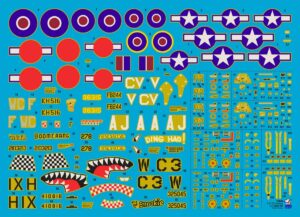
As my Mustang was built as ‘Princess Elizabeth’, a scheme not included in the box, I used a number of the kit decals, a few extra decals from a DrawDecals set, and a few sprayed markings (the HO-W and the invasion stripes). Decals were cut flush with the printing to eliminate as many obvious decal edges as possible, and, under the matte coat mentioned earlier, all but disappeared.
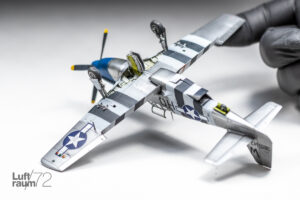
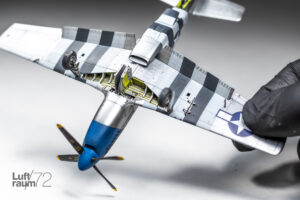
Final assembly was easy enough, with 5-minute epoxy used for most parts to ensure a solid join for the main gear, and doors, canopy, etc. In the end, the only additions to the kit components were brass microtube machine gun barrels, and Eduard Brassin Print replacement wheels and exhausts. In the case of the former, this saved having to restore tread detail to the tire, and for the latter, injection moulding has never been the friend of 1/72 exhaust manifolds, and I’d rather purchase the more highly-detailed resin part than to drill out and clean up the solid kit exhausts.
Being a new release, my build coincided with a number of others in the online communities I’m part of, and it was really cool to collectively share our experience and enthusiasm with this kit. There’s no doubt that Arma Hobby moved the goalposts with this release, pushing the 1/72 build experience, and their reputation, to new heights. As I’ve alluded to in my posts: if you’ve built one, you know. If you haven’t, you should.


See also:
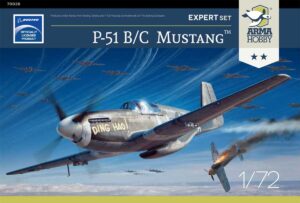
- Buy P-51 Mustang™ models in the Arma Hobby webstore: link
Wszystko co chcecie wiedzieć o Mustangu z Arma Hobby i nie boicie się pytać
Virtual Editor, guest post publisher. When blog authors fall asleep he works unnoticed to improve website content quality.
This post is also available in:
 polski

