
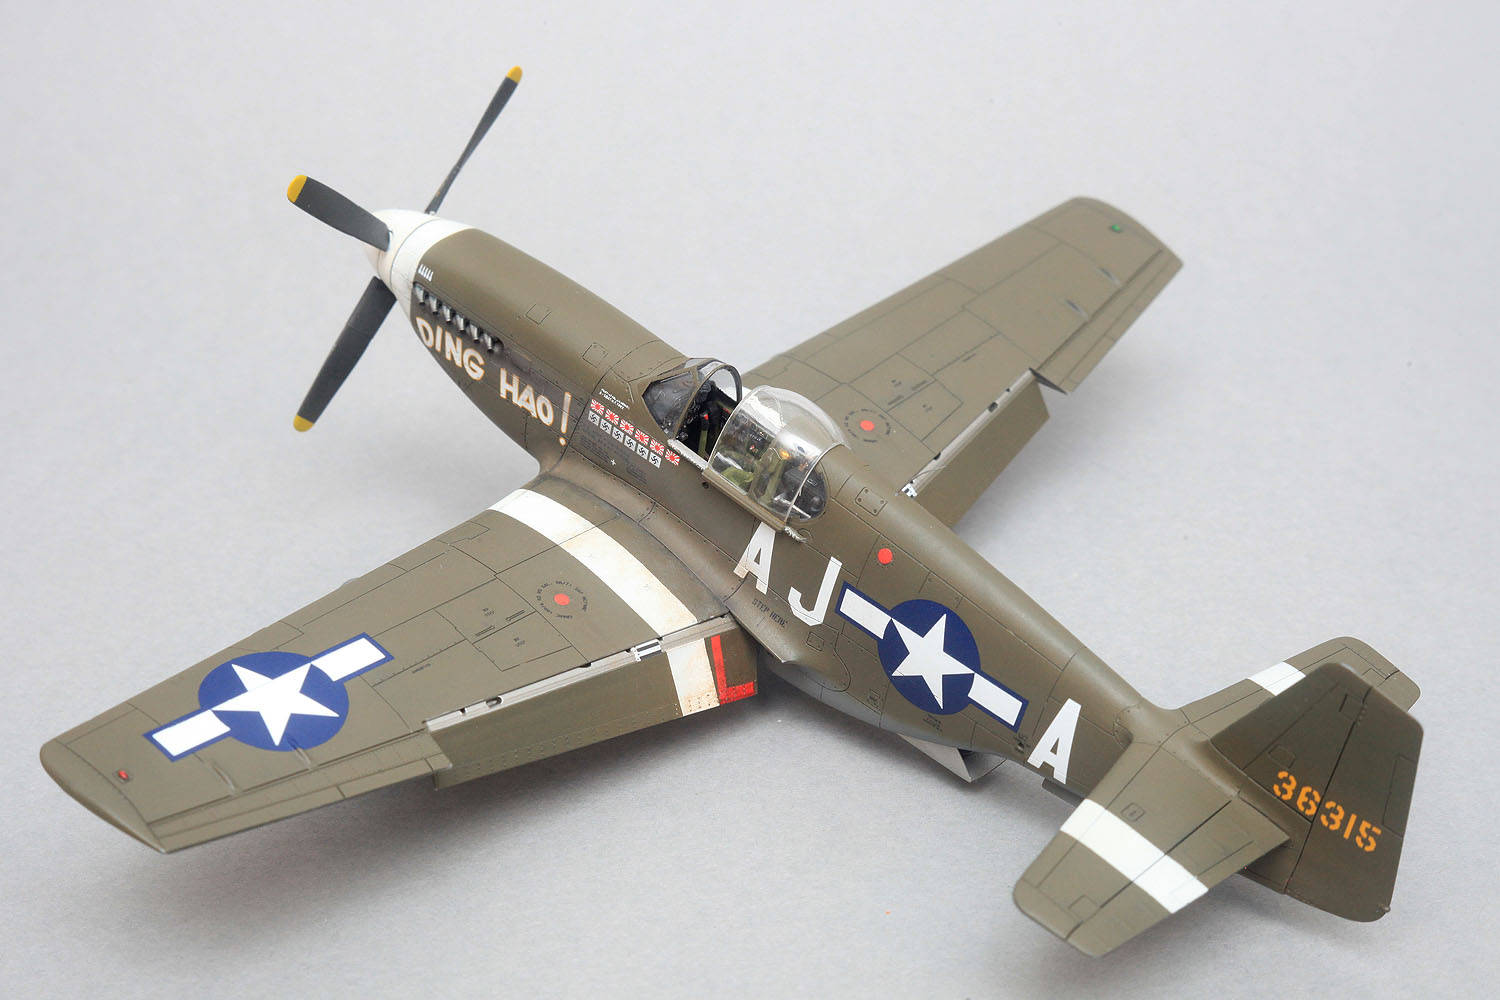
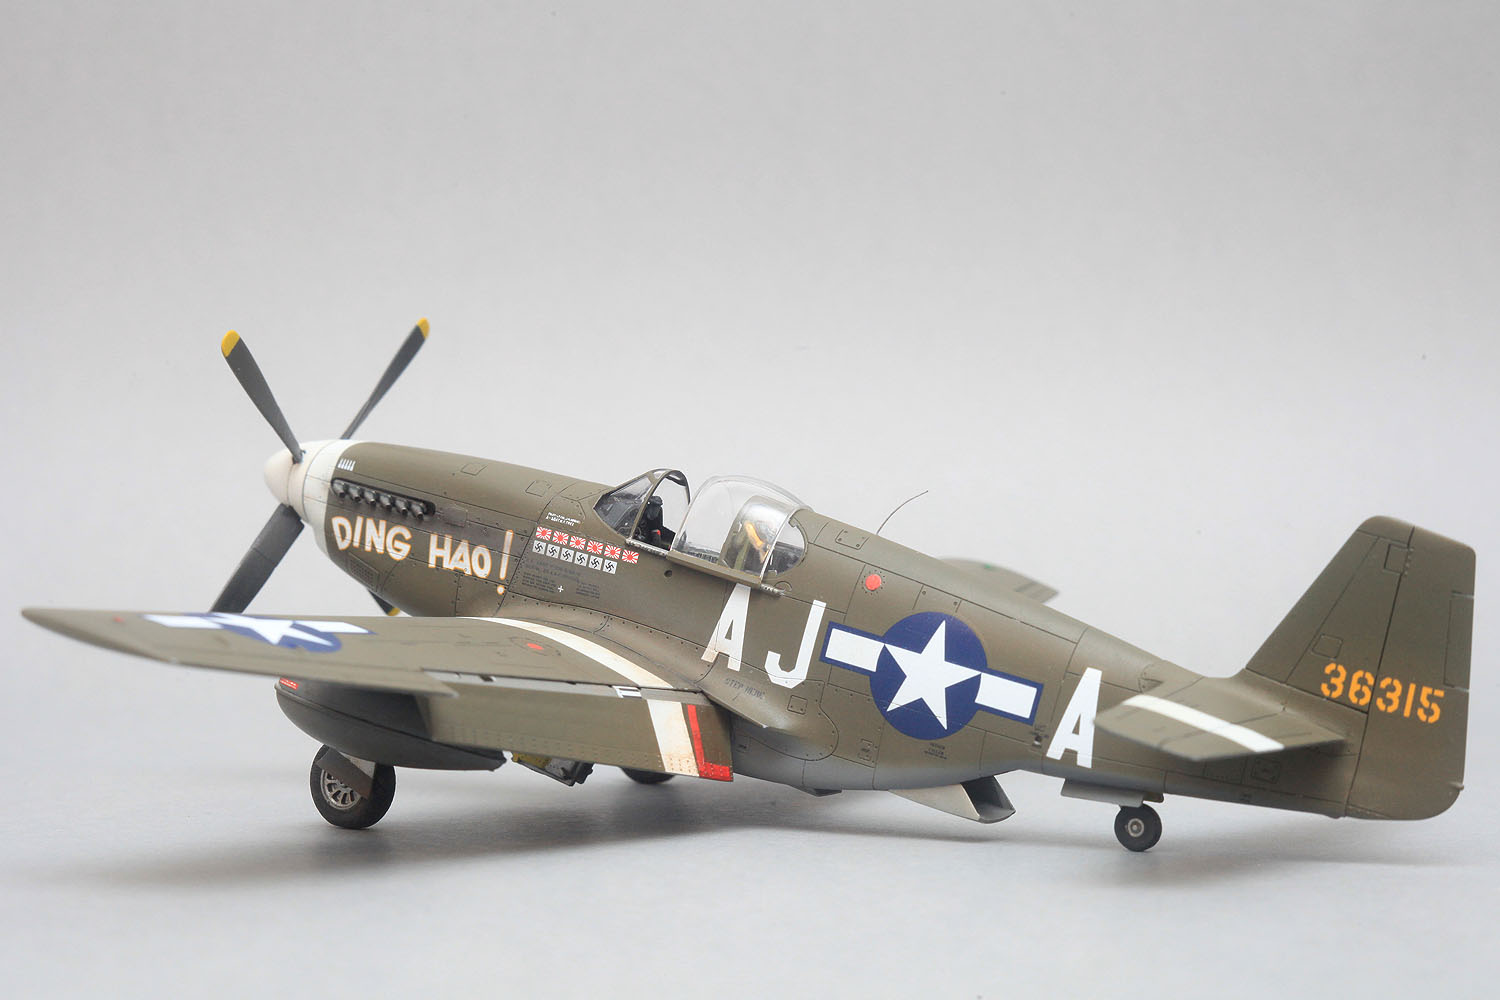
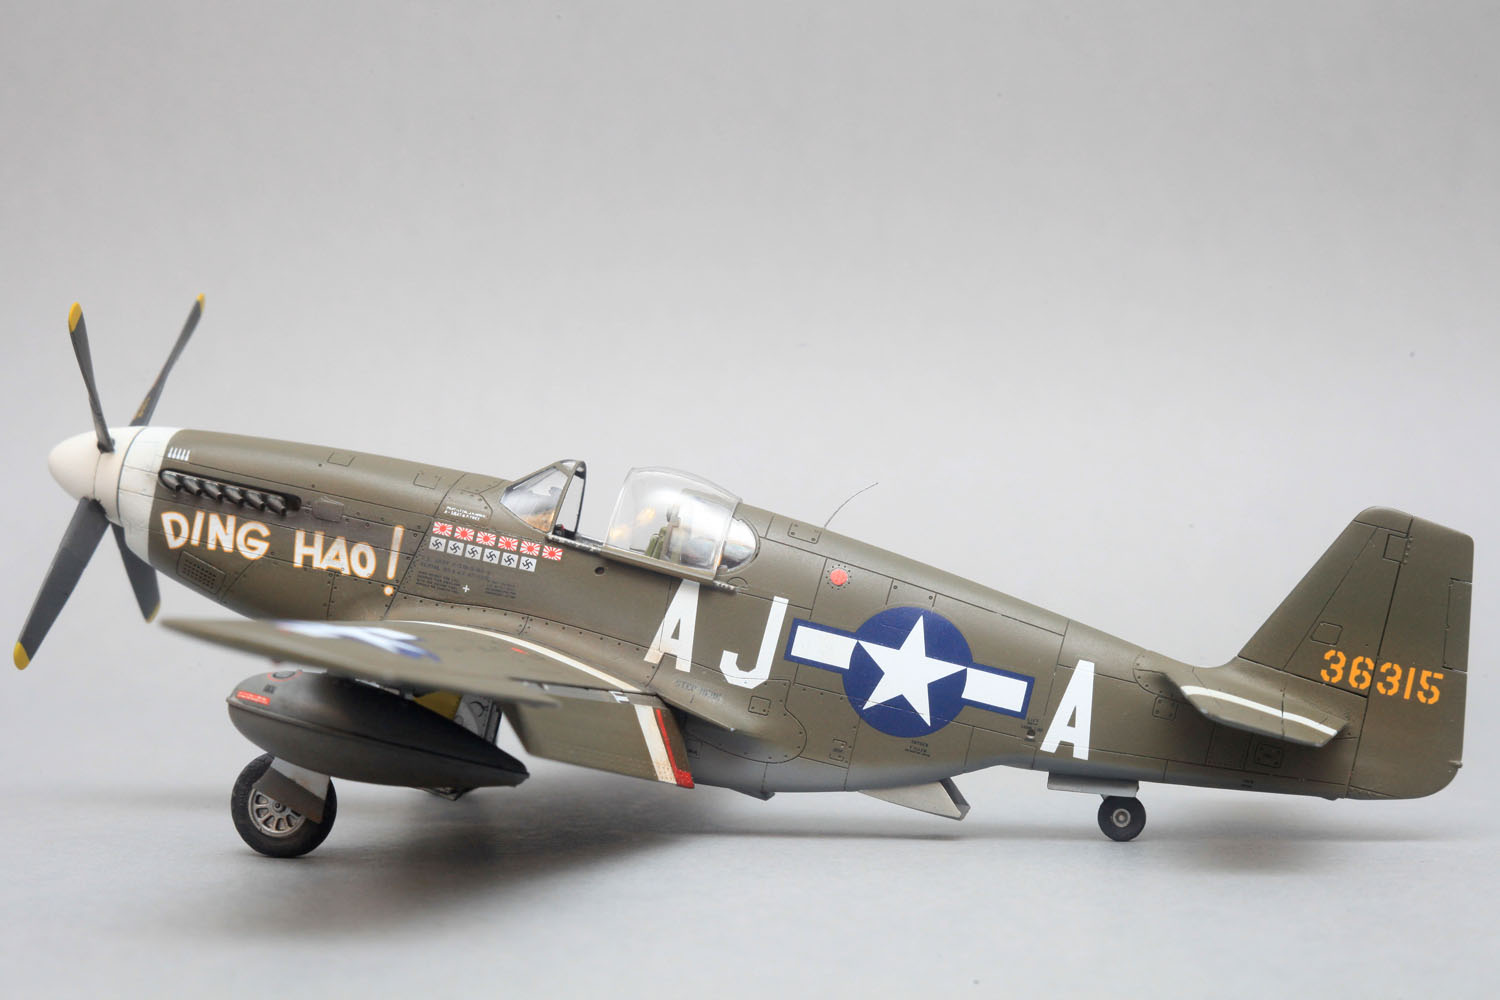
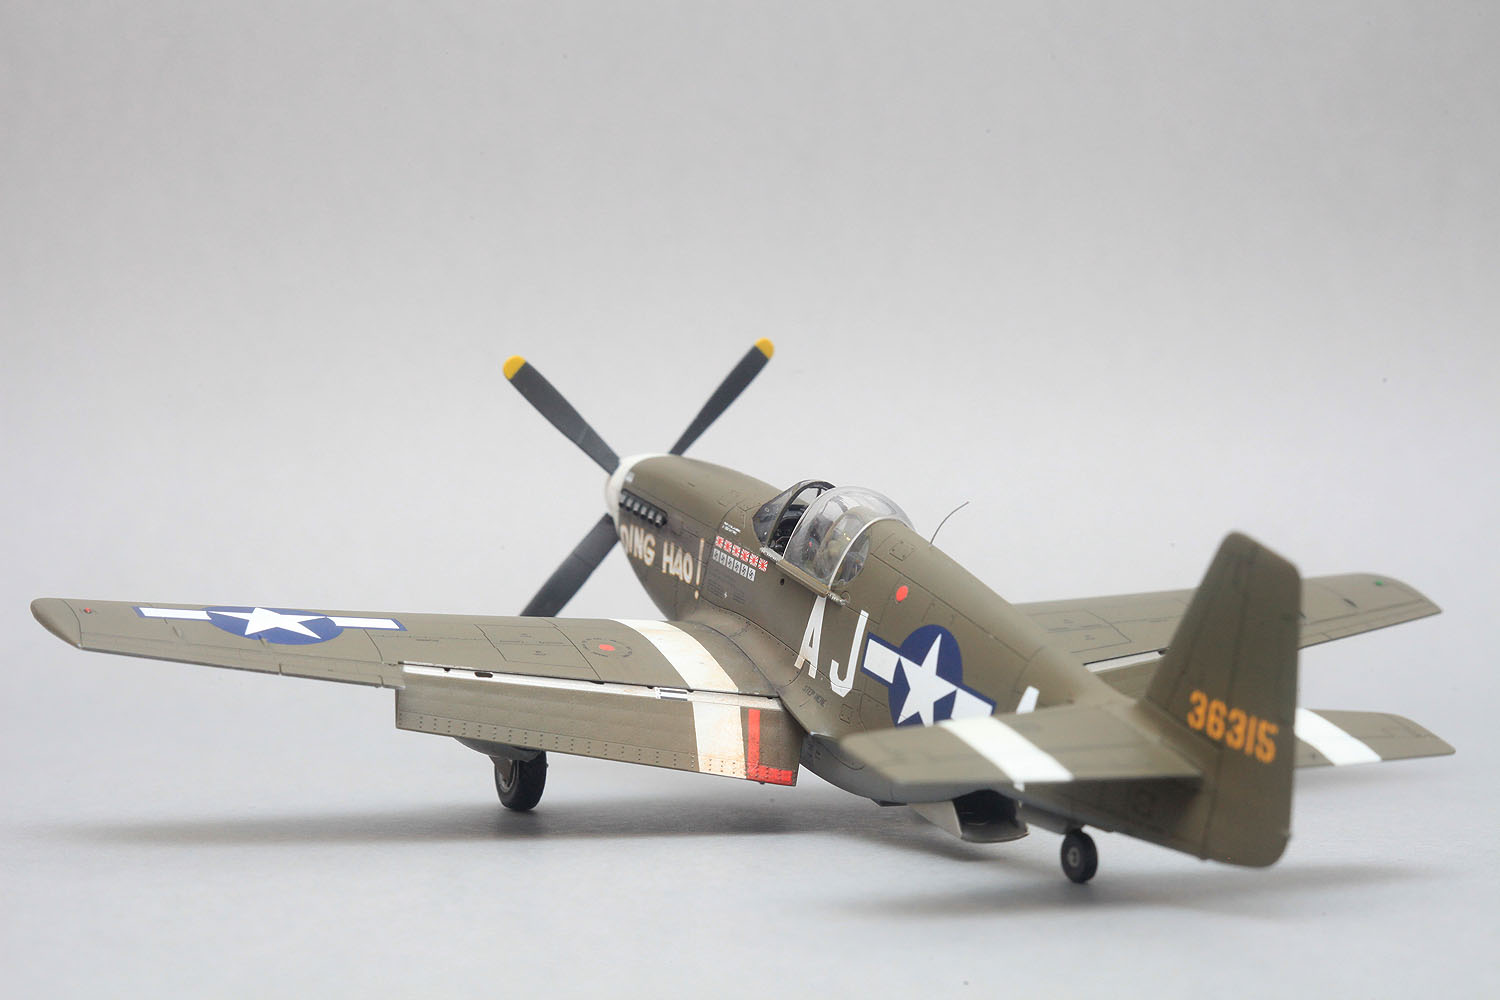
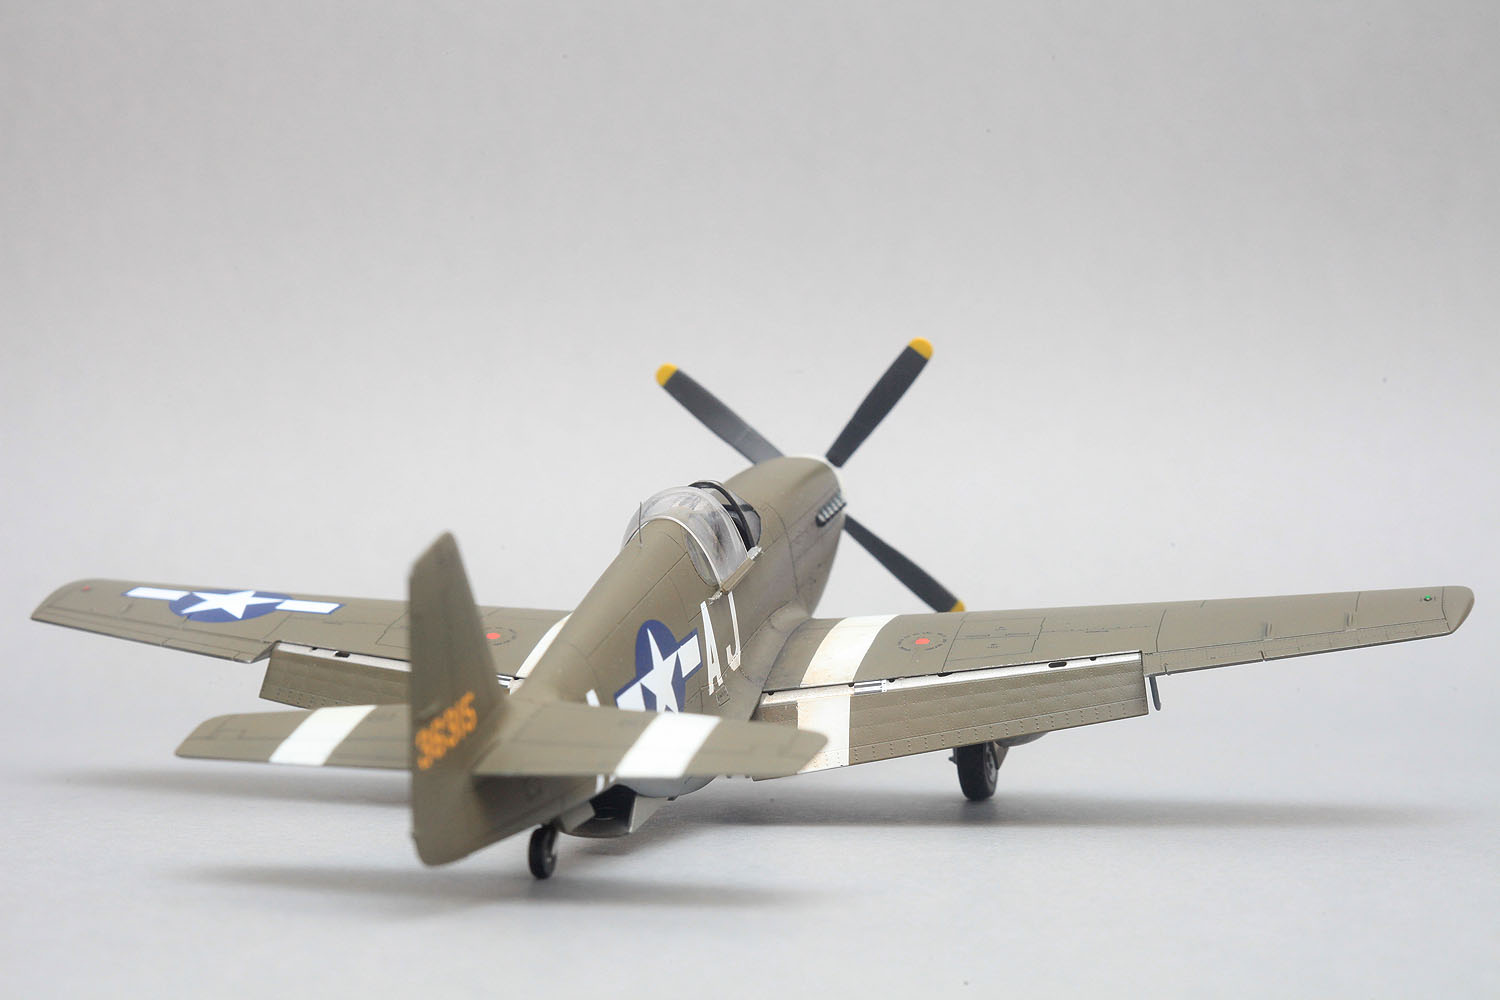
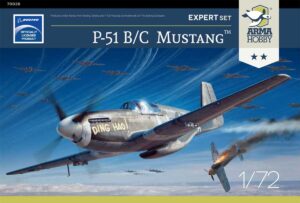
It is a privilege and duty for the designer to build the first examples of the model he has designed. For the first assembled and painted model, I chose a plane with the graceful name of DING HAO, already described on our website.
P-51 B/C kit assembly
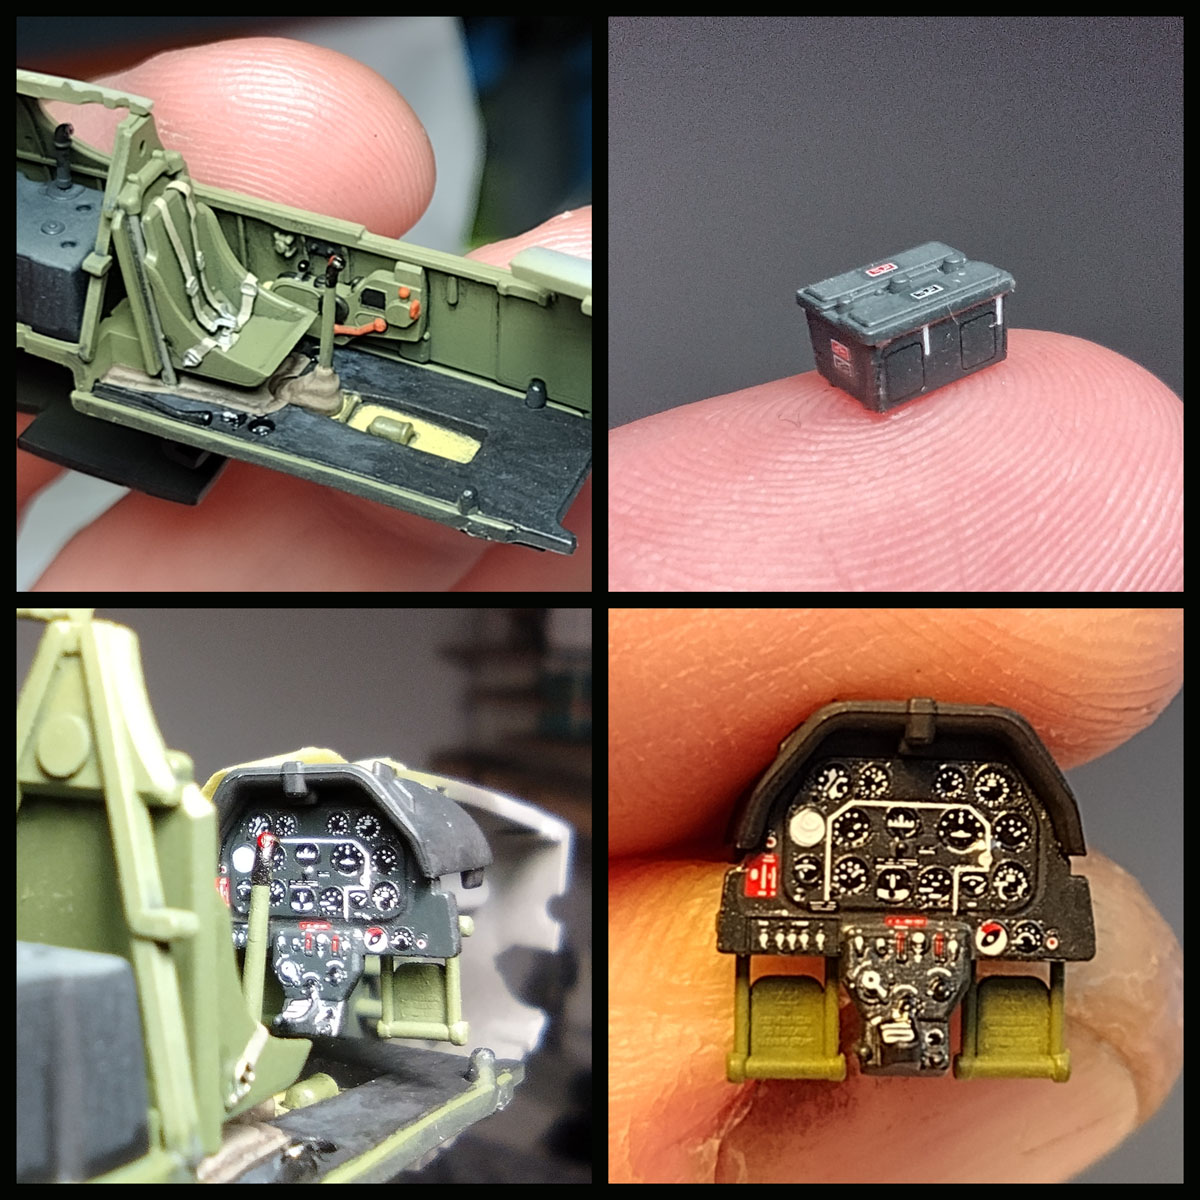
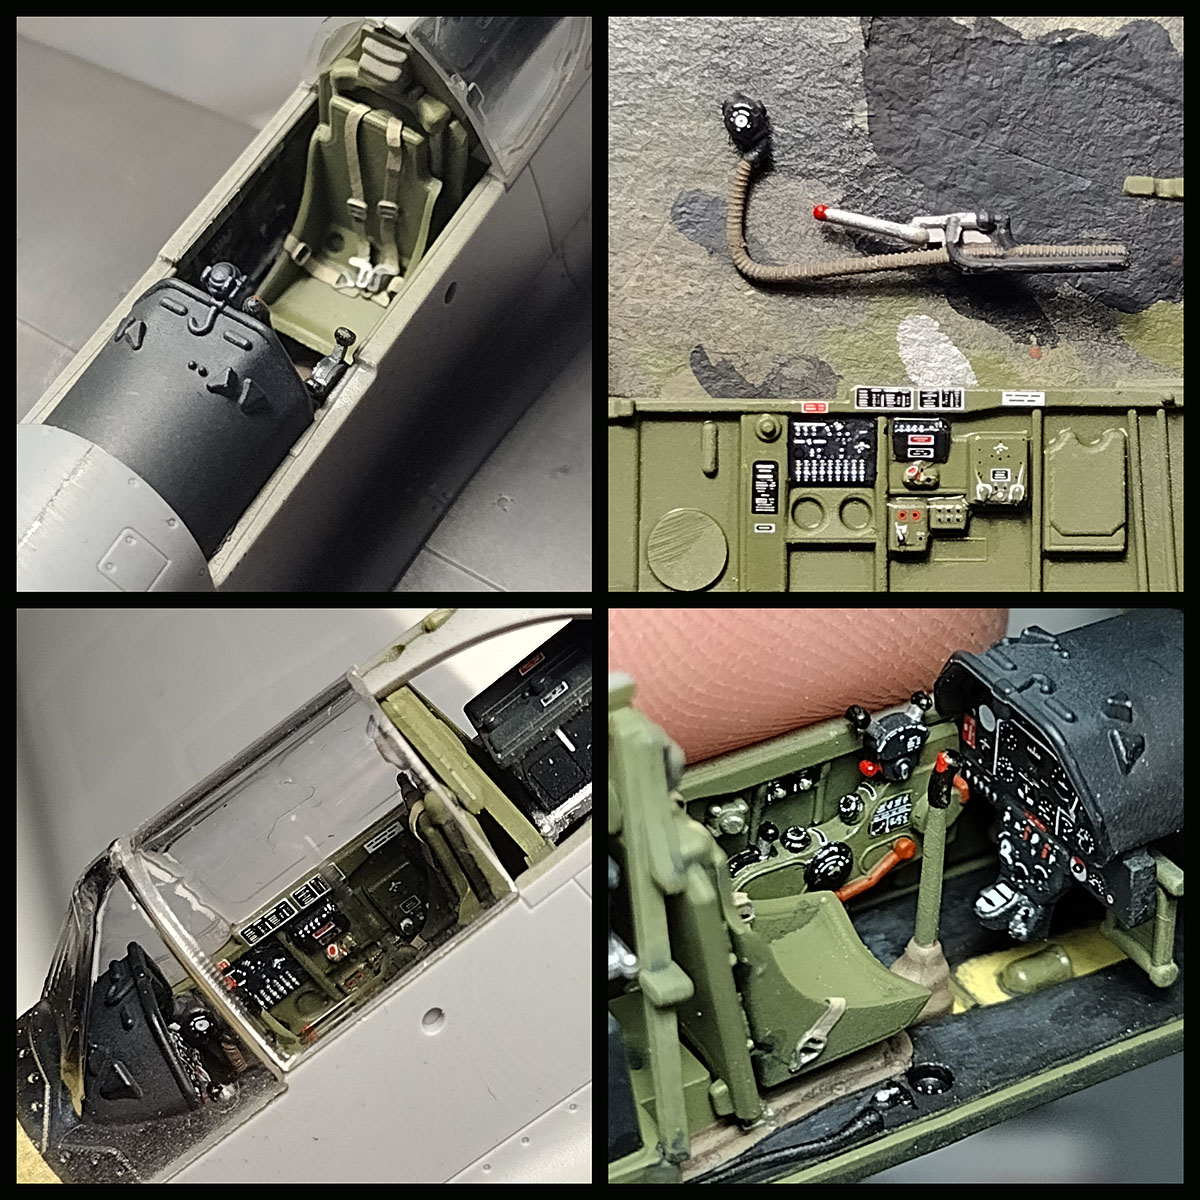
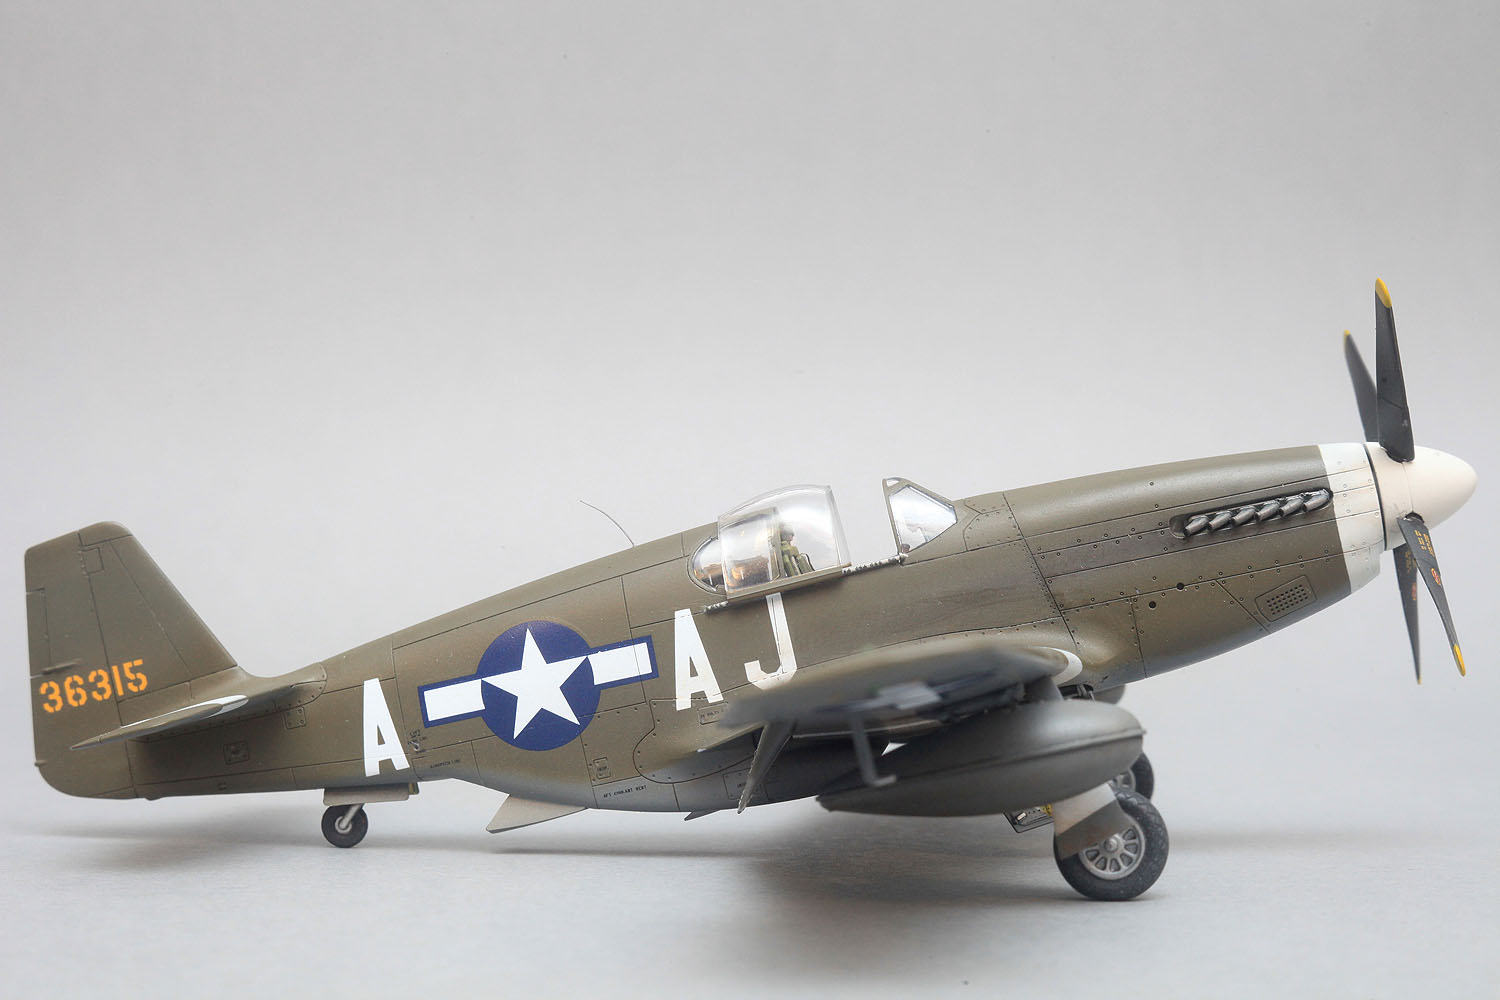
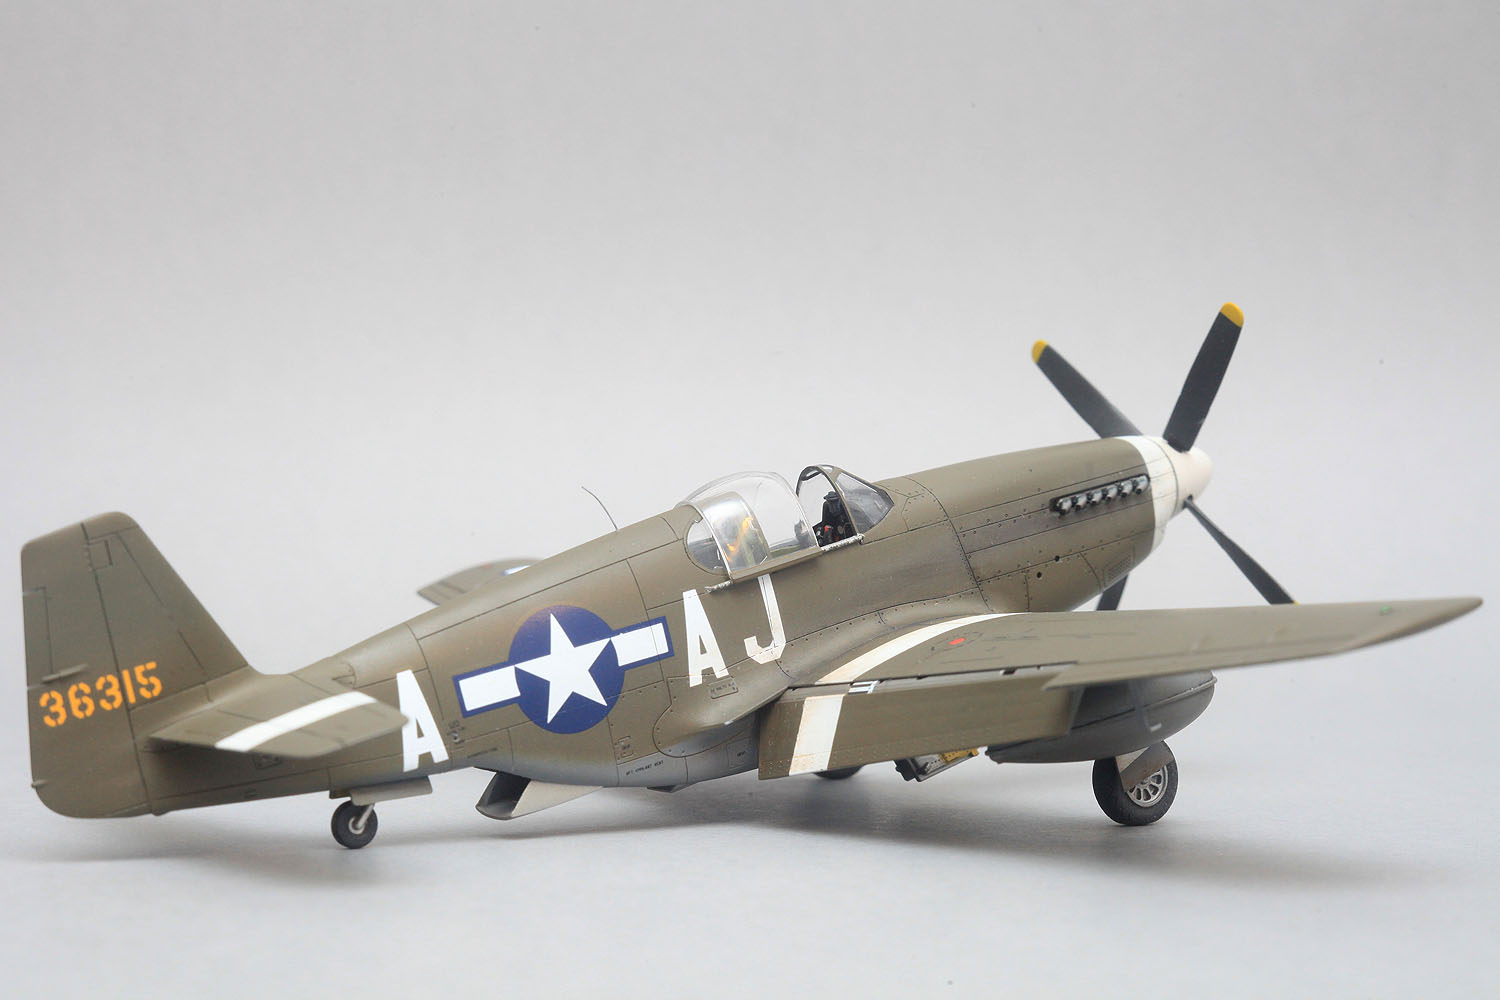
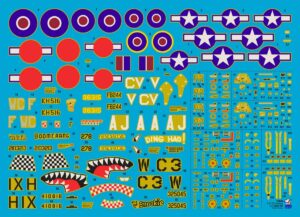
I started the assembly with test shots, so I had to make up for what was later improved. I had the most fun inside the cockpit. Painting with all the necessary colours has already given the cabin sufficient details density. There were so many decals with all the nameplates, descriptions, switches, etc., in the kit. Applying all of them is quite a challenge, but it does not take long. For example, I spent 20 minutes on the starboard applying about ten decals and softening them with liquids. We have already posted photos of the interior on FB.
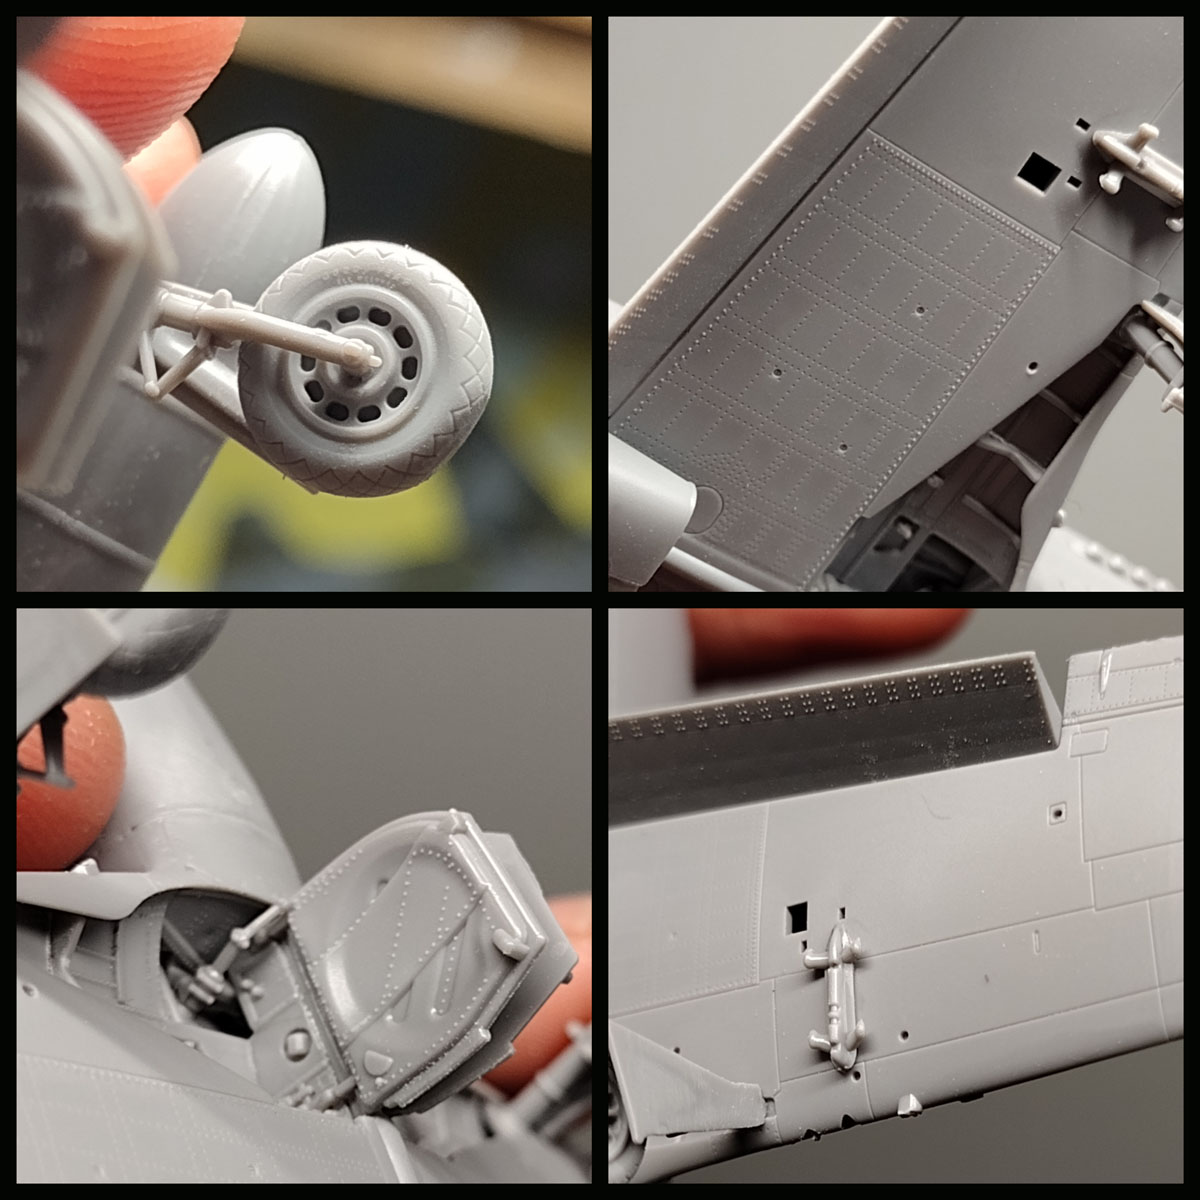
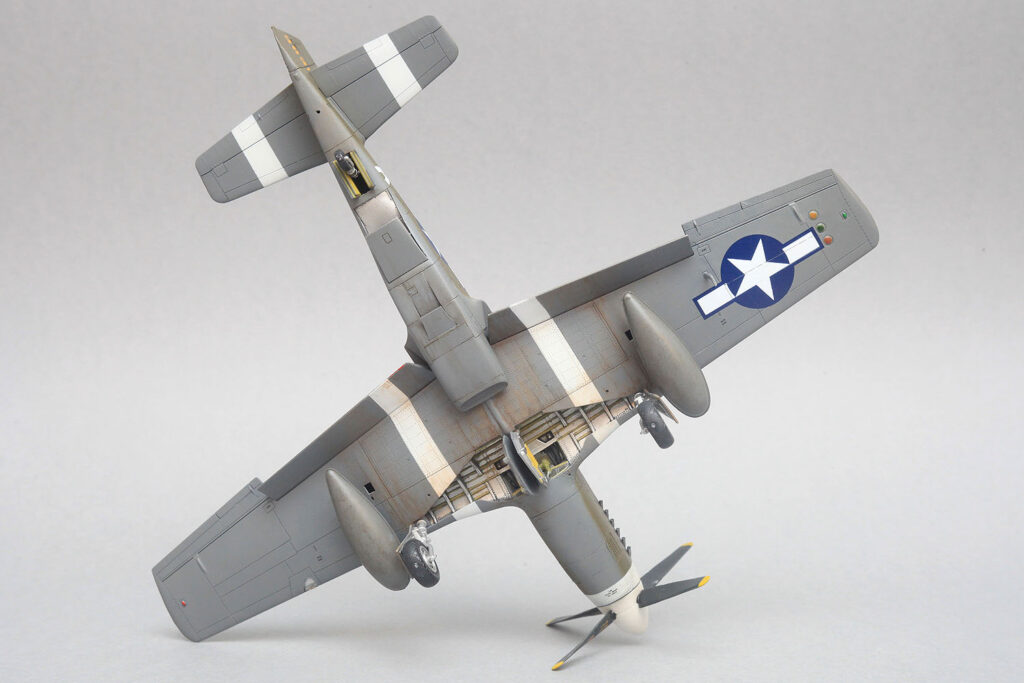
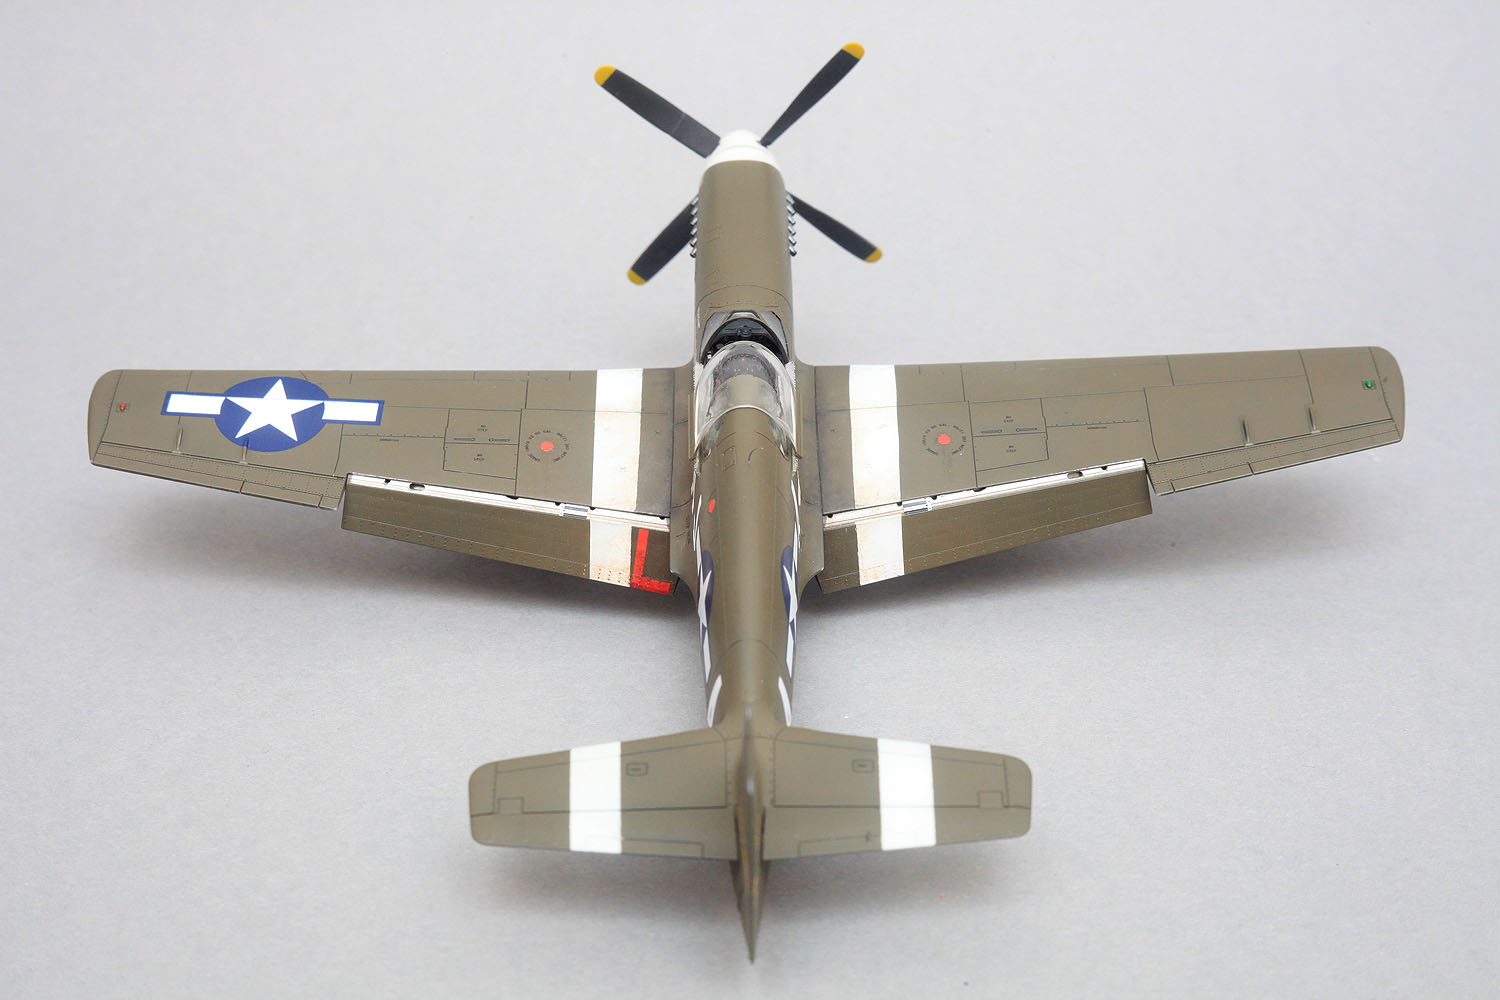
The landing gear bay is the second stage that has brought me a lot of satisfaction. I painted the whole thing with silver cellulose paint (such as Hataka C series, Gunze C or AK Extreme Metal). This type of paint is durable, so I recommend it. Then I brush painted the reinforcements of the sheathing and the ribs with Yellow Zinc Chromate acrylic paint. You could easily remove any paint bleeding beyond the desired detail with a pointed toothpick. Acrylic paint is easy to scratch off the surface of hard cellulose paint.
The airframe assembly was not tricky at all. In several places, I made smooth joints of the halves or other parts connections. As I had test shots, I had to fill the unnecessary panel on the right side of the vertical stabilizer. Thanks to the further corrections of the mould, you don’t have to do it yourself.
Instrukcja montażu modelu #70038 P-51 B/C Mustang™ Expert Set
Painting Mustang
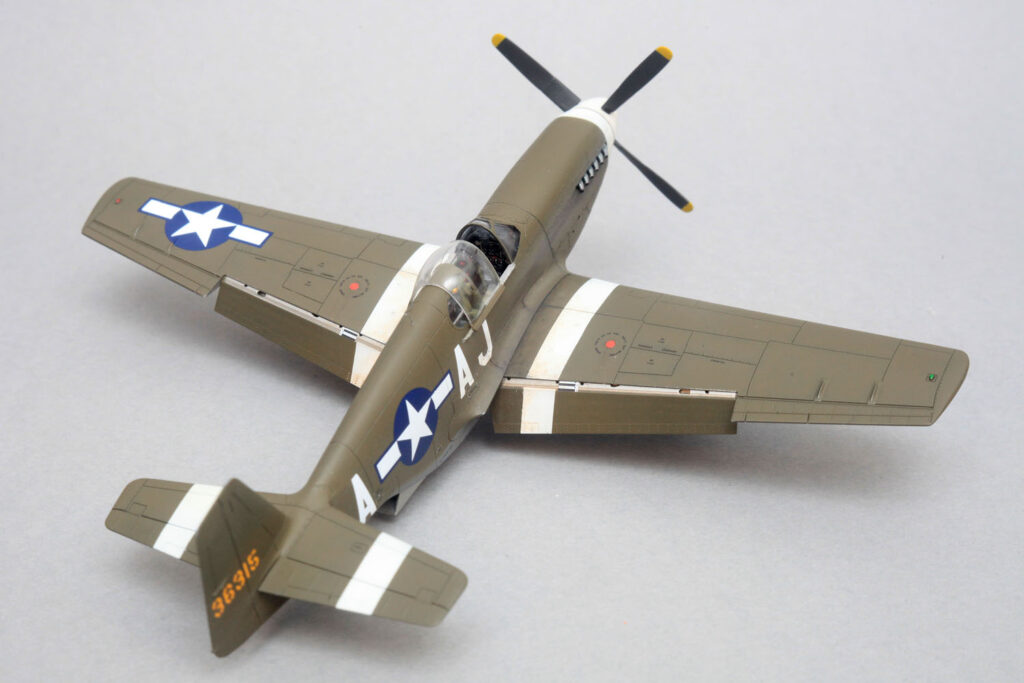
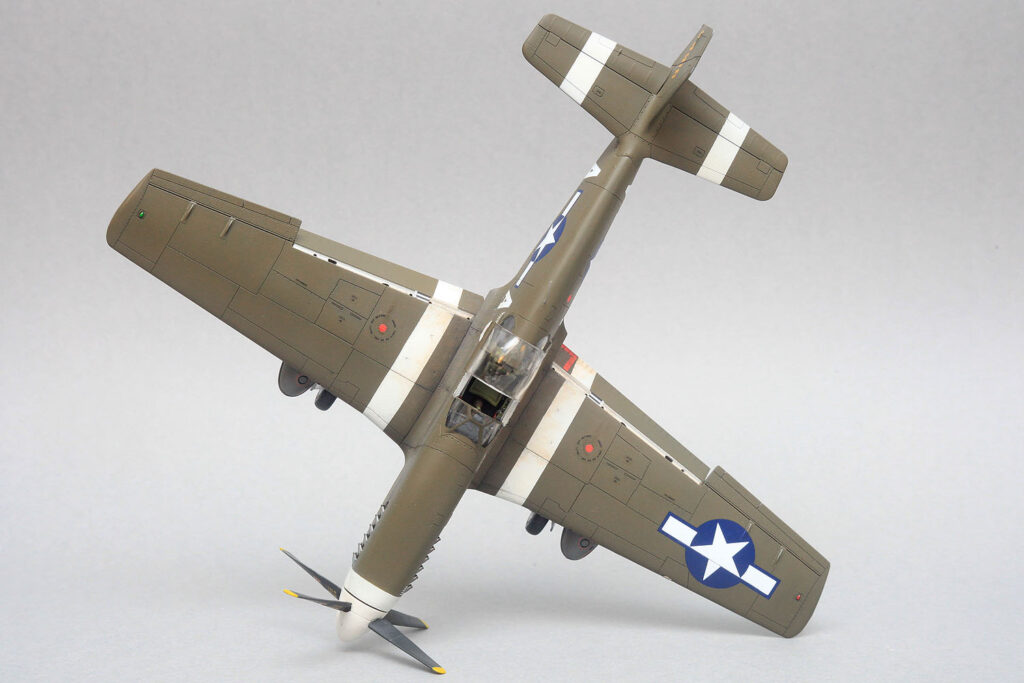
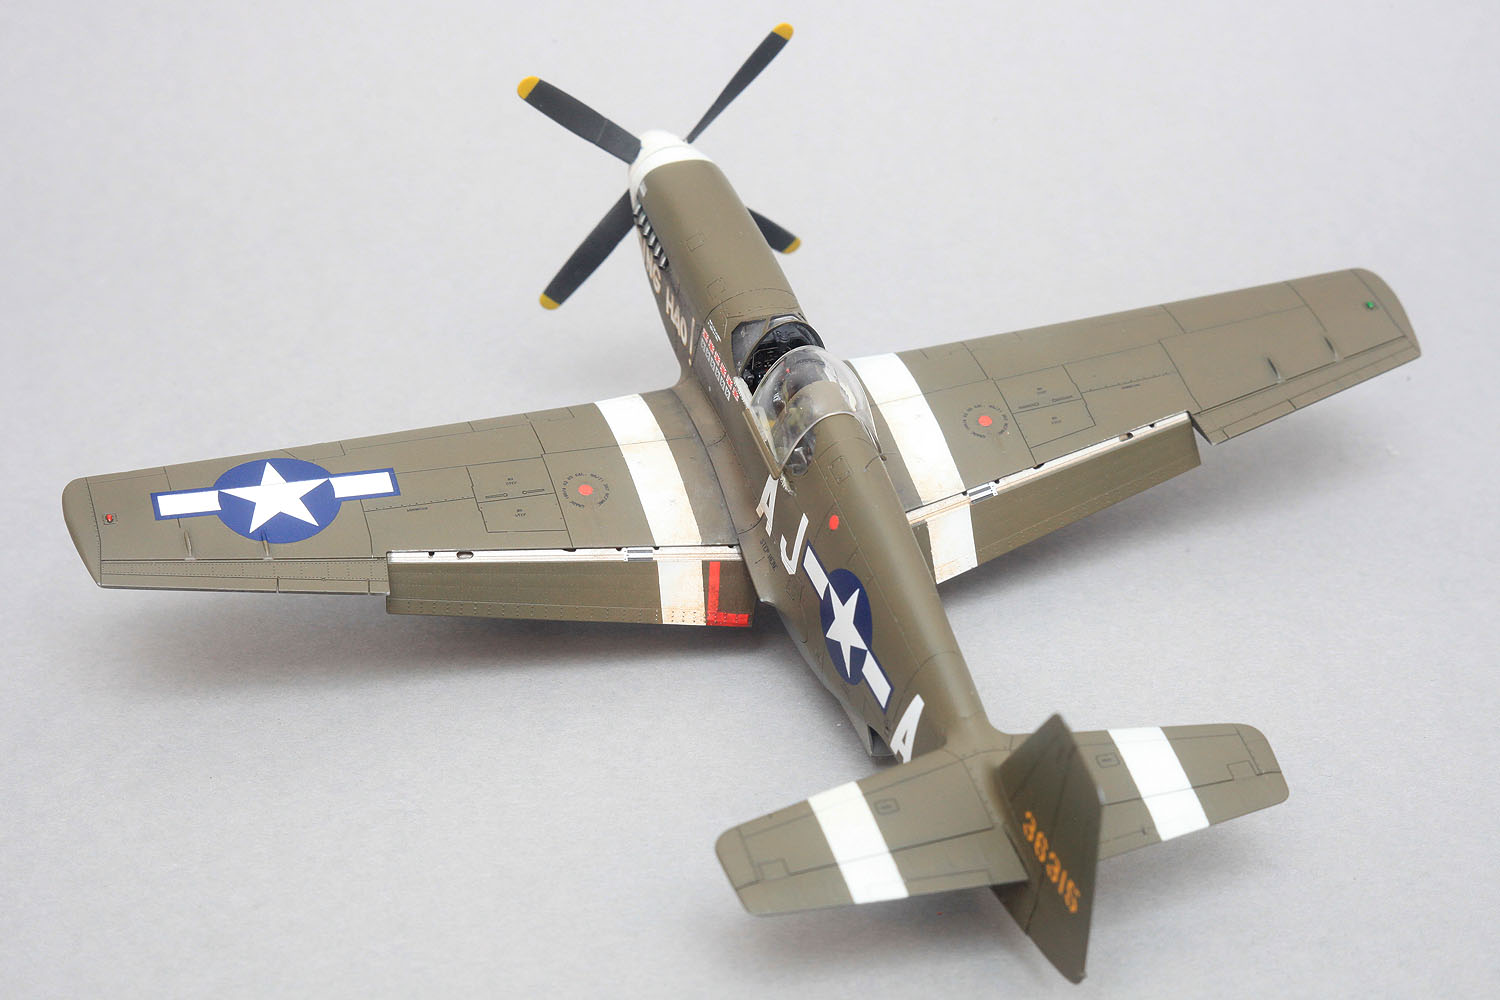
After assembling and preparing the whole model, I masked the cockpit, the landing gear bay and the radiator outlet with the Platafix. I used a black Gunze Surfacer as a paint primer. Due to the desire to quickly finish the model, I did not go into any complicated preshading or black basing effects, I brightened some surfaces, and here and there, I painted a few irregular spots through photo-etched stencils. Then I started with the camouflage colours. I painted the camouflage colours with Gunze C paints. Before applying the decals, I painted the whole model with clear varnish.
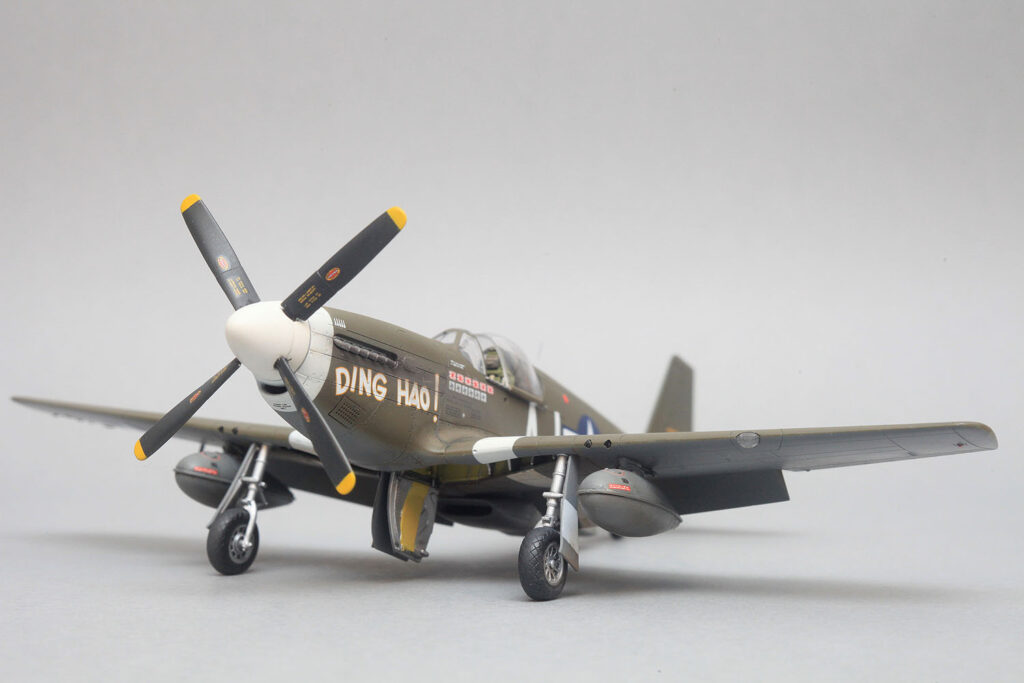
I painted white identification insignia before the decals. Unfortunately, on the first try, I overdid it. I made the continuity of the stripes on the flaps in line with the rivet lines. It was a mistake. The stripes are parallel to the plane’s axis, and the rivets are perpendicular to the axis of rotation of the flap. It is worth paying attention to this before masking, and you can always save some time. Decals were just a piece of cake. First, I put all the big markings and then stencil. The Microscale decal fluid worked very well with the kit’s decals. Then I painted over the soot with an airbrush, added a little dirt with Ammo Mig wash and sealed everything with Hataka matte varnish.
After the final touches, I added small parts, and the model was ready for presentation. I hope you will enjoy making it as I enjoyed designing it and building and painting the first copy. Soon I will publish on armahobbynews information on what to pay attention to when assembling and painting.


Wszystko co chcecie wiedzieć o Mustangu z Arma Hobby i nie boicie się pytać


See also
- Buy P-51 B/C Mustang™ Expert Set and more in Arma Hobby Internet Shop link
This post is also available in:
 polski
Too much clean aircraft. If there is dirt on the aircraft than must be not only on exhaust pipes…..
Looks great? Congratulations!
Brilliant. But what do you expect from craftsmen. I am looking forward to building mine but in the interim, I must be patient.
WOW! I think you have produced the DEFINITIVE P-51B in 1/72. Amazing!
SHAME ON YOU !!!!, if you don´t do it in 1/32 (and 48!).
Twinkle!!
Congrats and Merry Christmas