
Building a new model kit for the first time is a great experience. The more so that the time was short and the model was created in a week. It cost me two sleepless nights, but the effect turned out to be fully worth the effort.
The first experience is getting to know the details of the model kit. Every now and then a surprise, I discover another little thing designed by Marcin. In addition to the details, attention is drawn to the well-thought-out method of assembly and clever ways to make everything come together as it should. If I were to encourage you to build a kit, I would tell you about the satisfaction of assembling it step by step and finding new details. The challenge for me was the size of the model, so far I was doing 1/72 and I had no feeling for larger surfaces and more details.
Model kit assembly
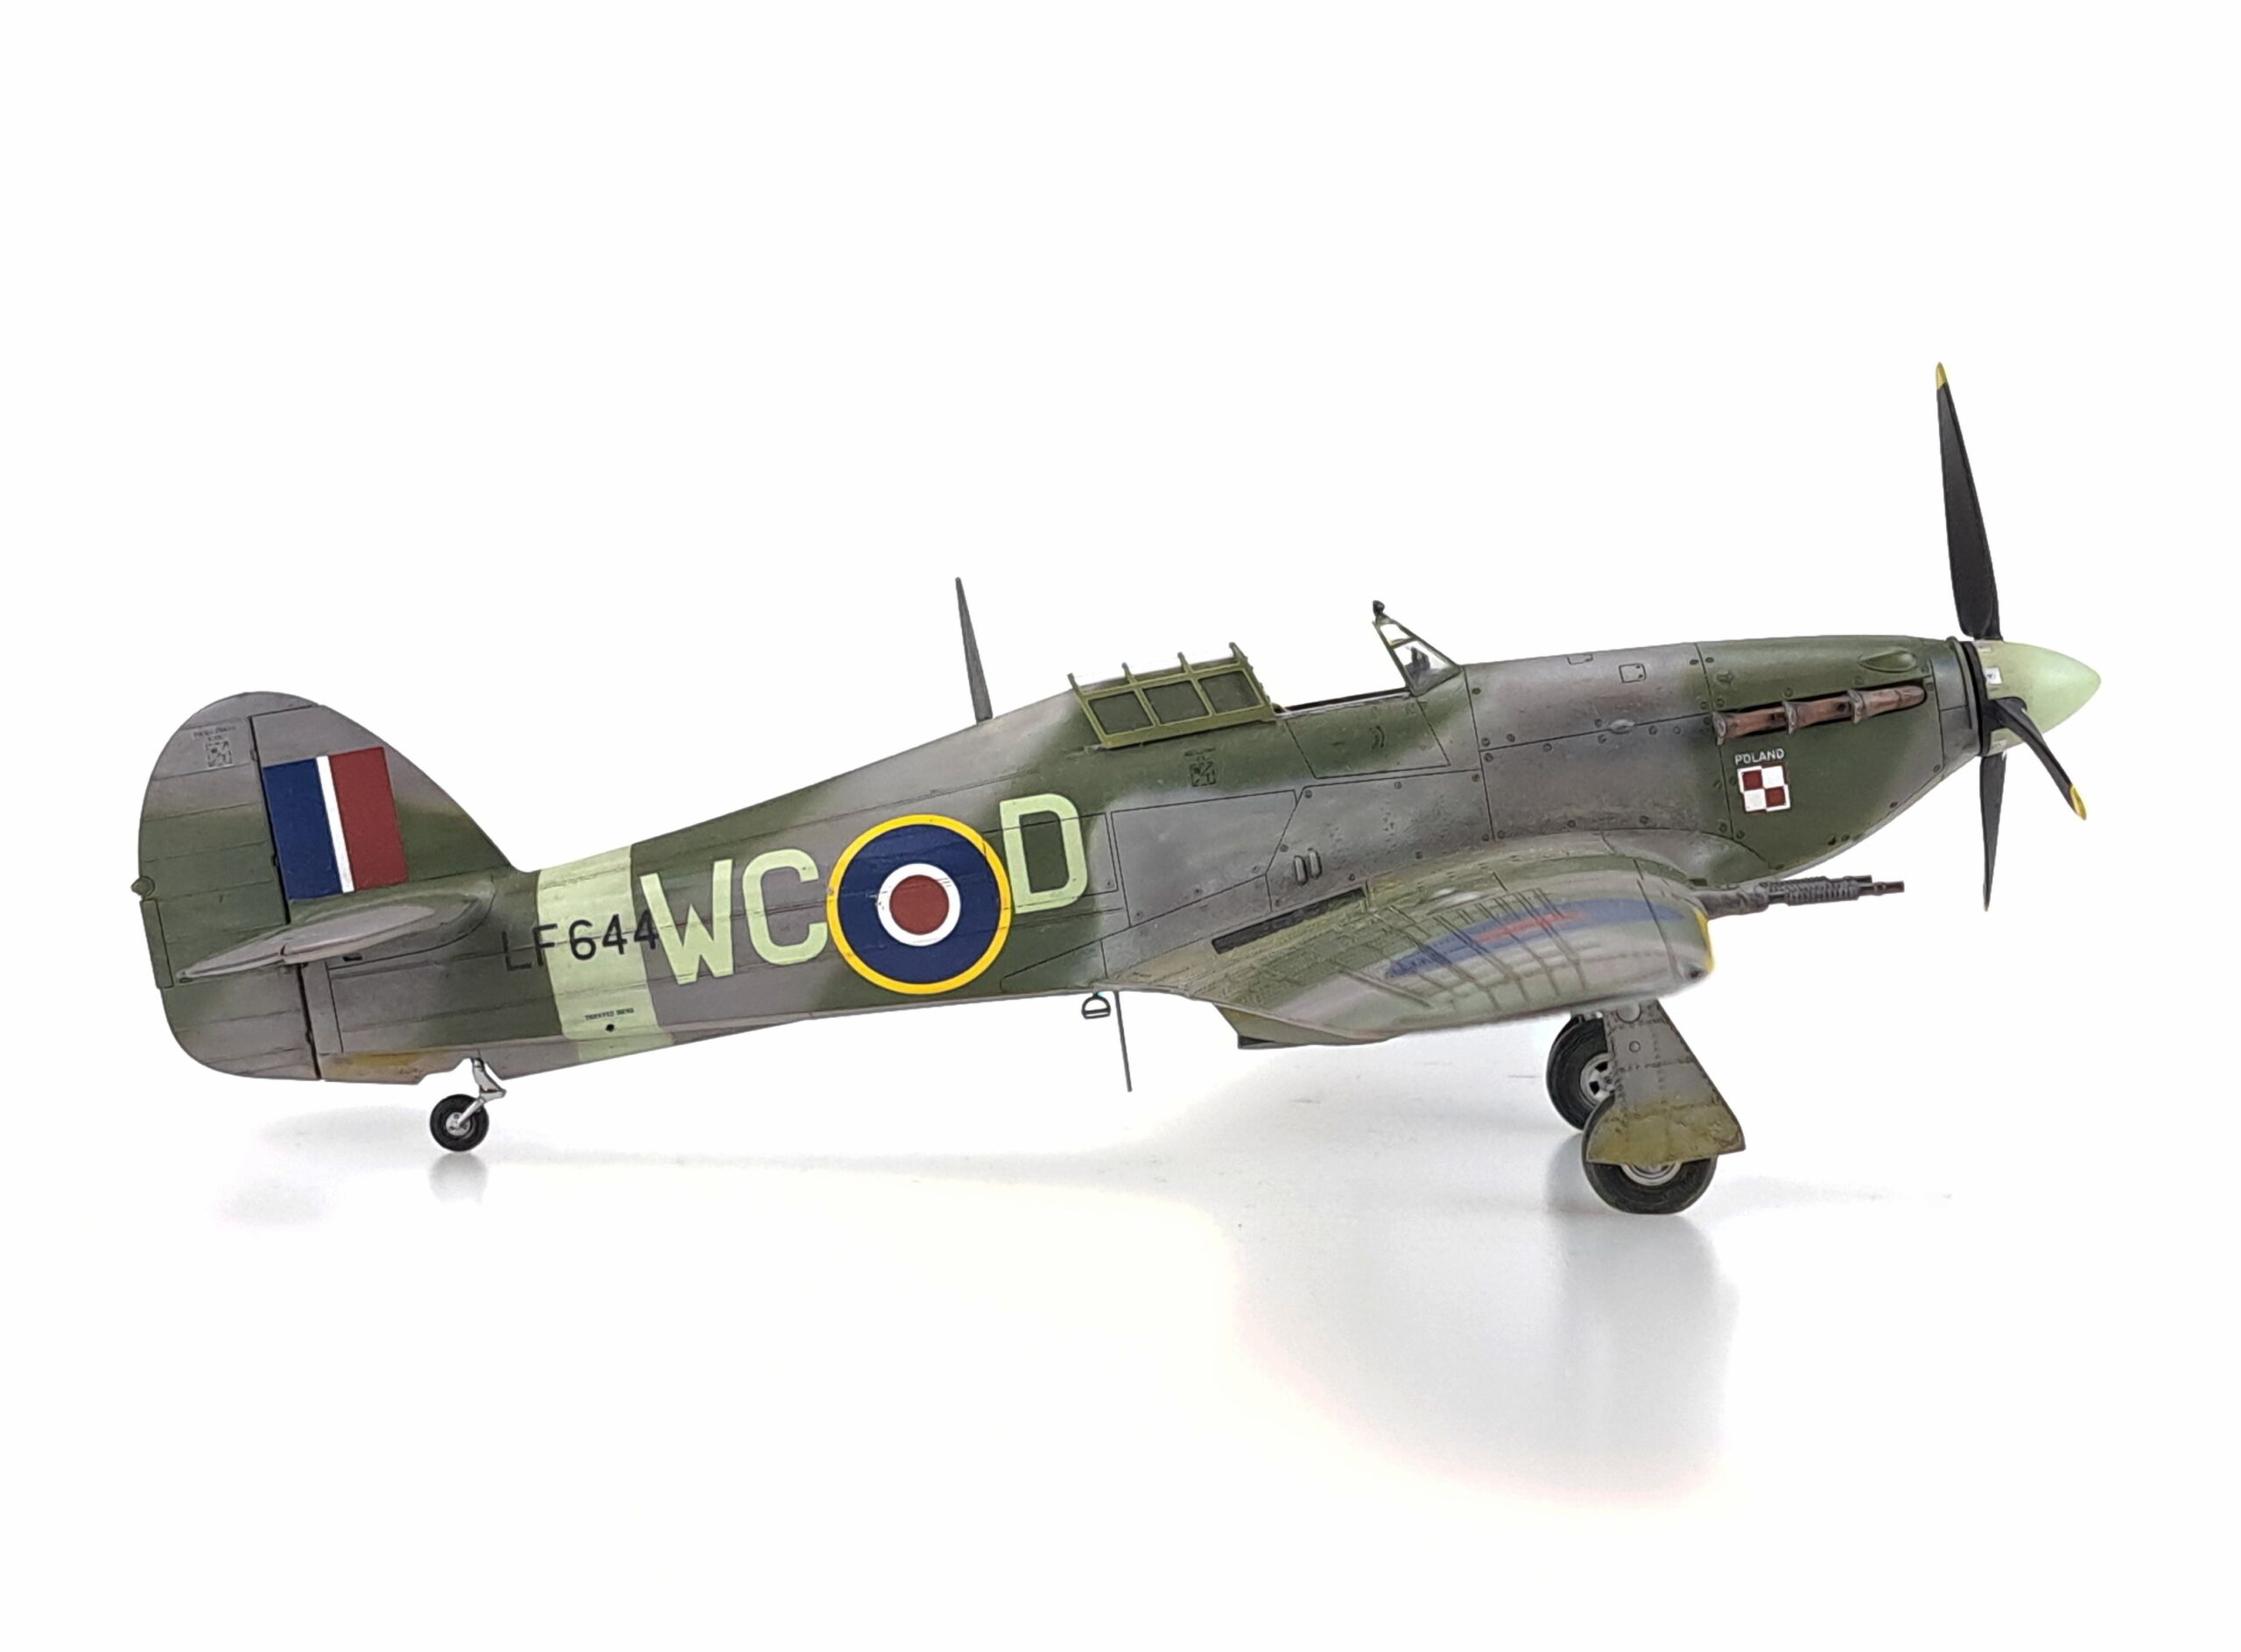
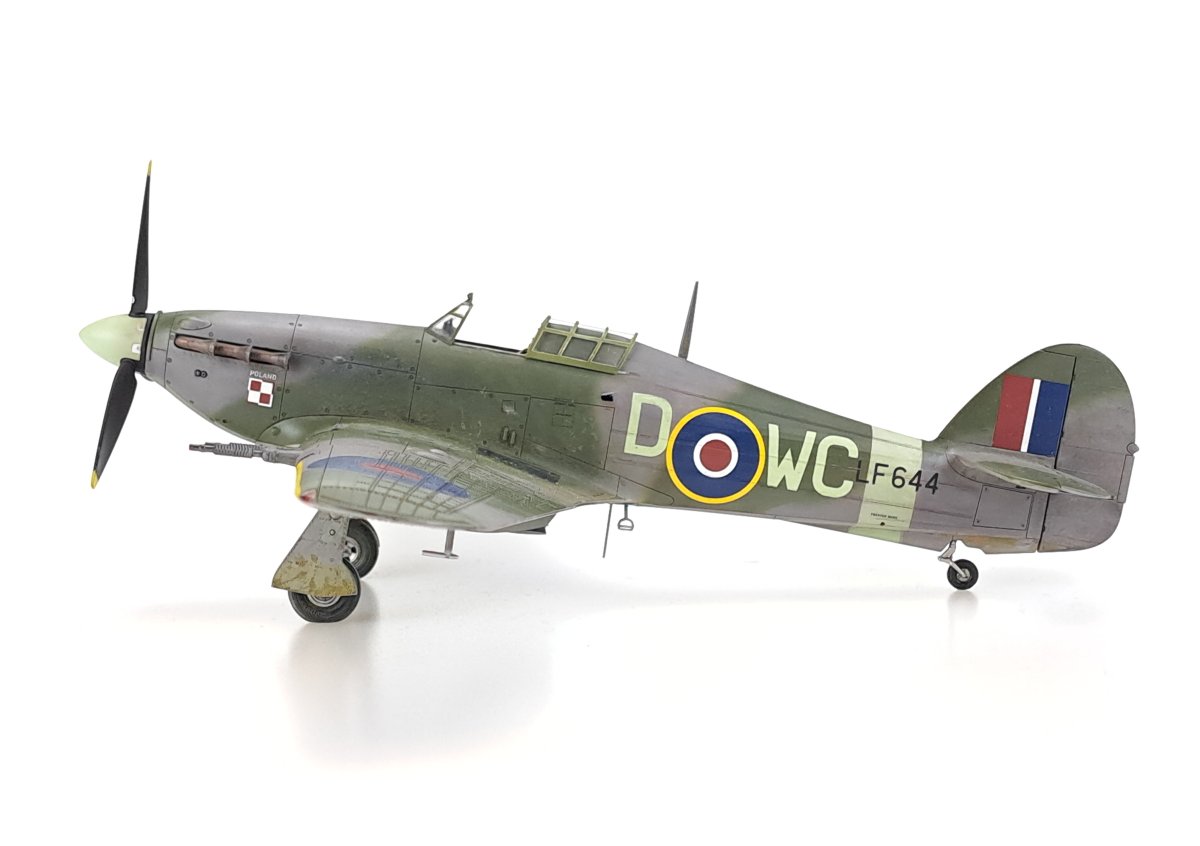
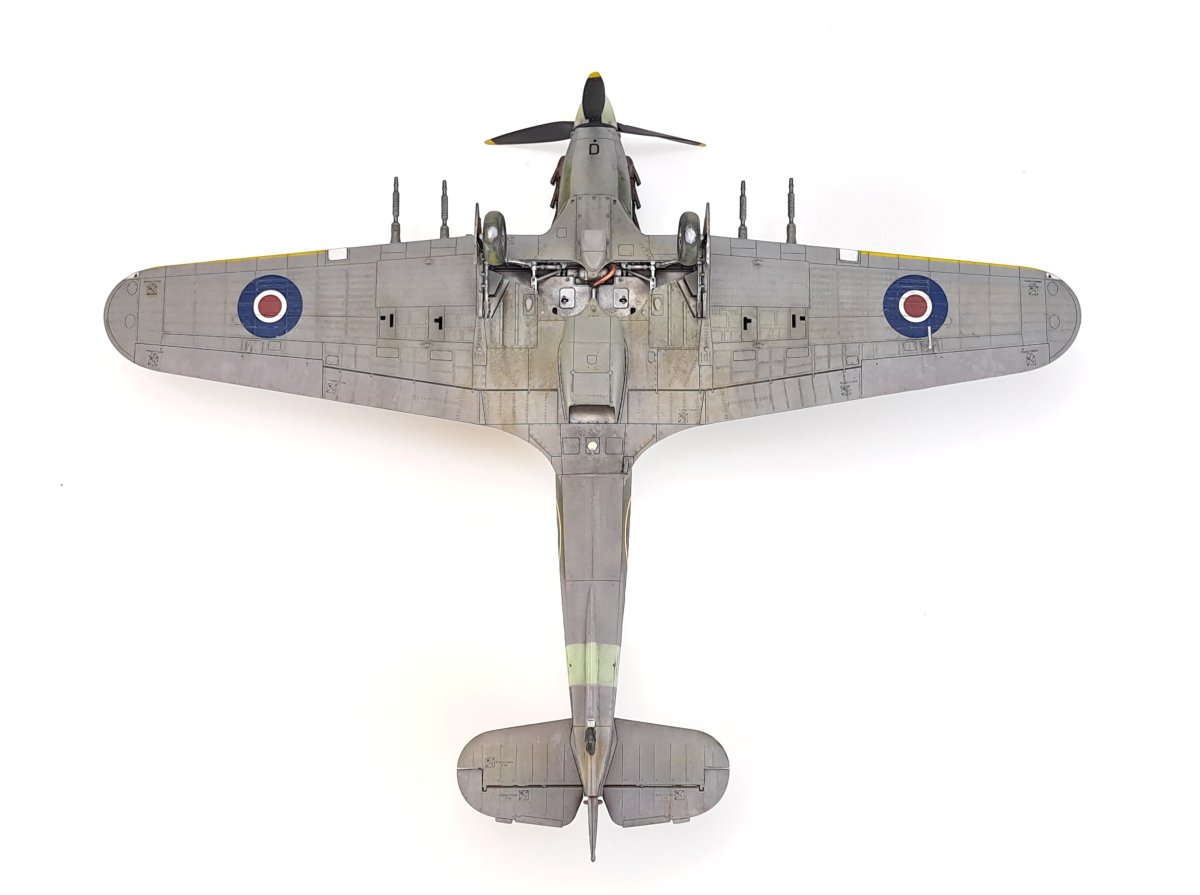
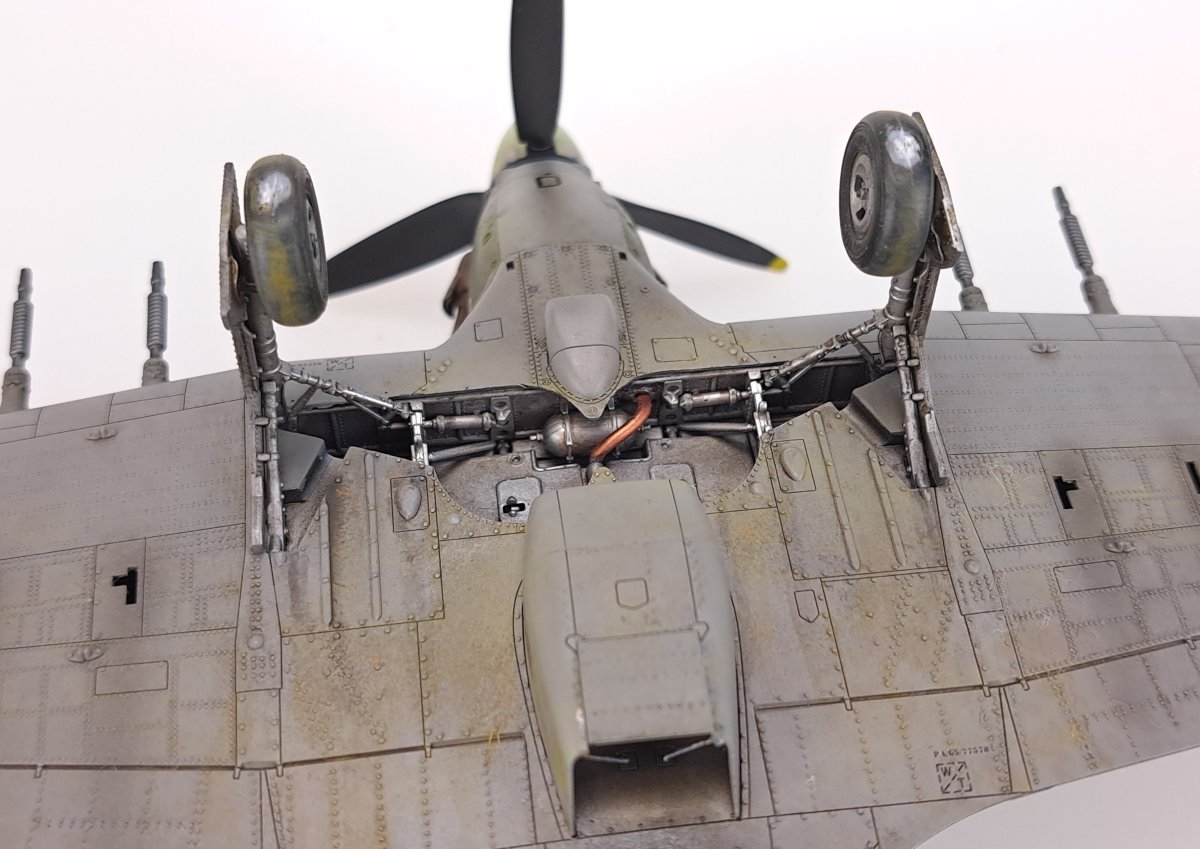
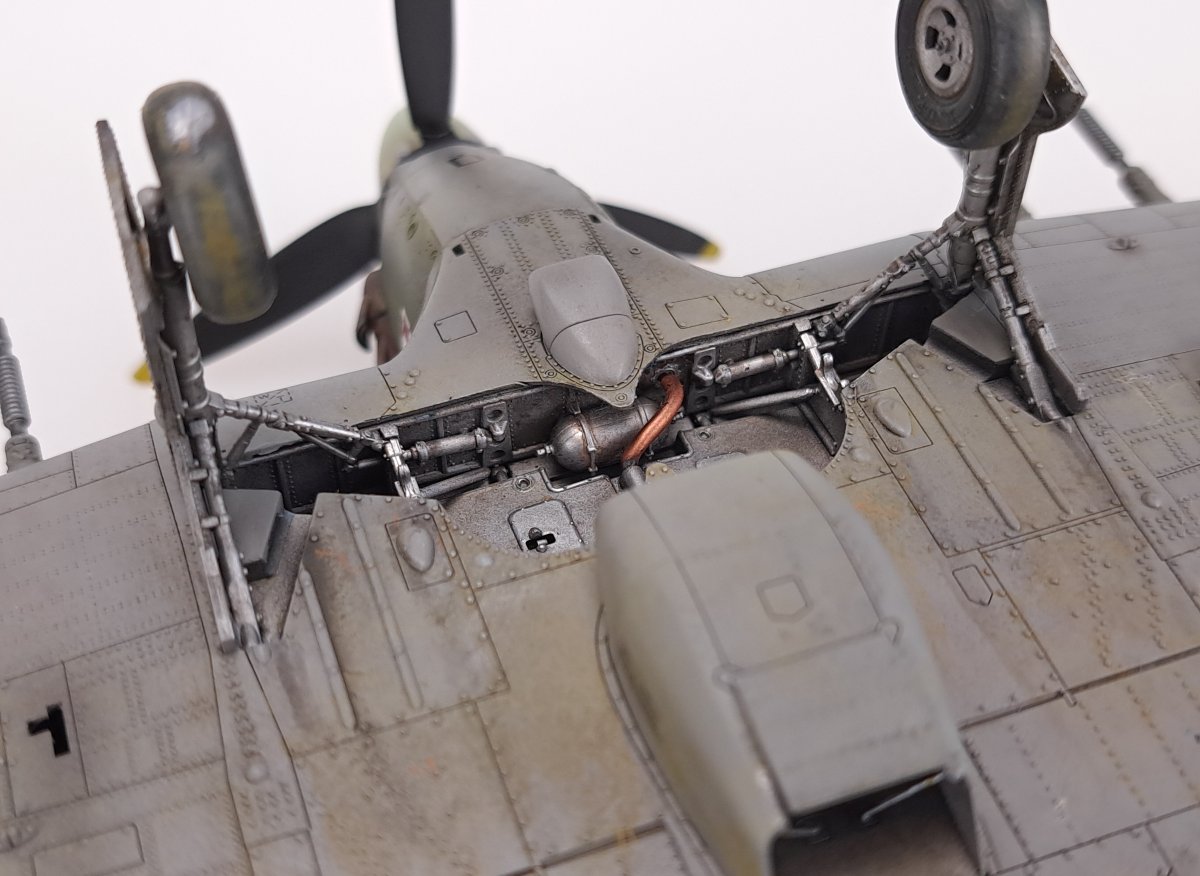
I started the model with the wing, to which I glued the complete cockpit truss and landing gear well details. After painting it silver, I proceeded to paint the details. The black boxes on the sides are nicely solved – I painted them separately and glued them to the painted sides of the fuselage.
- Armour plate (A23) – do not cut the two flat pieces on the bottom edge – they will help to fit to the rest of the structure. It’s also possible without them, but less comfortable.
- Instrument panel – the decal does a great job, I advise cutting it into segments – it can be easier to arrange on an extensive board relief. After glueing the fuselage halves, the finished panel itself clicks into the right place.
- Decal for the starboard side of the cockpit – I recommend cutting the envelopes and oval holes separately – it will be easier to put them in the right place without the need to stretch the decal.
- Horizontal stabilizer – the element connecting with the fuselage may require a light sanding of the edges (sandpaper – or even two strokes with the edge of a knife) – then it will fit into place without any problems. Similarly with the edge of the lower part of the fuselage.
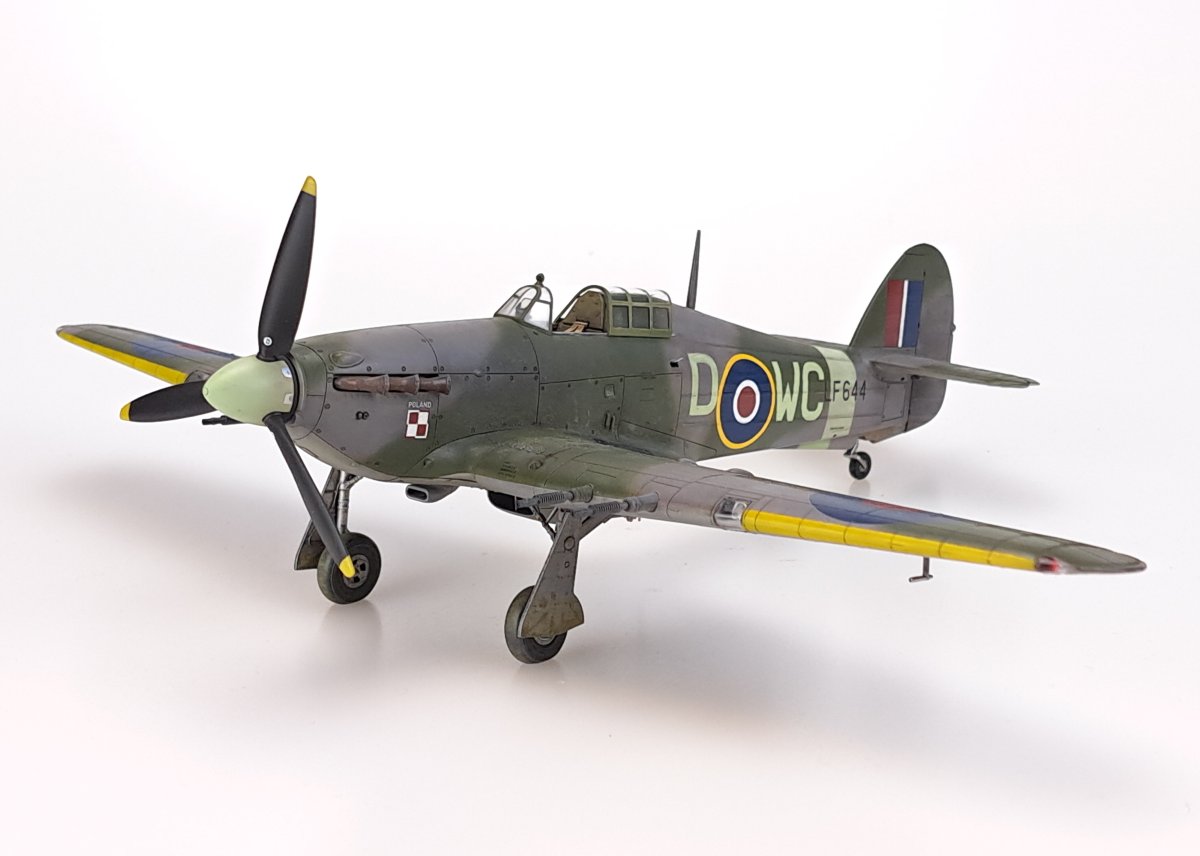
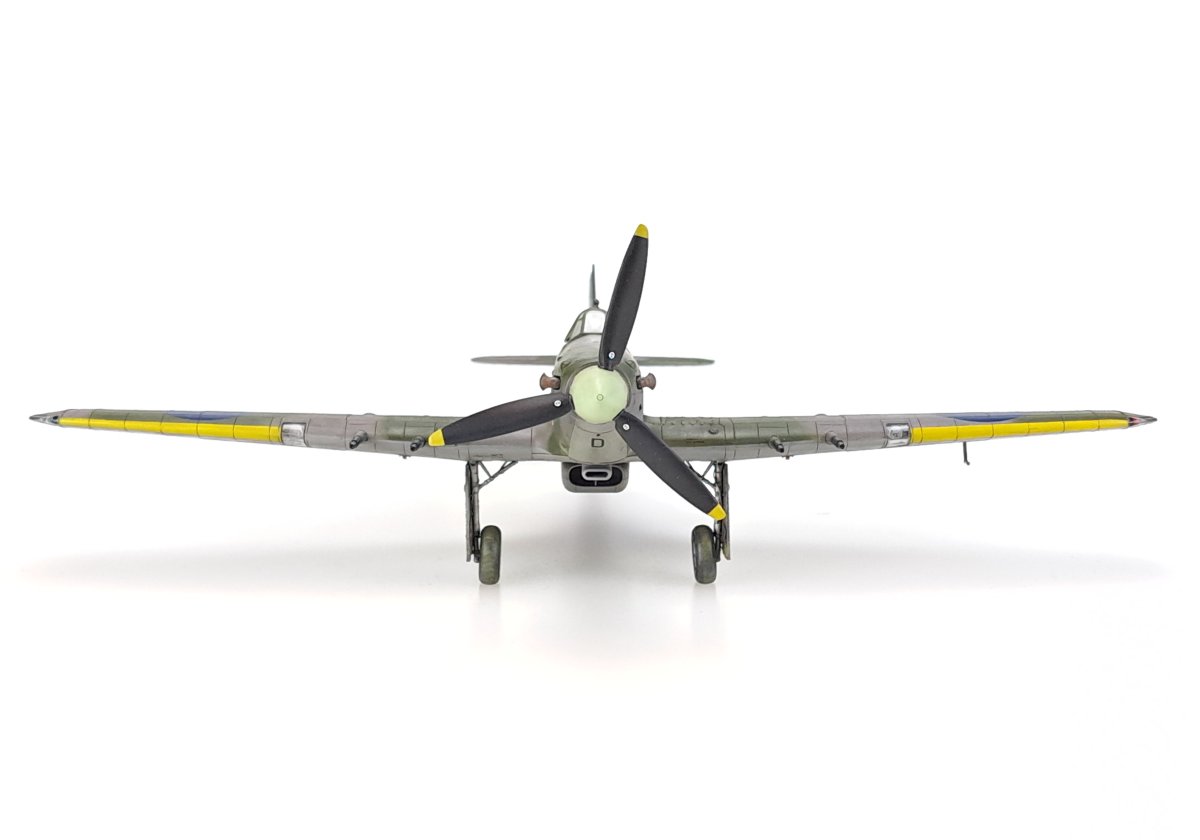
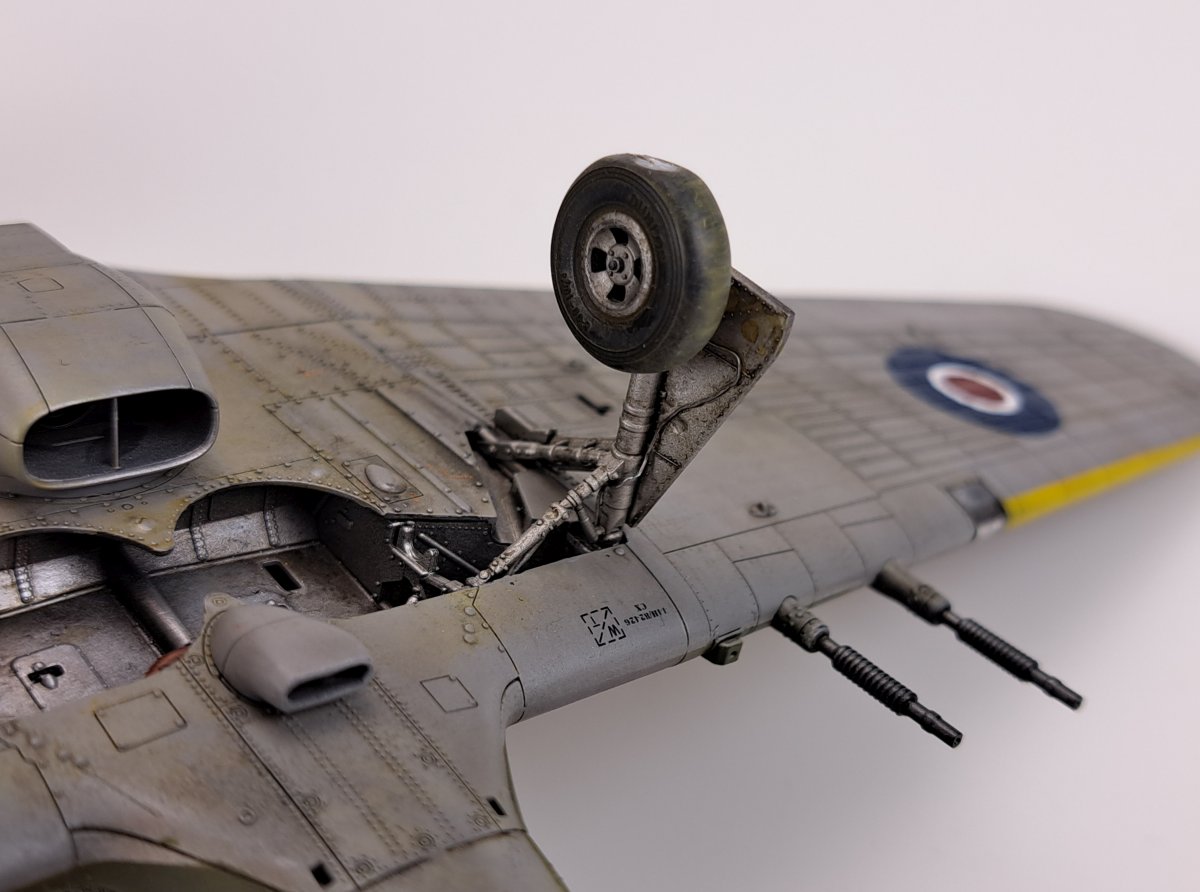
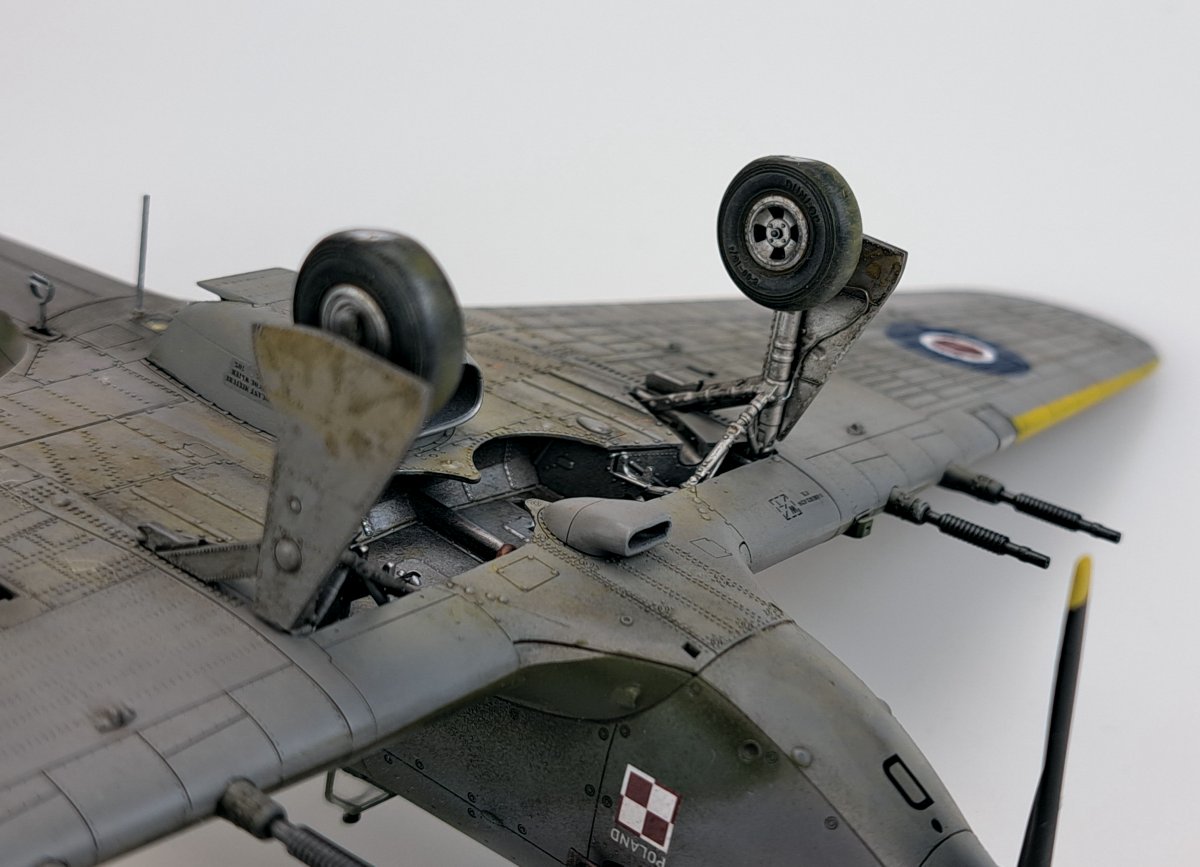
- Undercarriage – glue the undercarriage leg and support to the cover. Then it is easy to paint them in the colour of the interior. After painting, you will “click” it and glue it with two drops of glue. The wheels have a small pin positioning with the axle of the legs. Thanks to it, the weighted wheels will be in the correct position relative to the airfield surface. Unless you swap left and right…
Easy additions – how to enrich the model?
I did not refrain from a few little additions.
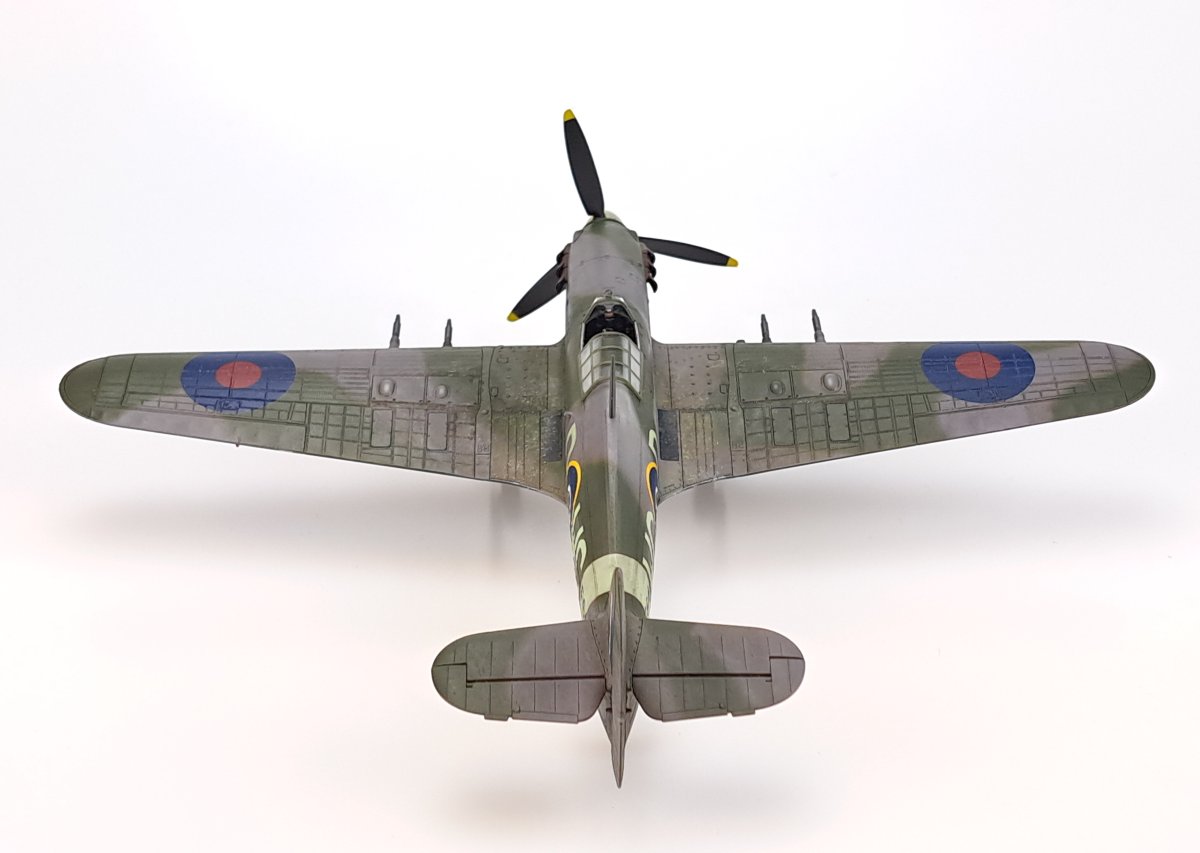
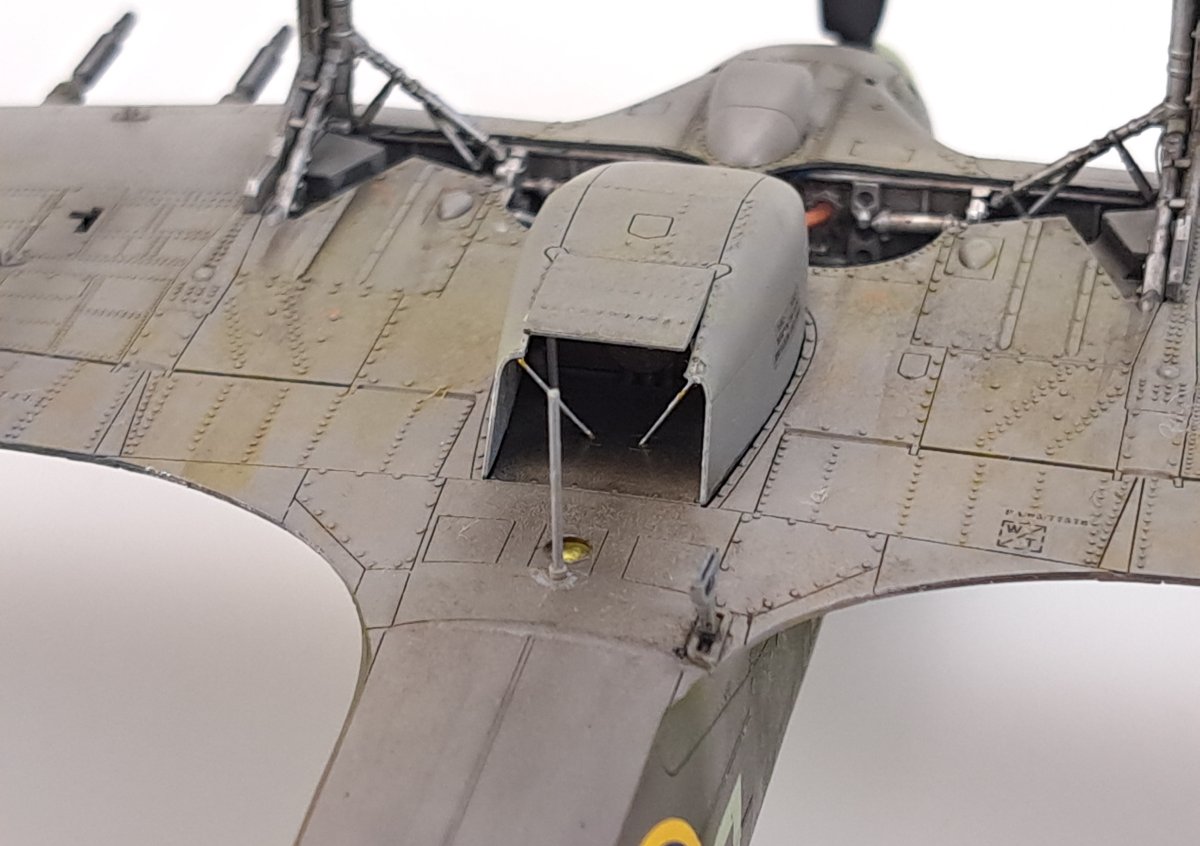
- There were pushing rods and reinforcements in the radiator. In the rear part, their attachment points are marked in the model kit. All you have to do is add a piece of plastic rods, Albion Alloys tubes or a sprue stretched over a candle.
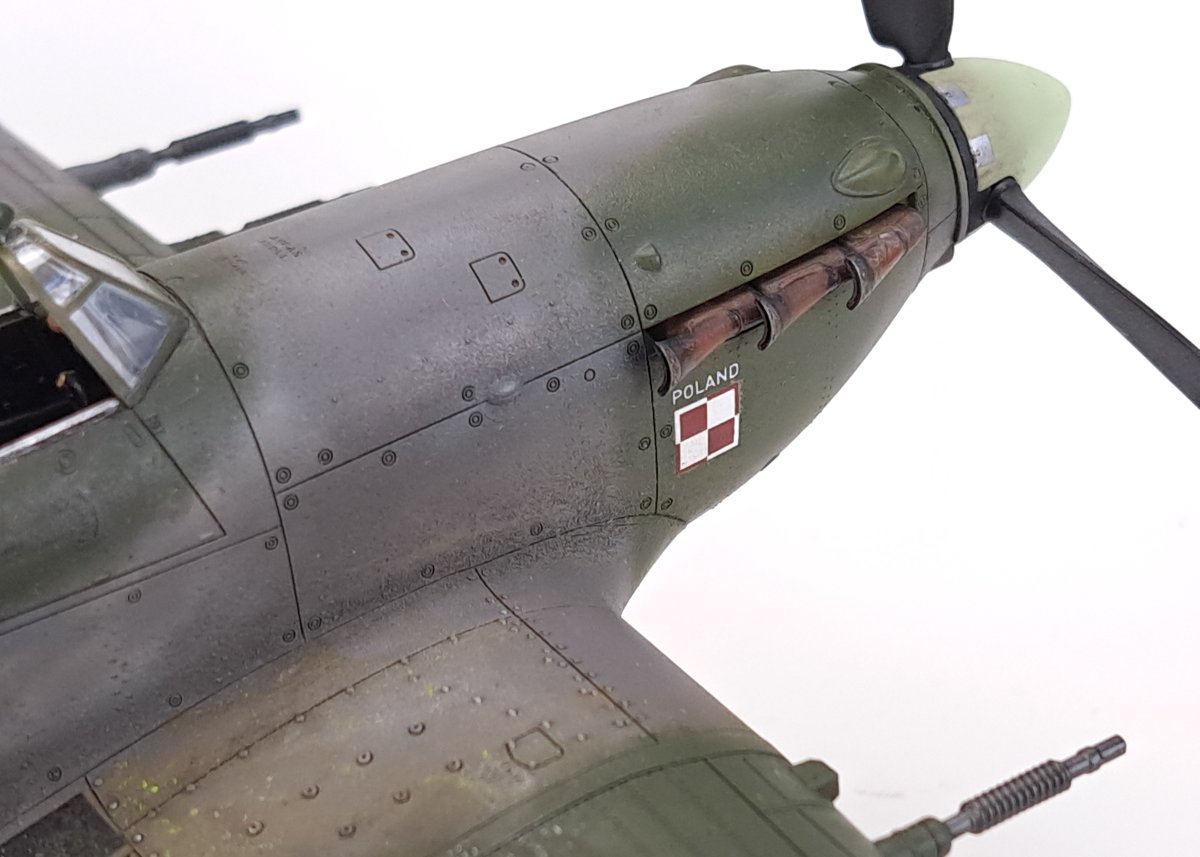
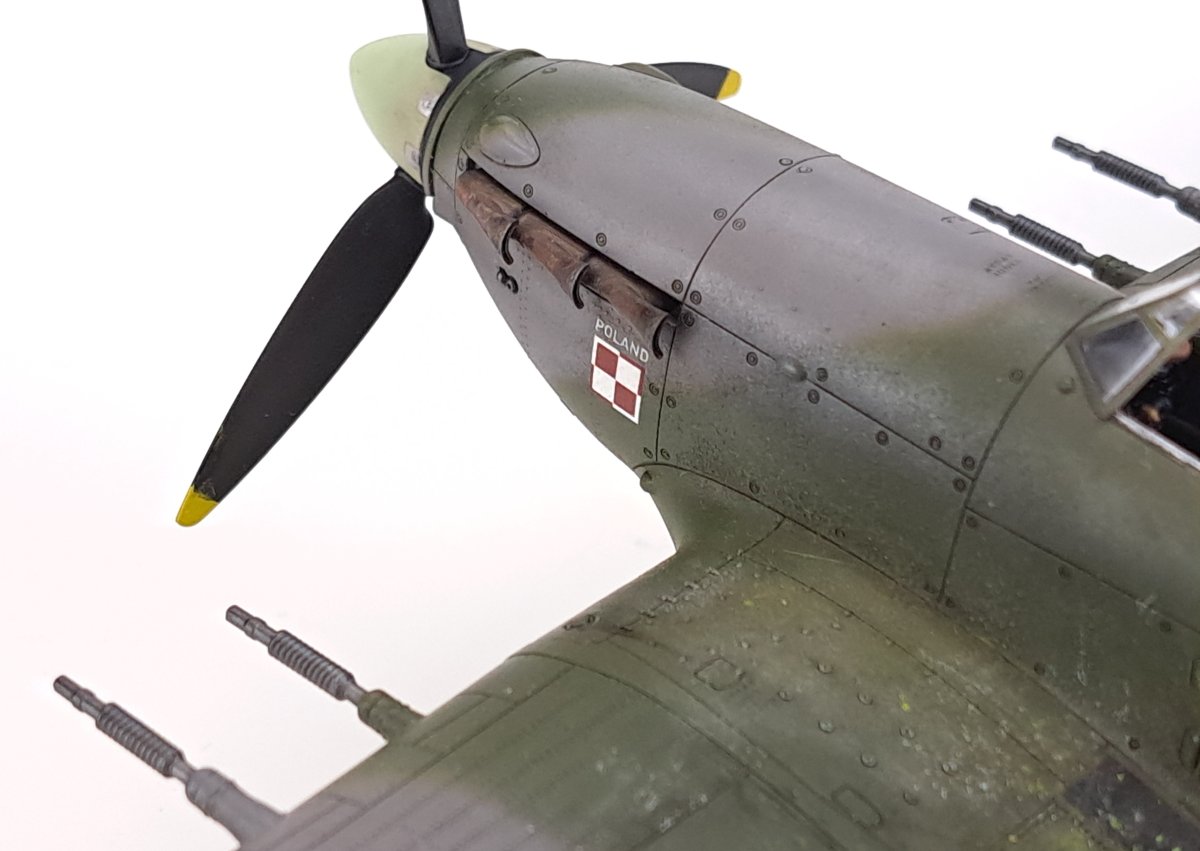
- On the left engine cover, you will find two tubes. One is bent forward. I gently drilled out the plastic parts with an Olfa blade.
- I added Dzus-fasteners on the engine cover where the fuselage halves are joined. I used a tube of the right diameter with a sharpened edge. I pressed it into the plastic and added the middle detail with a needle.
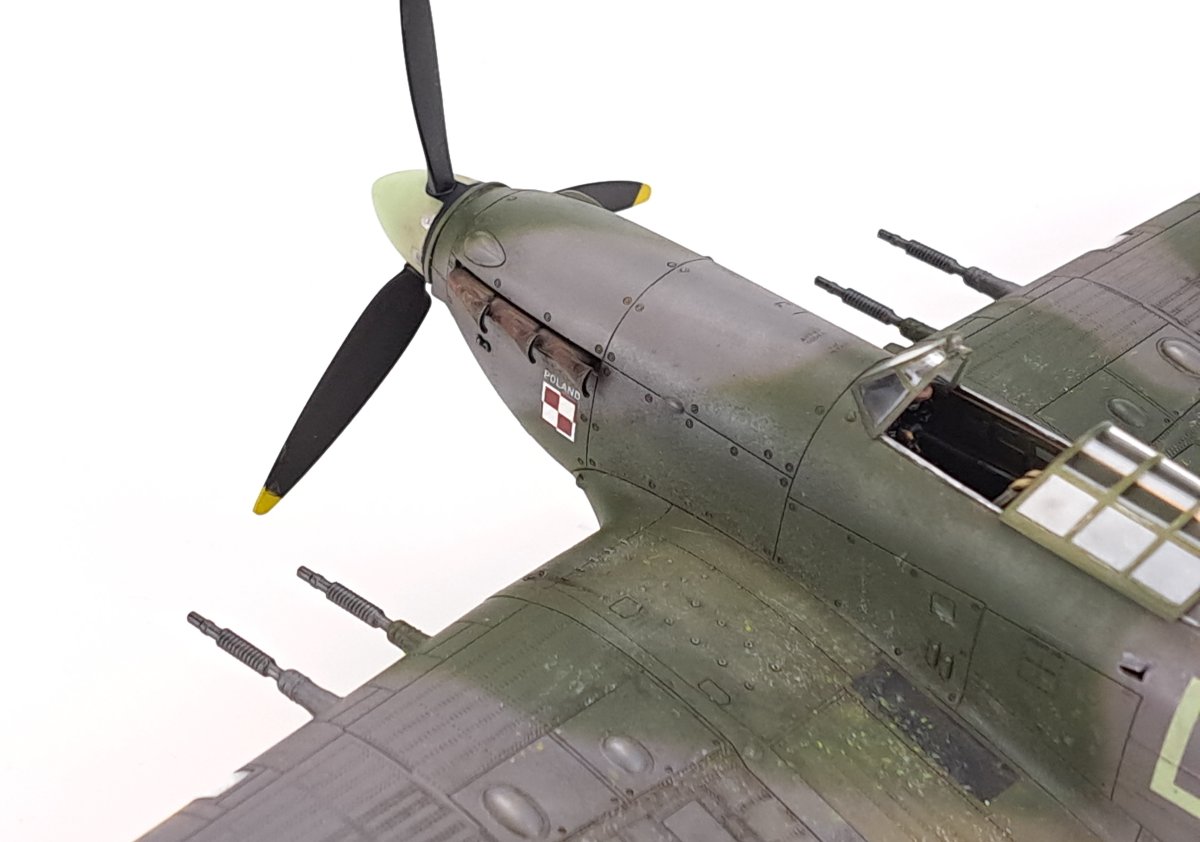
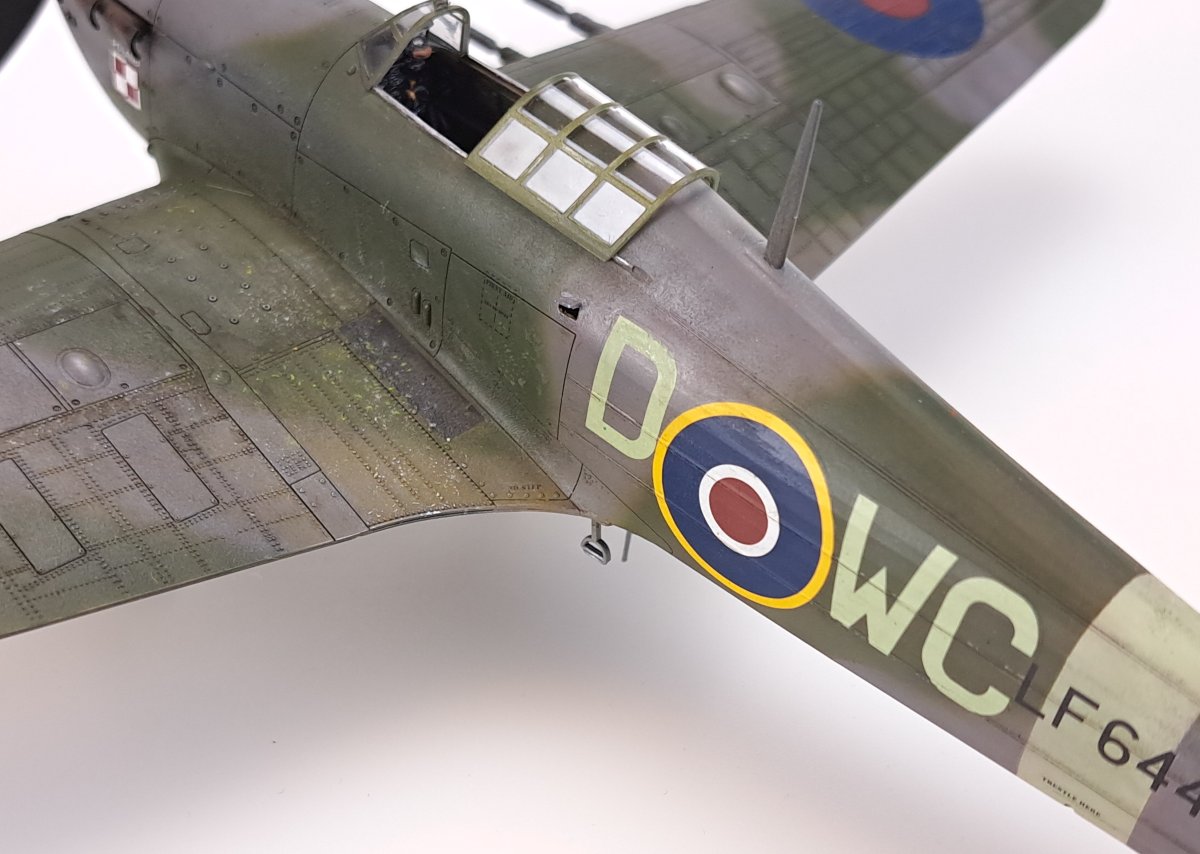
- Cockpit boarding handle. After the step was released, the small flap of the hand grip for the pilot was raised. There is a hole in the model for which there is a plug (A49) in case the model is made in take-off position. You can easily make a flap from a plastic plate, taking the shape of the plug as a template.
- Brake tubes on the undercarriage cover – made of 0.2 mm lead wires. They were a bit too brittle for stretching/straightening, I would rather recommend copper wire.
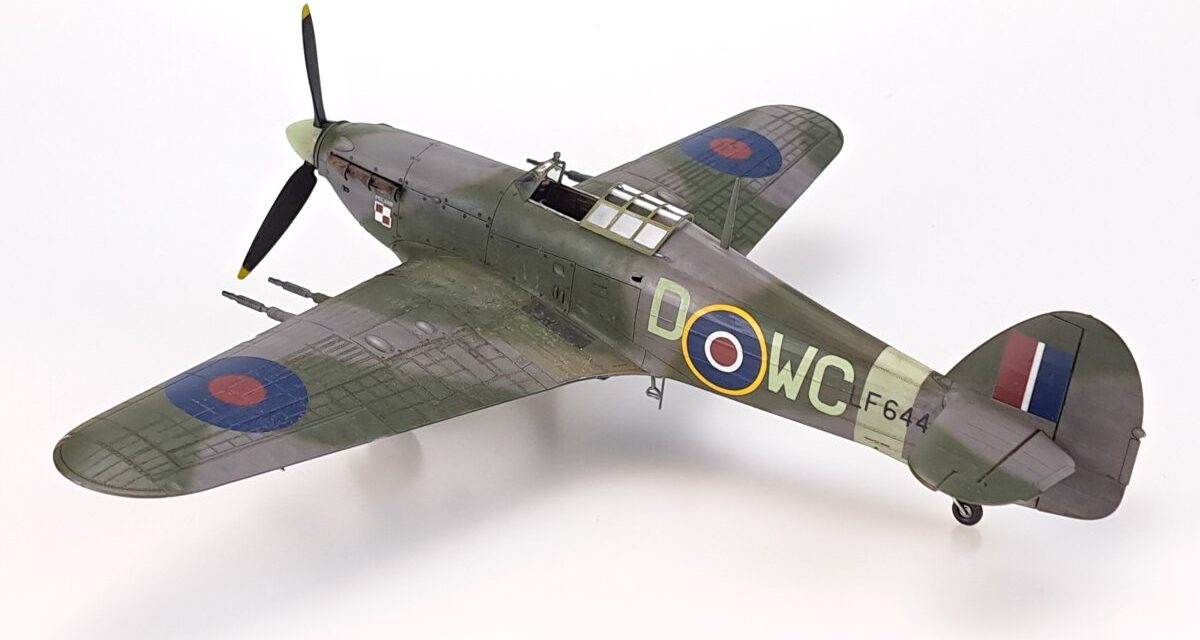
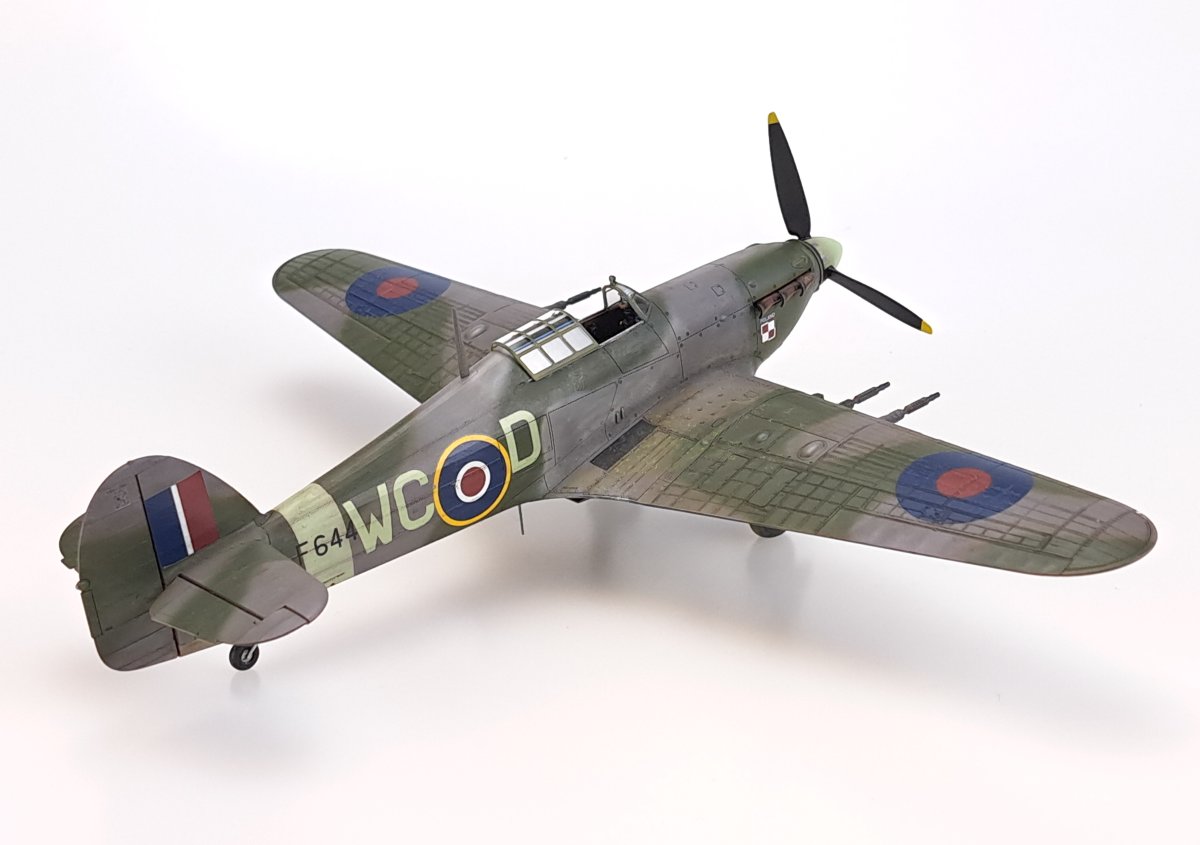
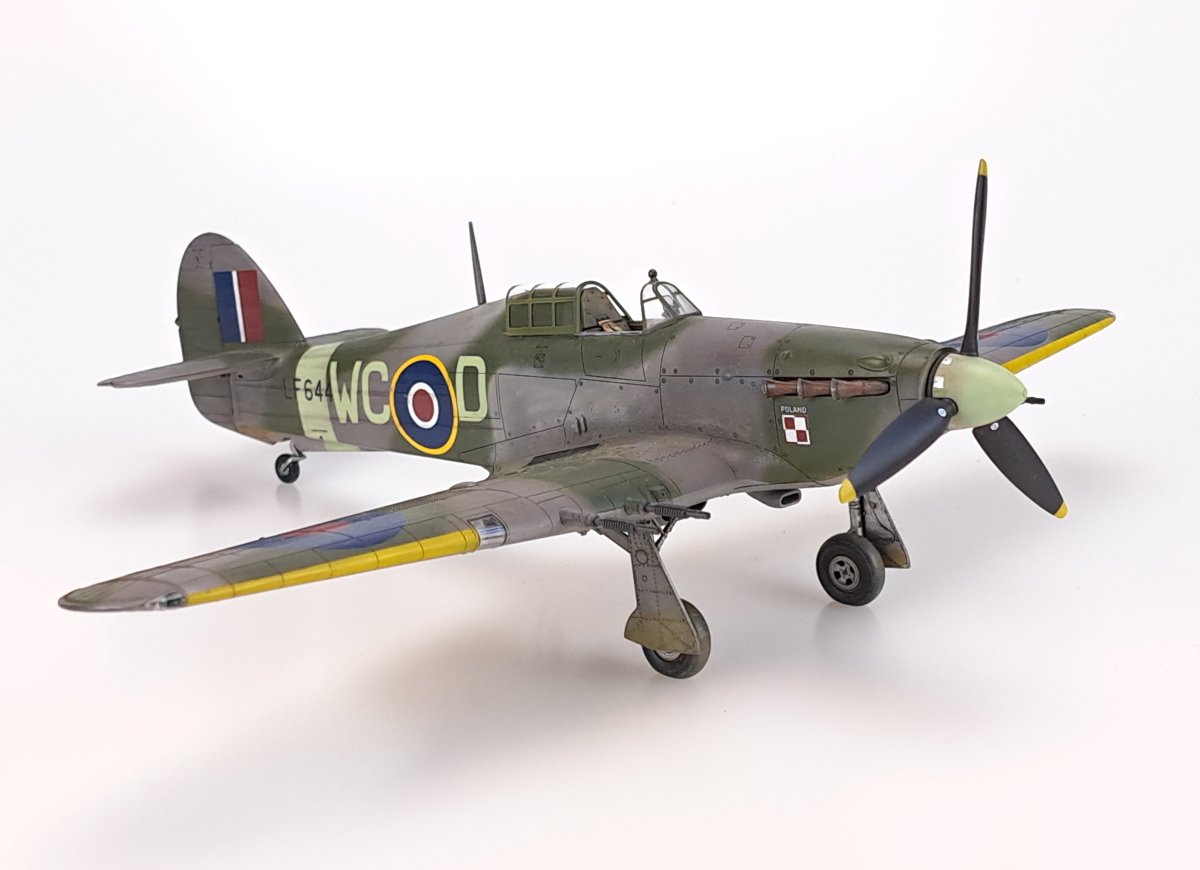
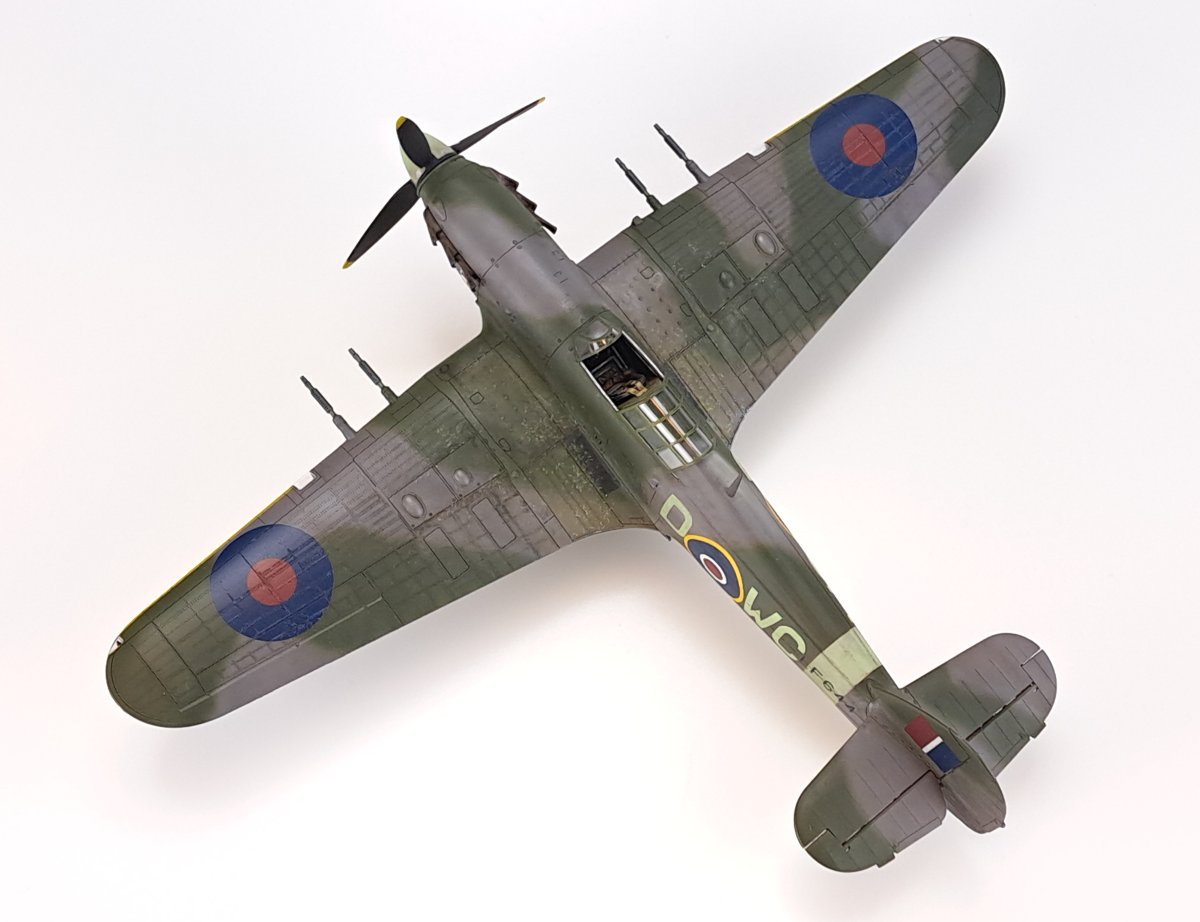
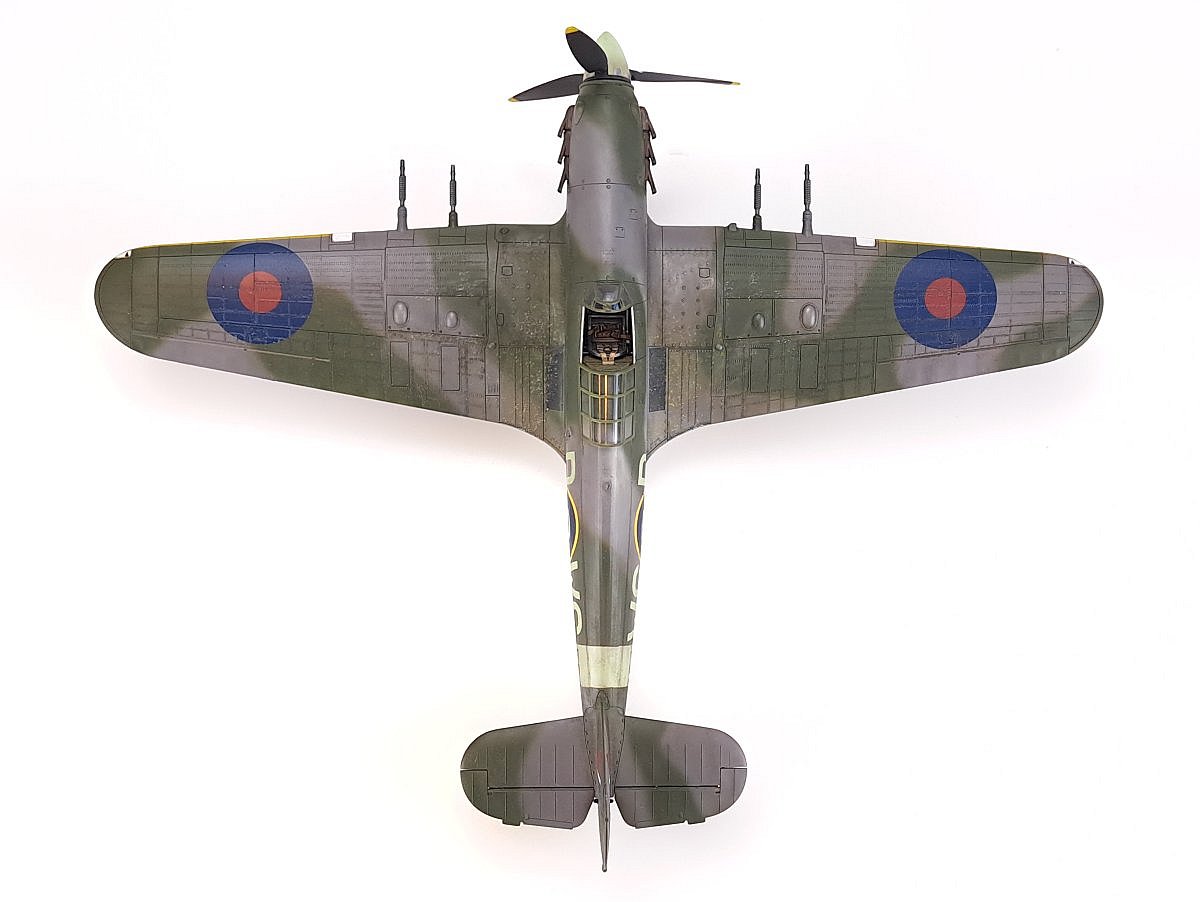
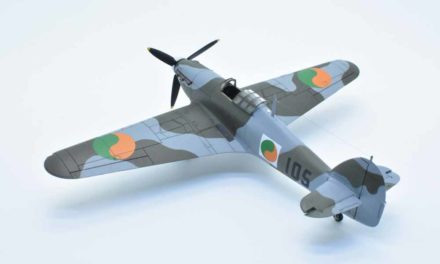
Camouflage and markings
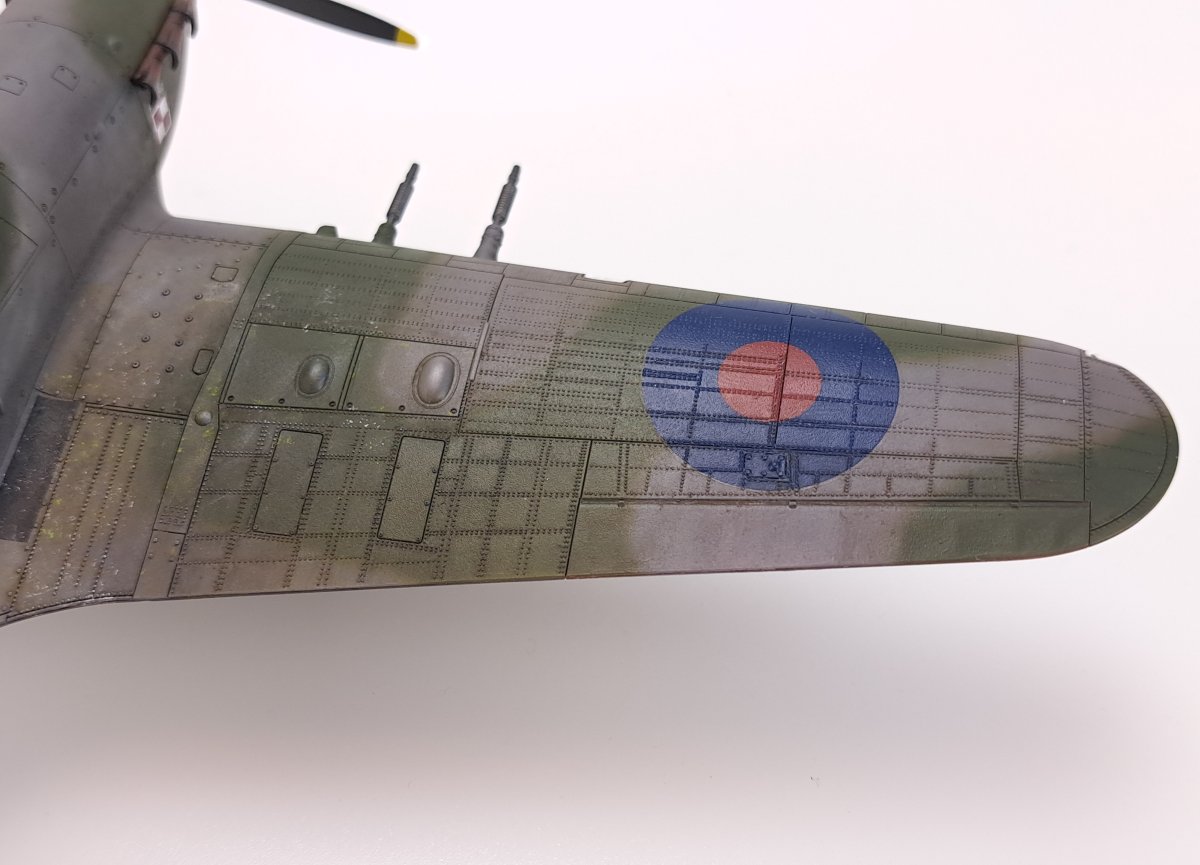
I had a problem with painting. For the first time I painted the camouflage freehand (Hataka lacquers), it was difficult for me and I couldn’t avoid dusting in the area where the wing connects to the fuselage. One thing didn’t work for me: I was counting on the characteristic difference in shade between the Sky colour on the spinner and tail band and the colour of the letters. I used Sky colour MRP-118 , which perfectly matched the decal’s colour. I guess I’ll have to accept it. Similarly, this colour matches also Tamiya paint for the Japanese fighters (XF-14), which I used to paint the decal when I accidentally scraped it with a tool.
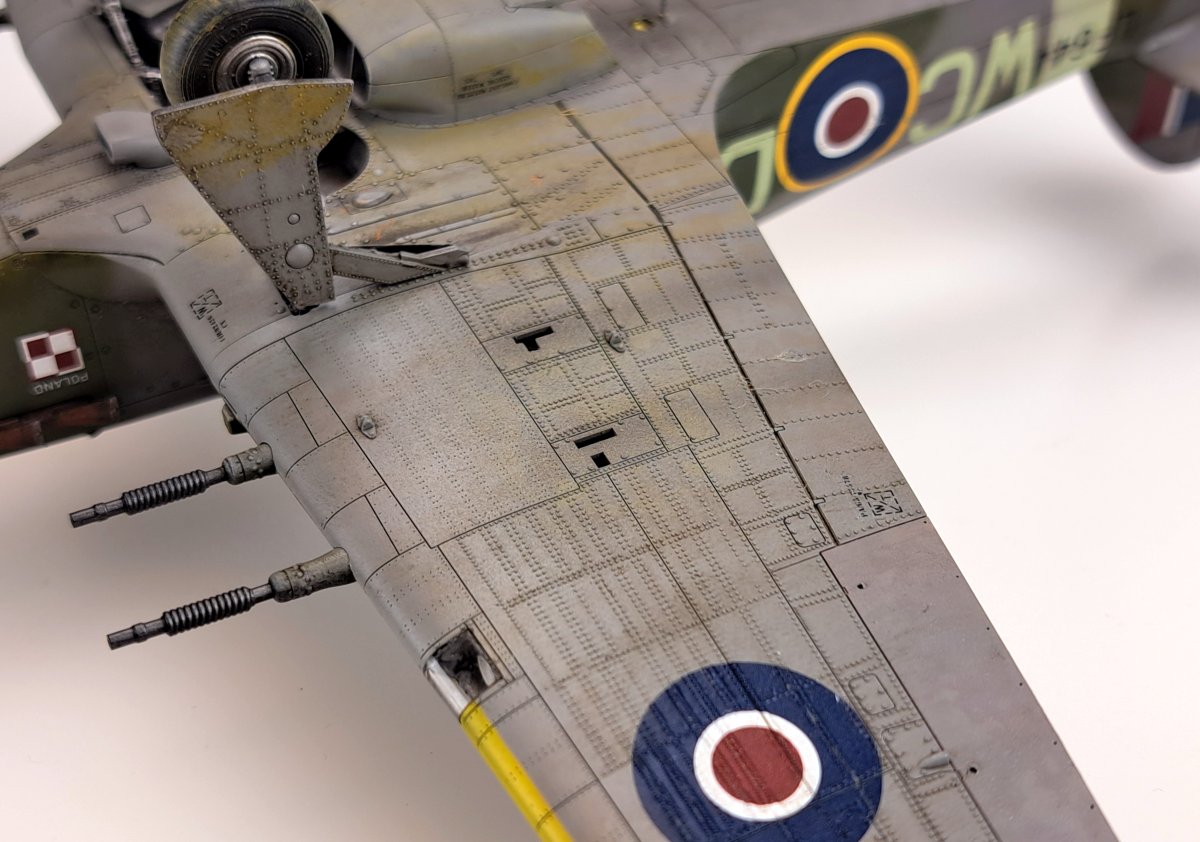
Applying decals to the wings, you have to deal with areas with mushroom-type and recessed rivets. Mushroom-type rivets can make it difficult to move the decal, so it is worth giving more liquid to the model to solve this problem. I used the Microscale system (Set-Sol) to apply the decals. The tiny recessed rivets didn’t go in well the first time, so I pushed the decal in by “stomping” it with a toothbrush. With double lines of mushroom-type rivets and panel lines, it was great to drag with the blade of the Olfa knife.
Weathering is an oil wash, silver paint and Zinc Chromate (drybrushing and scratches), some watercolour pencils and Tensocrom Lifecolor (dirty grease effect, dark earth and sand).
Attention: mixed construction aircraft. The propeller and parts of the fuselage next to the cockpit were wooden, and the back of the fuselage, tail and ailerons were covered with fabric. (bruises/scratches should be reddish brown). Wings and fuselage front – metal.
See also:

Modeller happy enough to work in his hobby. Seems to be a quiet Aspie but you were warned. Enjoys talking about modelling, conspiracy theories, Grand Duchy of Lithuania and internet marketing. Co-founder of Arma Hobby. Builds and paints figurines, aeroplane and armour kits, mostly Polish subject and naval aviation.
This post is also available in:
 polski
Very Nice Model! Bardzo Dubsza! Don’t forget to lower the under carriage when coming in to land! Safe landings!
Dziękuję. I rememeber to glue undercarriage straight! Hopefuly well landed on the shelf.