
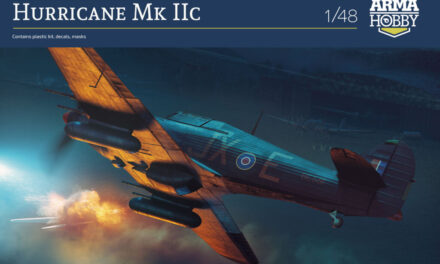
Arma Hobby Hurricane Mk IIc is a trendy subject on modeller’s workbench around a World. Joël Izard from France has prepared a step by step article on Expert Set edition of the kit. Read his advice, ask a question or post comment below the text.
It’s a great model, with super simple assembly, and it is very well detailed. I just added a pair of pre-painted Eduard photo-etched harnesses because I was lazy even to paint the ones provided in the box.
In my eyes, the only thing to replace it may be the barrels if Master releases a pair of them because even if they are not bad the plastic moulding at its limits at the level of the springs.
But if you want a fun model you can go there with your eyes closed, they set the bar high with the Mk I, but this Mk IIc is even better.
The mould has been revised, the undercarriage legs can be assembled at the end, and the cockpit is more comfortable to build without losing details than new and excellent the Wildcat of the same brand.
Hurricane Mk IIc Expert Set – built Step by Step

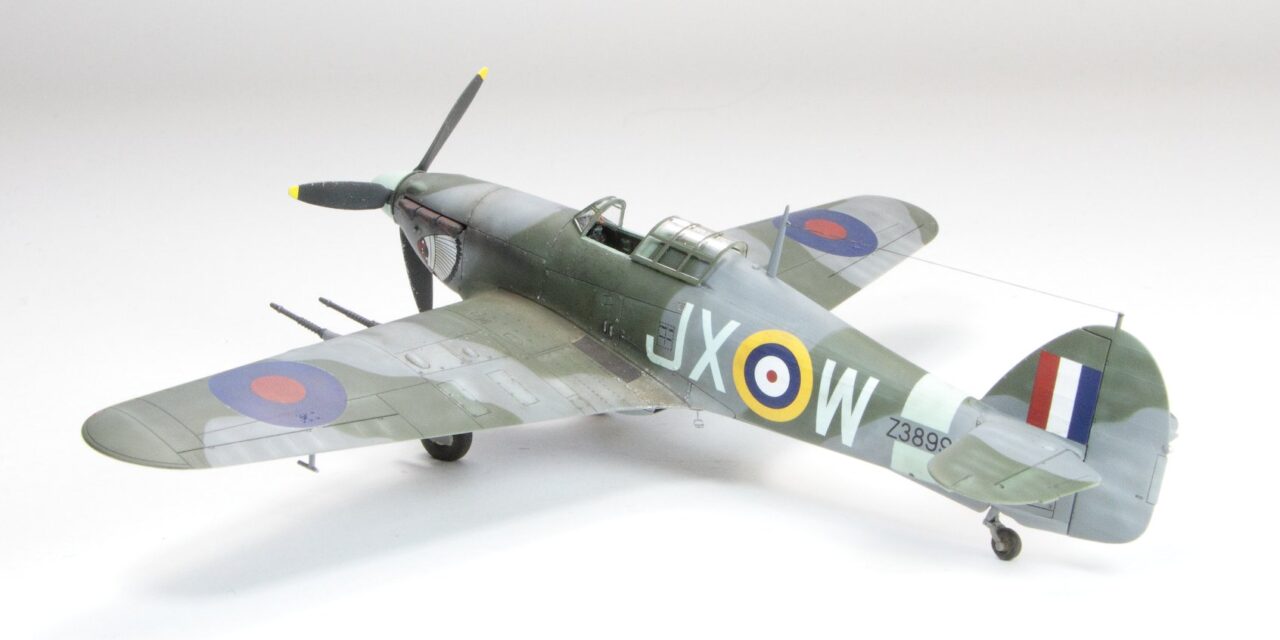
Picture 1: The top part of the Hurricane cockpit was painted in interior green. The areas that remain in aluminium are masked and a coat of AK Real Color Interior Green airbrushed. This colour matches quite well with the hue found on the pictures and samples in my documentation. Details are then painted using Citadel acrylics. I really like those paints as their coverage is very good. They are designed for brush painting, originally for painting wargames figures. A Vallejo brown wash helps bringing out the details.

Picture 2: After spraying a coat of matt varnish, I applied some scratches using AK pencils. I then proceeded with a light dusting of the floor, rudder controls and lower part of the cockpit walls using « European dust » pigments. The instrument panel is very nicely rendered and would sure stand comparison with pre-painted PE parts once the decals are applied. I only added some clear varnish to represent the instrument glass.
Picture 3: The collimator glass was cut from a rhodoid sheet using a punch & die. Its base was painted in aluminium followed by a coat of Tamiya clear orange. The leather pad protecting the pilot’s head in case of a crash is painted with a brown colour from the Citadel range.
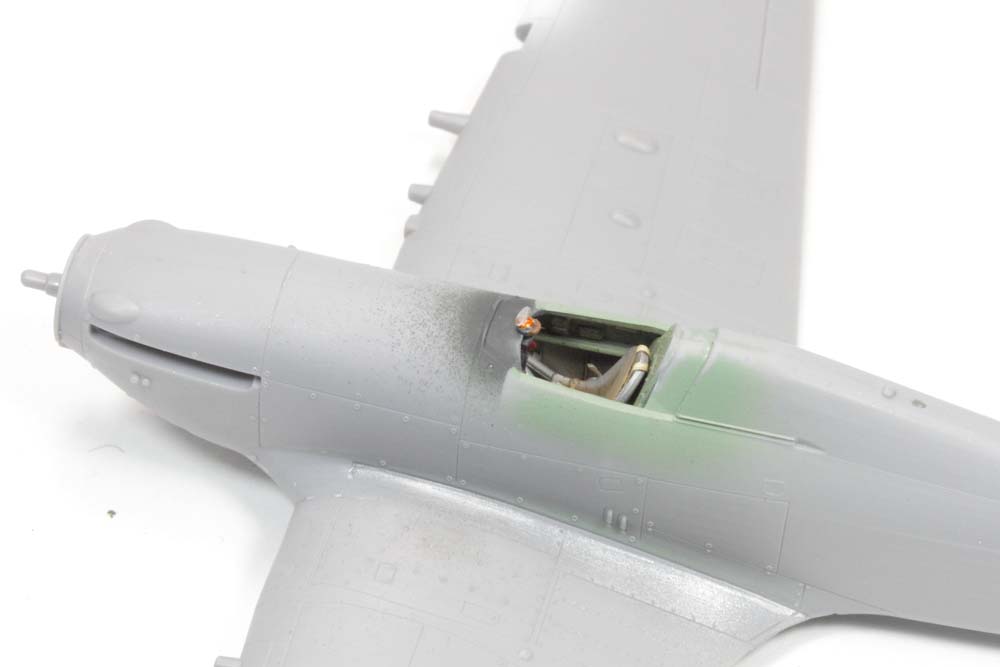
Picture 4: Prior to applying the camouflage, the leading edges are painted using Tamiya XF-3 yellow and masked. The clear parts were masked with the kabuki paper masks provided in the box and received a coat of interior green.
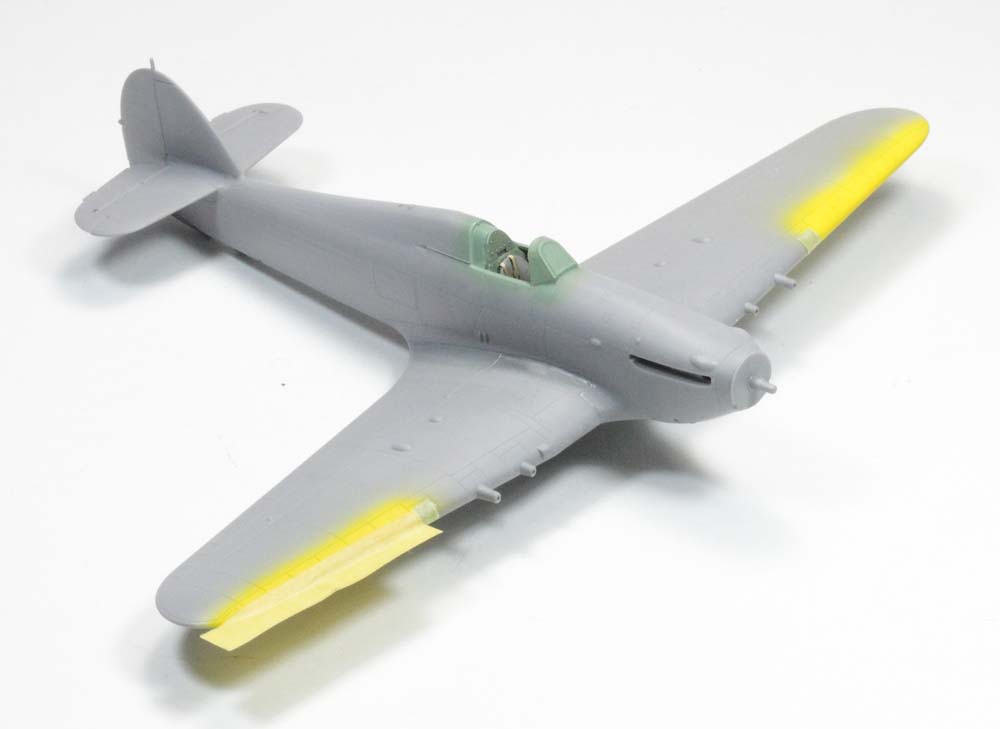
Picture 5: I started by painting the underside, then applied the grey on the topside and finished with the dark green. I always go from the clearest to the darkest colour. The hard-edge RAF camouflage is obtained using white tack sausages and, for the sake of safety, masking tape to cover the areas that I wanted to remain grey!
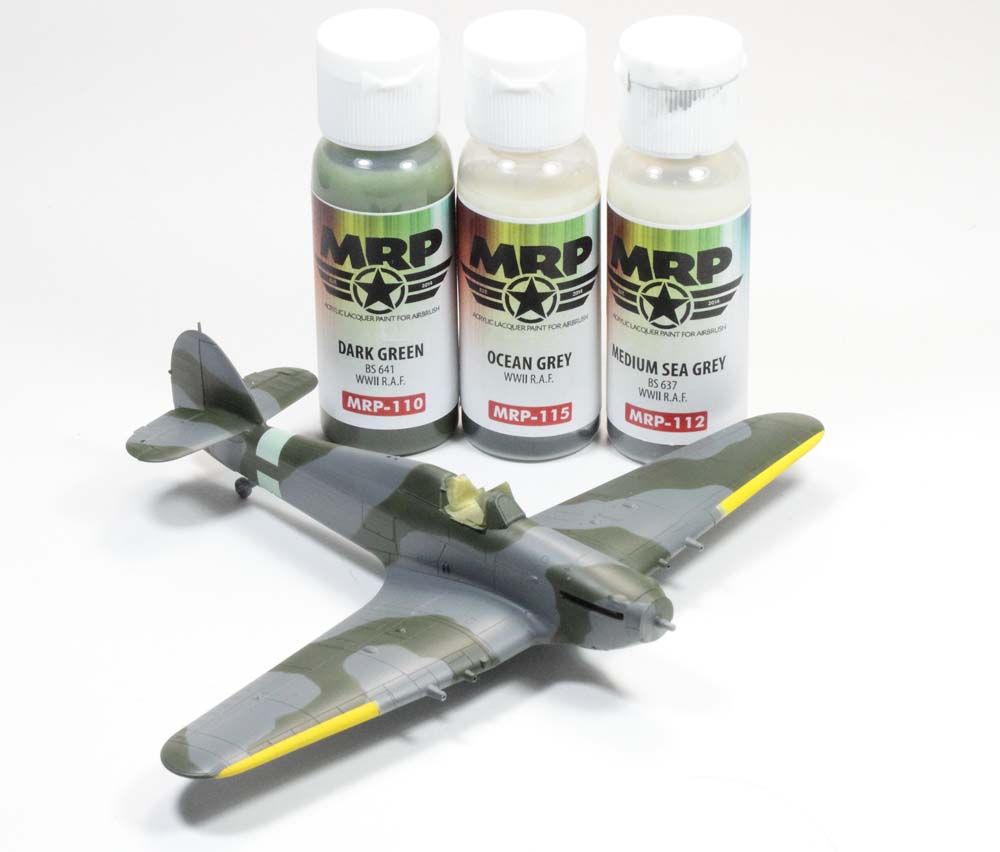
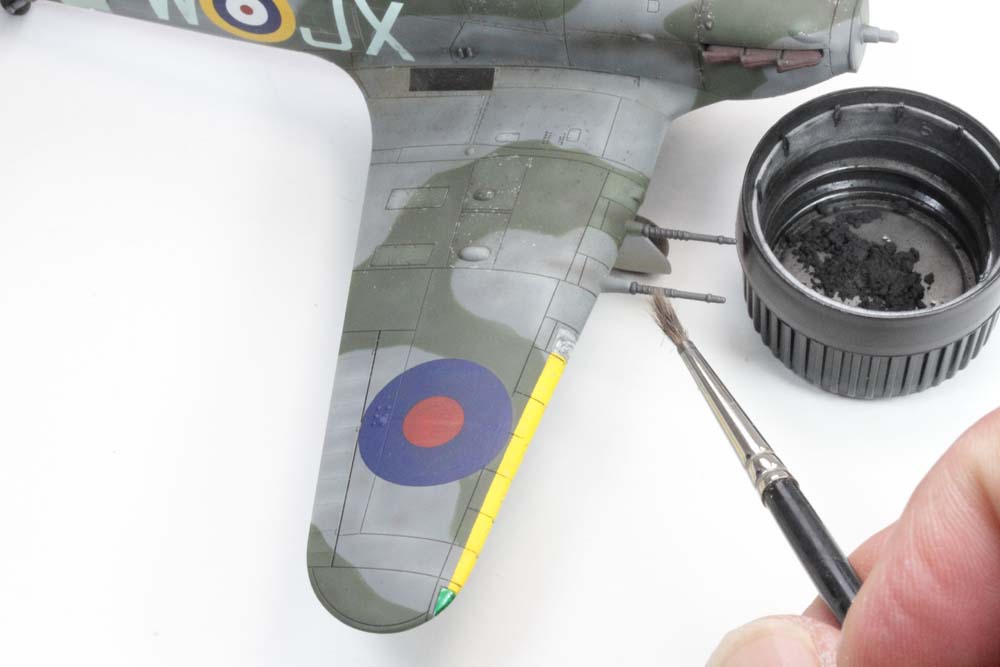
Picture 6: I used references from the Mister Paint range. I like them for their smooth finish, resistance and colour accuracy. The references I used on this model are: MRP-118 Sky, MRP-112 Medium Sea Grey, MRP-115 Ocean Grey and MRP-110 Dark Green. Thanks to their high coverage, I painted the sky fuselage stripe after airbrushing the main camo colours as masking was simpler for me that way.
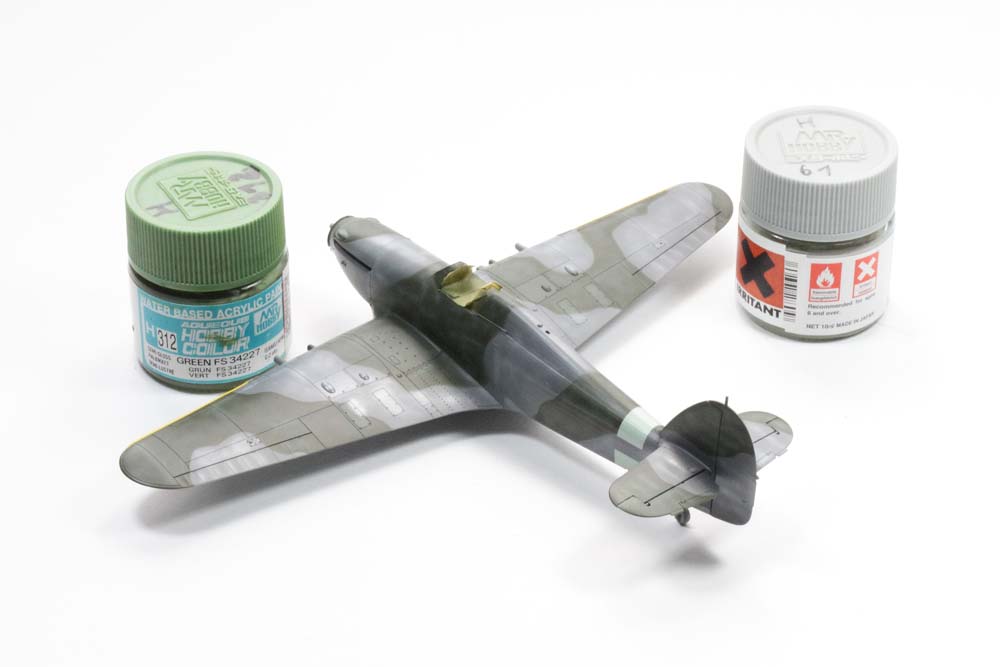
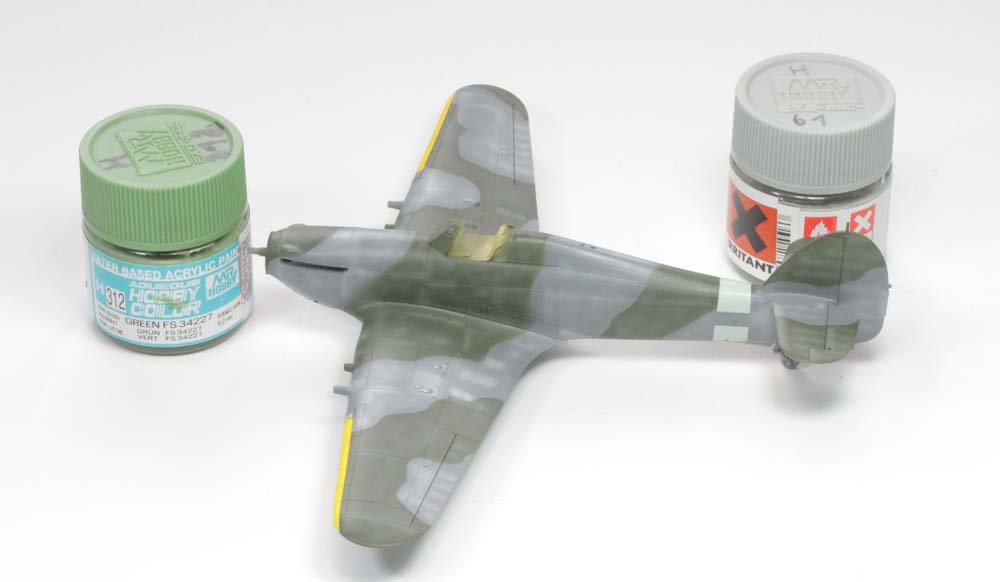
Pictures 7 & 8 : I then proceeded to mottling and applying highlights to give more life to the model. I used some highly (80%) diluted Gunze paints on the topside to build up the effects slowly in a controlled way. I feel these paints more convenient and user-friendly when it comes to working with high dilutions. I used H-312 over the Dark Green and H-61 over the Ocean Grey.
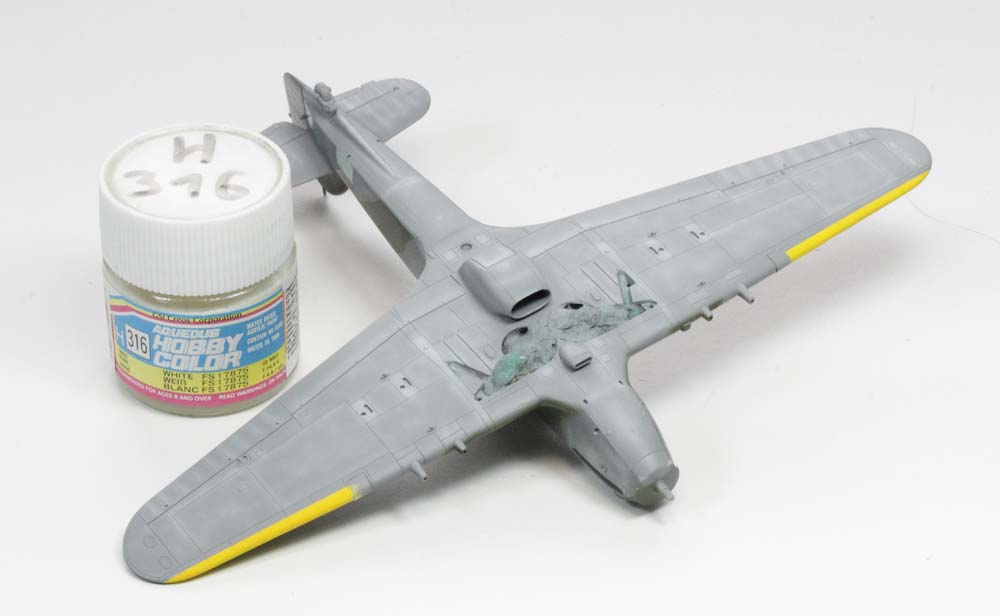
Picture 9: H-316 was used on the underside.
Hurricane Mk IIc – myśliwiec na każdą porę, w nocy i w dzień

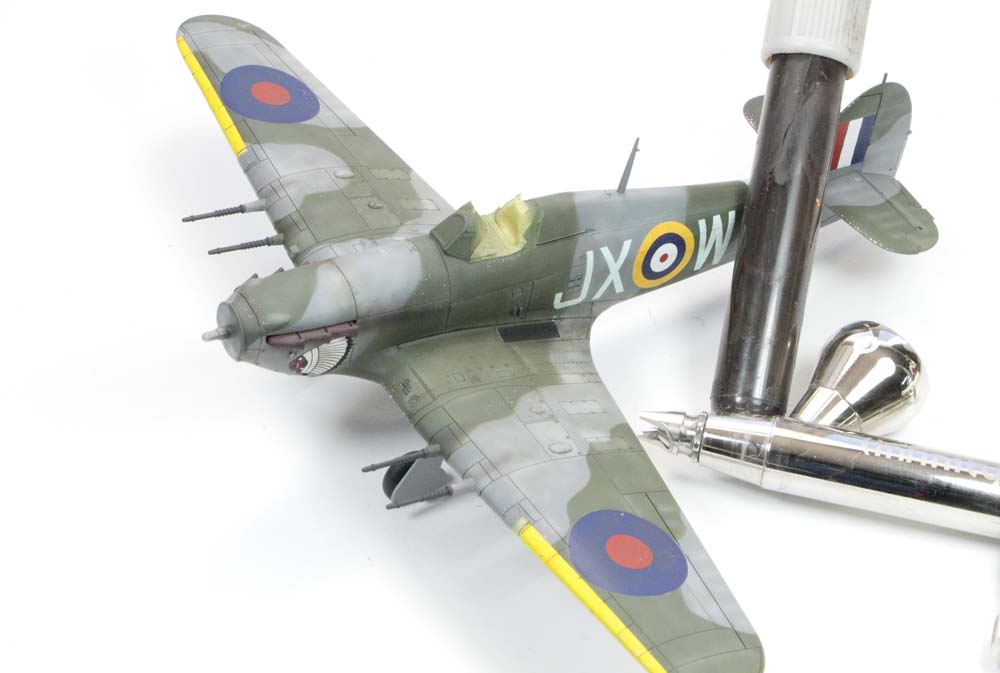
Picture 10: I airbrushed a coat of clear varnish before applying the washes. I used some dark brown Tamiya panel liner on the topside and a clearer brown on the underside. It was applied by capillarity in the nooks and crannies and around the raised details.
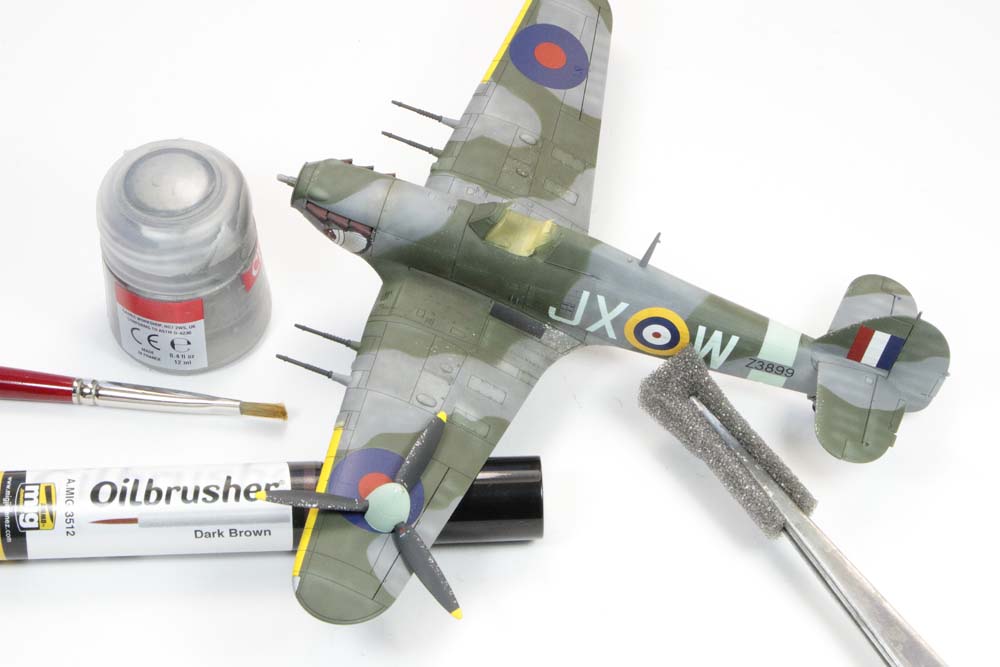
Picture 11: I made some scratches using the sponge technique on the areas where the pilot and ground crew would regularly step and areas prone to wear like the leading edges or the propeller blades. I darkened some zones of the model using a dark brown oil brusher like the junction between the engine panels or the Karman. This was done by applying a drop of paint and then blending it using a flat brush.
Picture 12: The exhaust stains were airbrushed using a highly diluted mix of brown and black, the same mix was using to represent the stains from the guns. Using a highly diluted mix allows to build up the effect gradually. For instance, I need to repeat the process 3 to 4 times to obtain the effect behind the guns. I also misted that same mix over the Indian head that looked too clean to my eyes. Finally, I made the first streaking effects that were going to be enhanced further in the next steps.
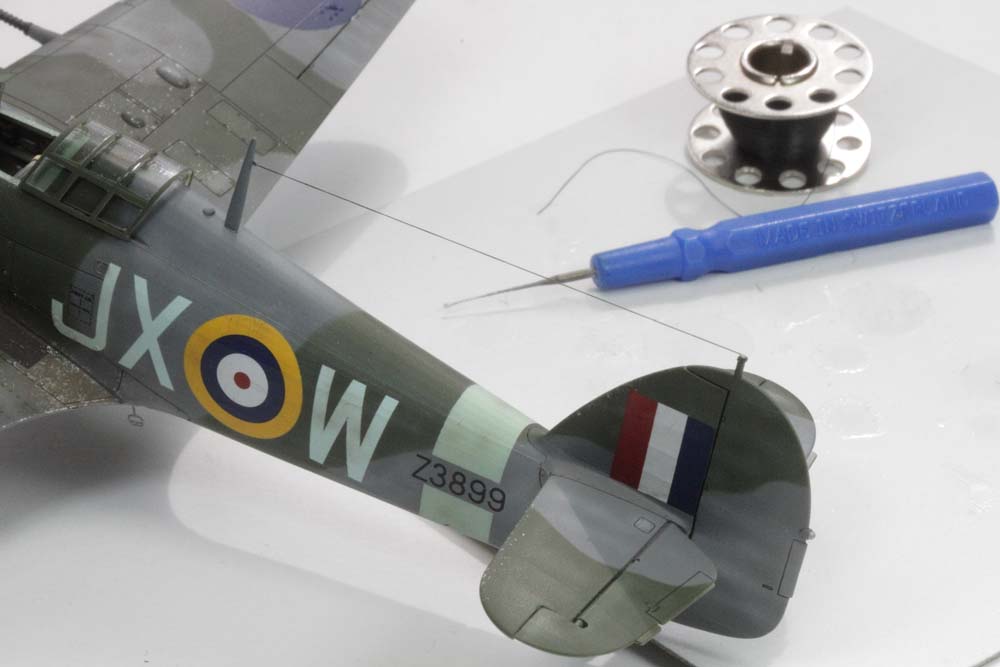
Picture 13: the aerial wire is made of thin elastic thread. To secure it into place, I use one of two methods. I either dip the end in a CA glue drop or I apply a small drop of CA glue using a sharp toothpick on the area where the wire is to be positioned. It is up to you to decide which method suits you most.
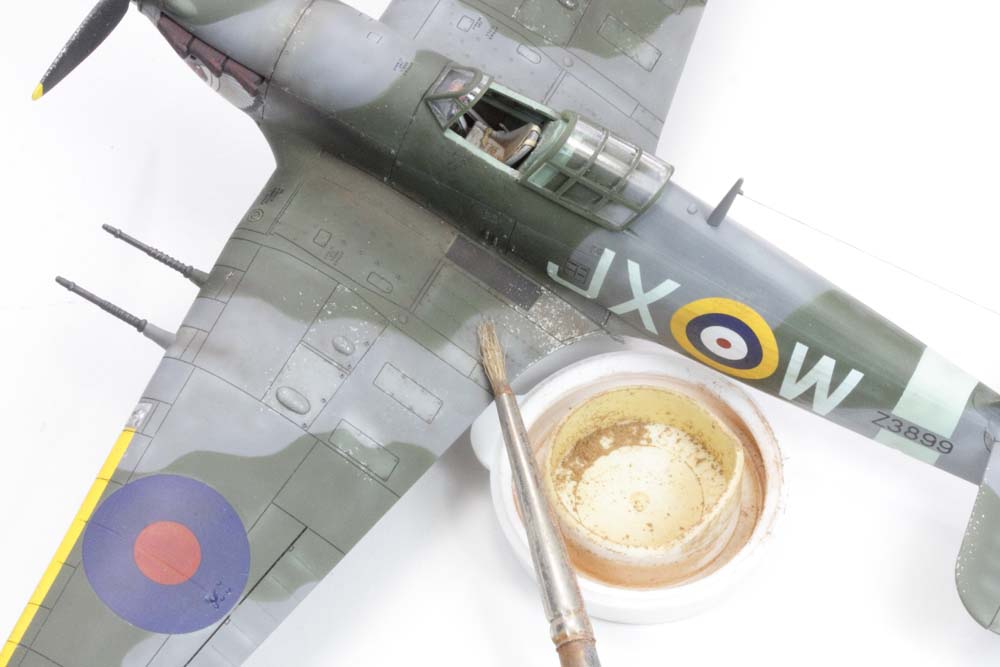
Picture 14 : « European dust » pigments are applied on the walking areas and set using lighter fluid. The effect can be toned down using a thin brush moistened with thinner.
I followed the same process for the landing gear bays, the wheels and their hubs.
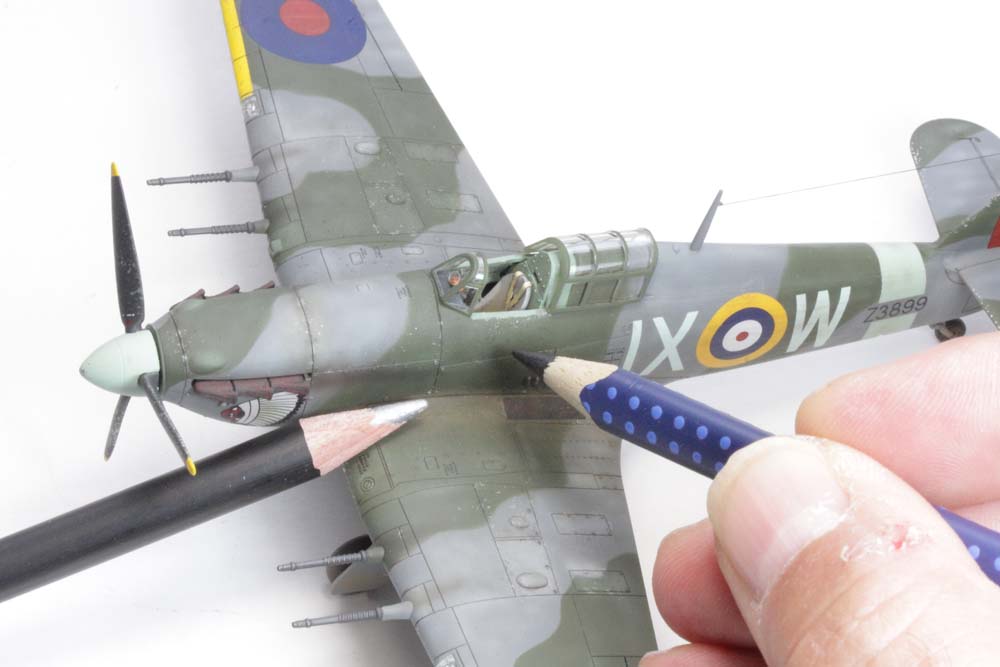
Picture 15 : I applied a coat of matt varnish and made some small scratches and marks using weathering pencils. These are applied on the areas that are prone to heavy wear caused by the ground crew when walking or working on the aircraft. For instance, I made some scratches using an aluminium pencil on the engine panel screws, wing roots and around the armament bay doors. The walking areas and recesses of the cockpit are stained using dark brown and black pencils. If the effect is overdone, it can be easily toned down using a cotton bud moistened in water. These effects are then protected with a mist of matt varnish.
Picture 16 : the guns are painted black and then brushed with dark metal pigments to give them a metallic shine. In my opinion these parts are not as good as the rest of the kit but it is hard to do better in injected plastic. I will probably replace them with Master metal guns one of these days.
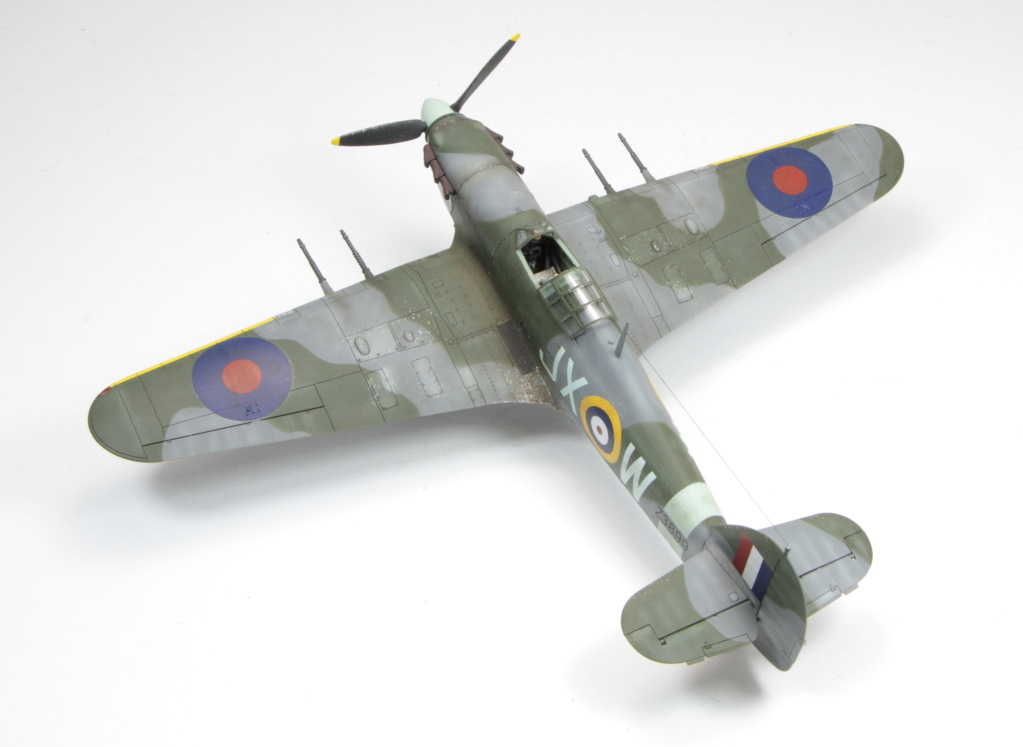
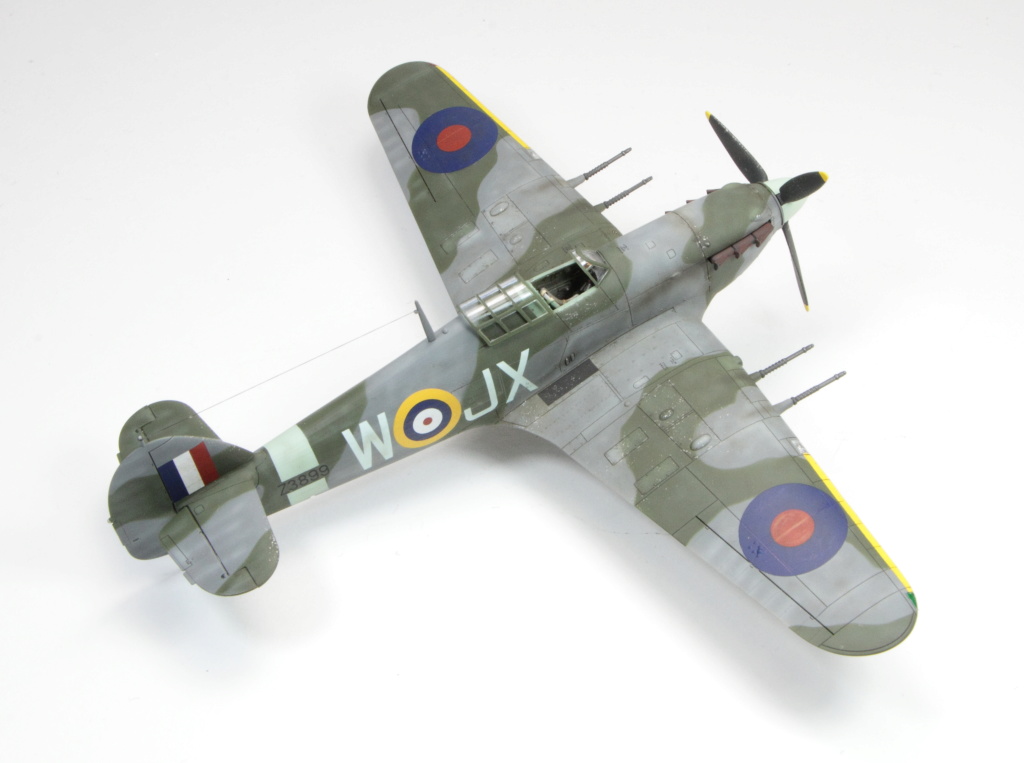
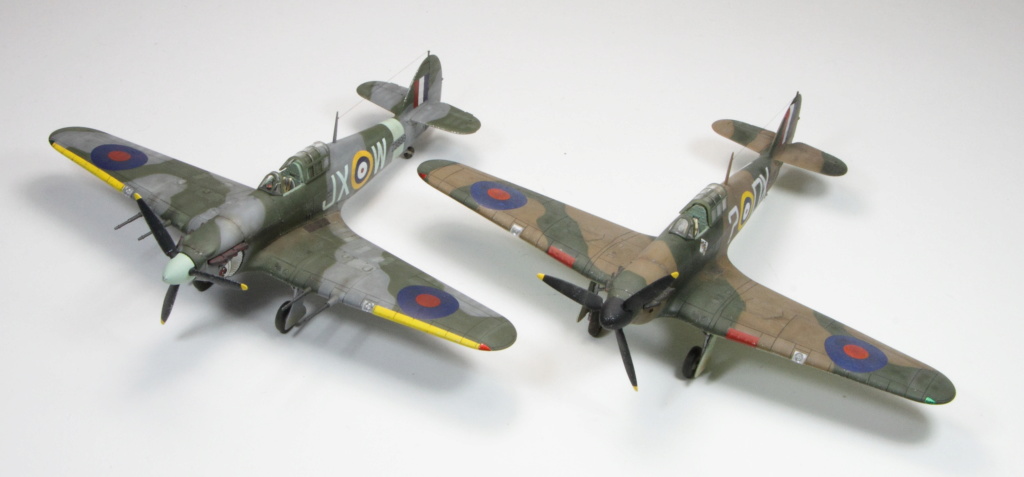
Photos of finished Hurricane IIc model

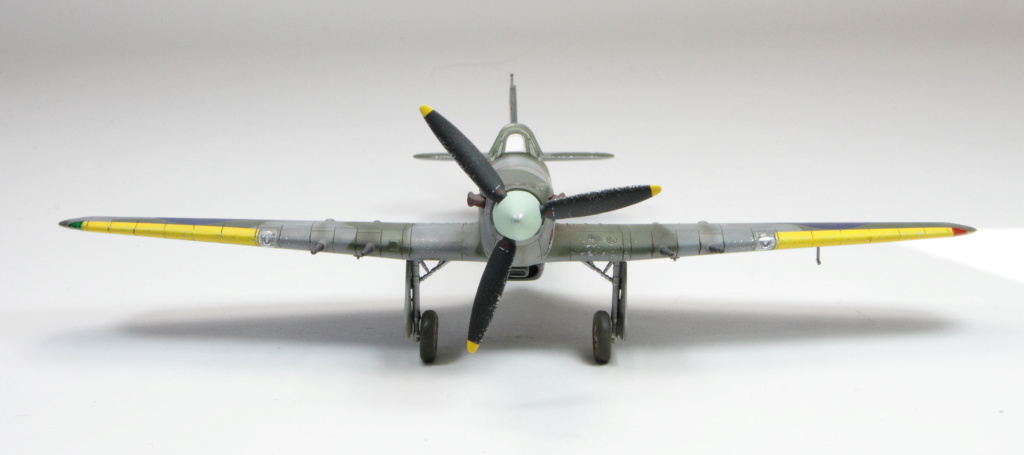
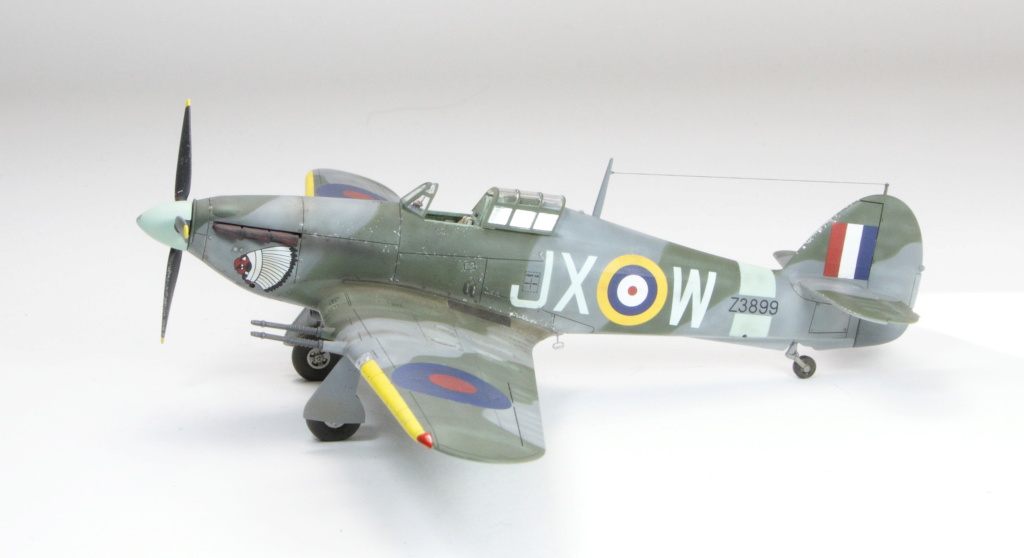

After giving us a very nice Hurricane MkI kit in 2018, the young Polish firm delivered to us at the end of last year what is in my eyes the best MkIIc kit at my favorite scale.
You may be interested
- Joël Izard model on Maquette72 (French)
- Models and accessories for Hurricane in Arma Hobby webstore
Virtual Editor, guest post publisher. When blog authors fall asleep he works unnoticed to improve website content quality.
This post is also available in:
 polski

Lovely work. One problem I have with every Hurricane I built was to get the upper wing insignia to bed down over the raised details without leaving a crease or tear. How do you approach this? Thanks
Techmod decals included in Arma Hobby kits cooperate very well with Microscale SET and SOL decal liquids. Originally the SET should be used under the decal before application, and SOL over it after setting in place. But I prefer using only SOL, both under and over the decal – VERY CAREFULLY – as it softens the decal film a lot. It’s good to train it before application of the desired decals, each kit includes many surplus decals.