Each and every of important Fokker’s airplanes had mostly one key innovation in its design. E.I-E.III monoplanes, of modest performance, had machine guns synchronisers allowing them to shoot through the rotating propeller. That ability made them the first real fighters. Dr.I Triplane’s wings were thick and short so they needed no rigging in order to avoid the drag caused by the rigging wires. Additionally, thick airfoil gave excellent climb. Fokker’s D.VII advantage over enemy airplanes was the nearly perfect, tuned for high altitudes BMW IIIa engine. Also ‘Fokker’s Razor’, E.V monoplane, besides the conservative fuselage and powerplant design unchanged since Dr.I, had ‘this thing’. The revolution was in the wing.
Innovative wing design
Wing design used in Fokker E.V had no match in earlier series produced airplanes. It has been only tested in some prototypes and experimental airframes. The wing was one-part, with thick ‘Fokker’s’ airfoil and wooden construction covered with plywood, which kept proper surface shape on the whole wing’s length. It was not possible with traditional fabric-covered design, as the fabric sagged between the ribs. New wing’s stiffness allowed for cantilever arrangement, without the drag caused by the rigging. Thanks to these features Fokker E.V, despite quite weak rotary engine, had very good speed and excellent climb. Such wing, called ‘Fokker’s’, was later used very widely in many other airplanes, also as big as commercial and bomber Fokker F.VII/3m (and also in designs of many other producers!) till the ‘30s.
Plywood through the modeller’s eyes
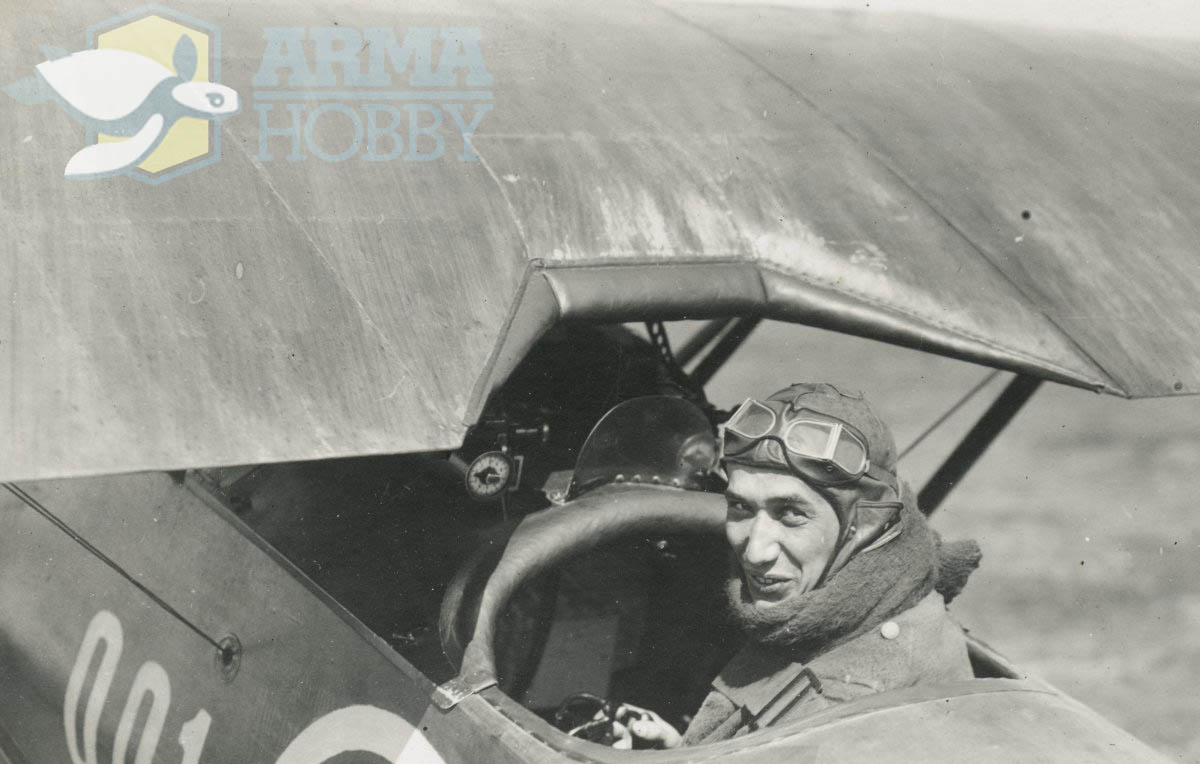
From the modeller’s point of view Fokker E.Vs wingis a very interesting case. It has no sagging surface, so typical for all those ‘ragwing’ planes from the contemporary period. But it is also not as smooth as the later plywood designs (eg. Mosquito or CANT Z.506), Fokker has very prominent panel lines between the overlapping plywood panels, applied without the sanding and filling.
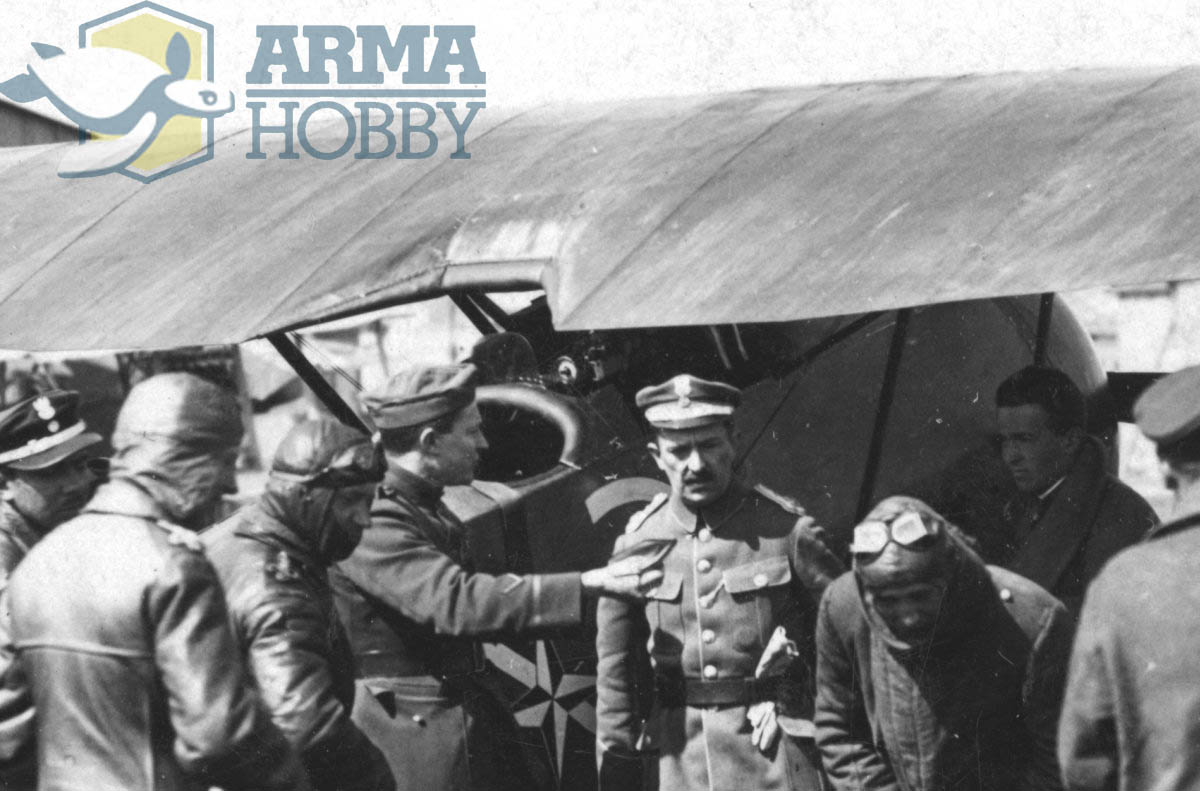 Wing of the Fokker E.V „001” used by Stefan Stec in April-May 1919. The plane was about 8-9 months old at that time. Plywood panel lines are clearly visible. Photo: Tomasz Kopański collection
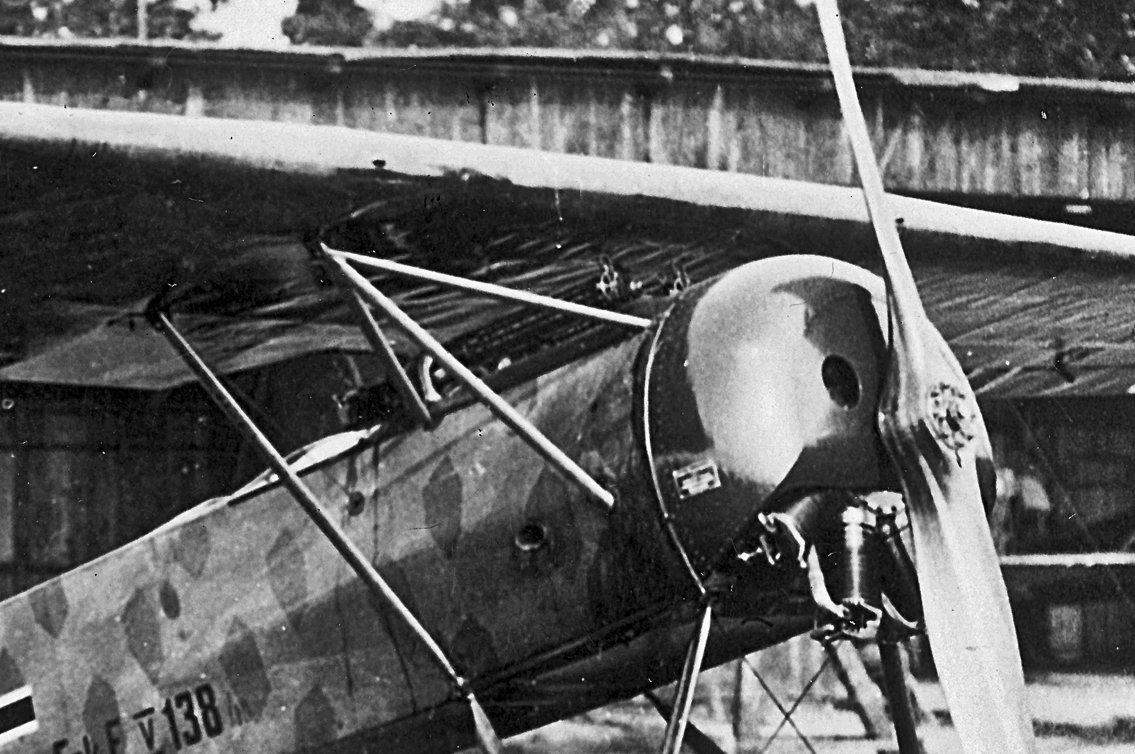
These lines, due to the plywood bigger thickness and lesser stiffness are even more prominent than in the metal covered airplanes. It is clearly visible on the good-quality photographs. Also the plywood surface is not smooth – even on the factory-fresh airplanes some sagging and waving is clearly visible, but, of course, not as much as on the fabric covered wings.
Factory-fresh Fokker E.V 138/18 delivered to the naval Marine Feld Jasta in August. Plywood sagging and waving on the bottom wing surface is clearly visible. Photo via Jack Herris
 Another Stefan Stec’s Fokker E.V „001”photo, city of Lwów, April 1919.The airplane was at that time about 8-9 months old. Plywood sagging and waving on the bottom wing surface is clearly visible. Photo: Tomasz Kopański collection
Second innovation – painting
Aiming on simplicity and profit maximisation, Anthony Fokker has already found a way to save the weight and money due to special painting. Triplanes, trainers and early Fokkers D.VII were covered with diluted, non-fully covering paint, leaving visible uneven streaks. Later Fokker has gone even farther, completely eliminating paints from fabric covered airplanes camouflage – enthusiastically adapting the printed fabric (Flugzeugstoff – called lozenge). Lozenge printed fabric was also used to cover fuselages and tailplanes of the Fokkers E.V. But there still was a question of the wing.
Question of colour
For many decades painting scheme of the Fokker E.V wings was described as solid olive-green, made probably with the same paint which was used to cover all the metal parts (struts, undercarriage legs, engine cover). It was a mistake, caused most probably by the poor quality of the available photographs and lack of access to the source documentation. This is common cause of mistakes in historical camouflages reconstruction. Similar problem was with the determination of the early Messerschmitt Bf 109 camouflage (often described as painted in uniform green colour), or German armoured vehicles from 1938-1940 period, shown as uniformly panzer-grey camouflaged. In reality the documents describing their camouflage and the high-quality photos show the two colour camouflage: RLM 70/71 in case of the Messerschmitt and panzer-grey and brown used to camouflage the Panzers.
Synthetic stain-pigments
There was similar story with the Fokkers. The first doubts were caused by the document, being factory drawing with the index of the materials used in wing manufacture. It included four synthetic stains in following colours: ‘Mocha Braun’ (Mocha brown), ‘Azur Blau’ (azure blue), ‘Azin Violet’ (azine violet) and ‘Neu Echtgrün’ (‘new true green’), very popular at that time high quality products of the German chemical industry.
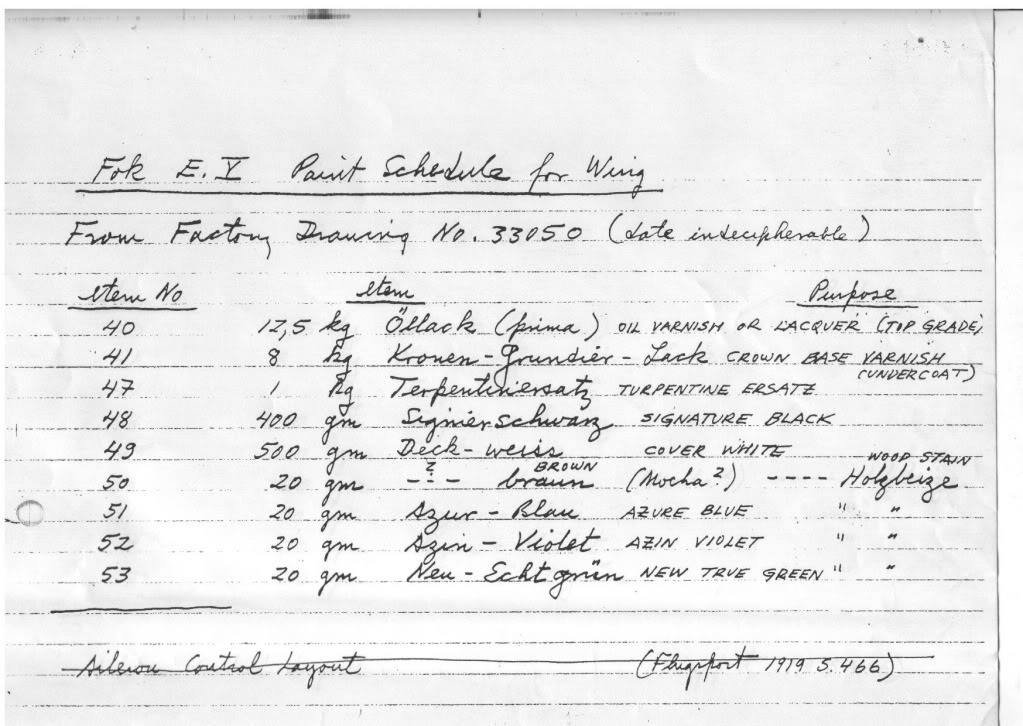 Copy of the factory index of the materials used in the Fokker E.V wing manufacture. Stains and pigments are listed with their exact quantity. Photo via Stephen Lawson
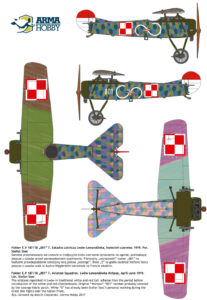 Initially it was assumed that the four stains have been mixed together in order to obtain the olive-green colour, but the experiment proved that assumption wrong. In addition, the listed stains were transparent, unlikethe pigments used in making of the covering paints. Also the listed quantities in were not enough to paint the whole wing (20 grams of each stain, compared with 400 grams of the black and 500 grams of white pigments used to paint the German crosses only!).
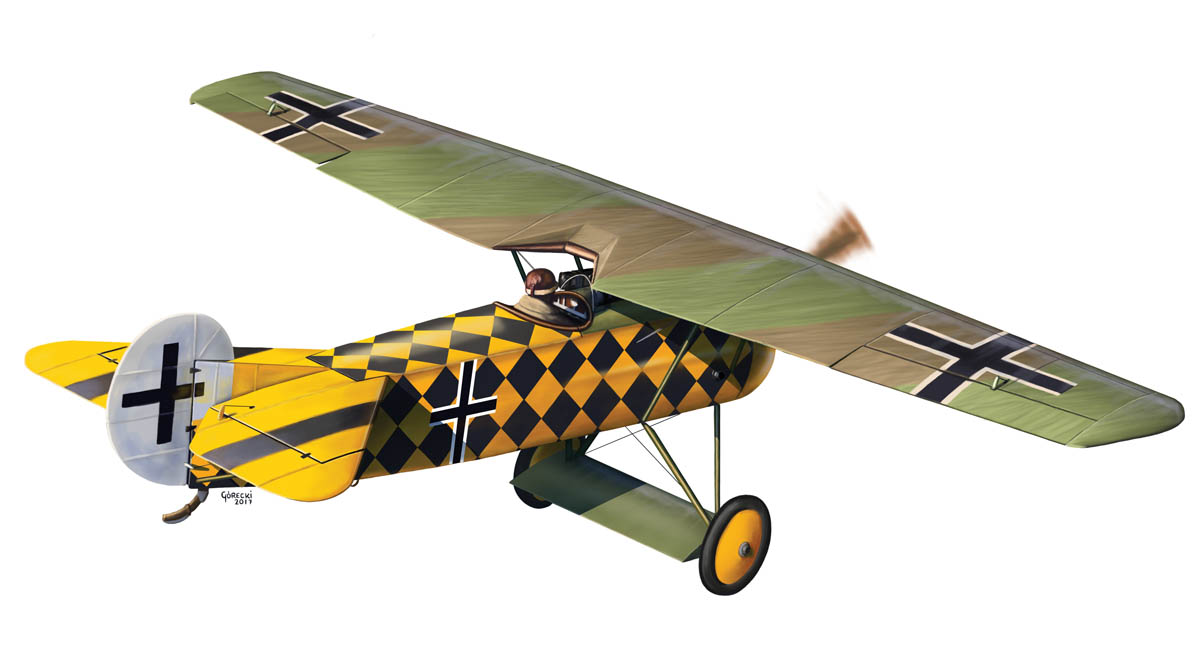
Left: Camouflage colours on the Ltn Stec’s Fokker E.V. Click on picture to see bigger image.
Final coup against the ‘olive-green-wing theory’ was the find of the high-quality photographs, showing the wings with prominent uneven streaky effect typical for the stained wood, impossible to achieve using the oil paints. Paint leaves a layer on the plywood surface, while the stain irregularly soaks the wood. On these better photos one can also see the different shades applied in wide camouflage stripes – representing two top and two bottom camouflage colours.
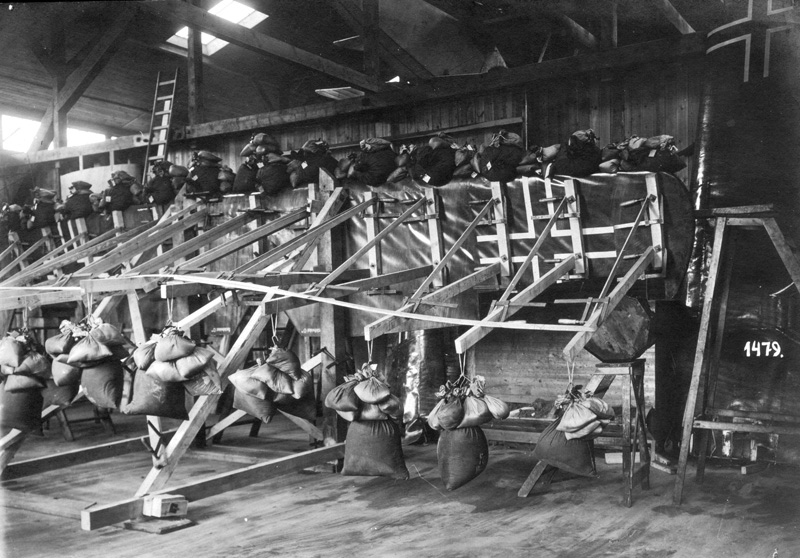 Fokker E.V wing during load test. Stain streaky effect and the lighter and darker diagonal camouflage fields are visible. Photo via Stephen Lawson
It is interesting that the stains colours were chosen to match the general appearance of the printed lozenge fabric used on the fuselage and the tailplane. There was one important difference: lozenge fabric was printed with very durable dyes, resistant for the weather and sun, while the stains used to camouflage the wing faded very quickly losing its initial bright colours and becaming rather dull and pale. Also the dope used to seal the surface weathered losing its initial high-gloss appearance.
 Wing of the Polish Fokker E.V „001” flown by Stefan Stec. Streaky stain finish and prominent plywood panel lines are visible. Photo: Tomasz Kopański collection
The ‘olive-green-wing theory” has been put in doubt and finally disproven by two Great War aviation enthusiasts, Australian Langdon Badger (flying Fokker E.V exact replica owner) and Austrian Koloman Mayrhofer, owner of the famous workshop building the Great War-period airplanes strictly according to the contemporary technologies.
Fokker E.V model kits you can find in Arma Hobby internet shop
Modeller, son and father of a modeller. Loves digging through references and analysing old photographs. He builds aircraft, ship and vehicle models, the older the better. He has a weakness for Polish equipment, but does not despise the RAF, FAA and Great War topics. A journalist by training.
This post is also available in:
 polski


The four colours are not paint though, they are stains. They would be probably mixed with water or another solvent before application. Wood stain goes So coverage woulnd’t be like paint. Artificial dyes can be quite concentrated, so even when diluted they would probably give a colour stain that could be seen on the ply. The stained wood would then be varnished.
Having said that, I would like to see the original document, and I’m not 100 onvinced by the two lower colours arguement
We do not have any additional documents, so the choice of particular colours for the top (brown and green) and bottom (blue and violet) we have based on the Achim Engels, Koloman Mayrhofer and Langdon Badger research (supported by late Dan San Abbot). On the other hand, the fact that the undersurfaces were in two colours is clearly confirmed by the photo of the load tests.
Let’s look at that paint schedule. That’s very intriguing. Take a look at the amount of base Varnish. 12.5 Kilograms. 1000 grams in one Kilogram. That’s 12,500 grams of Varnish Lacquer. Assuming it was clear or slightly brownish. ( 26 pints) 3.25 gallons. Now is that for the inside of the wing and the outside or just the outside. Probably worth an area calculation to see what looks right. Now look at all the other amounts. The largest amounts next to the Varnish was the white and black for the crosses and that amounted to 4 and 500 grams. That’s equal to about 1 pint per all the white and black crosses. Seems low. I’m thinking 1 pint per cross top and bottom. Next we look at the other colors which are very small. 20 grams of the various colors. 20 grams is equal to .0423 pints. This is miniscule. Based on these amounts, if correct, the wing was just Varnished and was not even painted green. There is no way you could paint the wing in multiple colors with only 20 grams of paint. If those amounts are correct then I’m looking at a wing that was only Varnished,… Read more »
Lyle, as Dave wrote: these were not paints but stains, made of powdered water-soluble artificial dyes which are concentrated and lightweight. Those quantities (20 grams) are given for powdered, dry dyes, which later were mixed with pure water or water and alcohol. This has been tested by Achim Engels, Koloman Mayrhofer and Langdon Badger, as these dyes are still in production in Germany/Austria.
Sorry you had to wait so long for my answer, I was away for two weeks due to Holidays.
All the Best in the New Year!
Thanks for a very informative article! I just received your excellent new E.V kit and – like many others, I’m sure – really wondered what the colour call-outs for the wings was all about. So it’s great to see this well researched documentation!
The kit itself is a little gem. I particularly like the way you have designed the undercarriage. It should make building so much easier.
I look forward to other aircraft kits featuring WW1 German designed planes in Polish colours!