
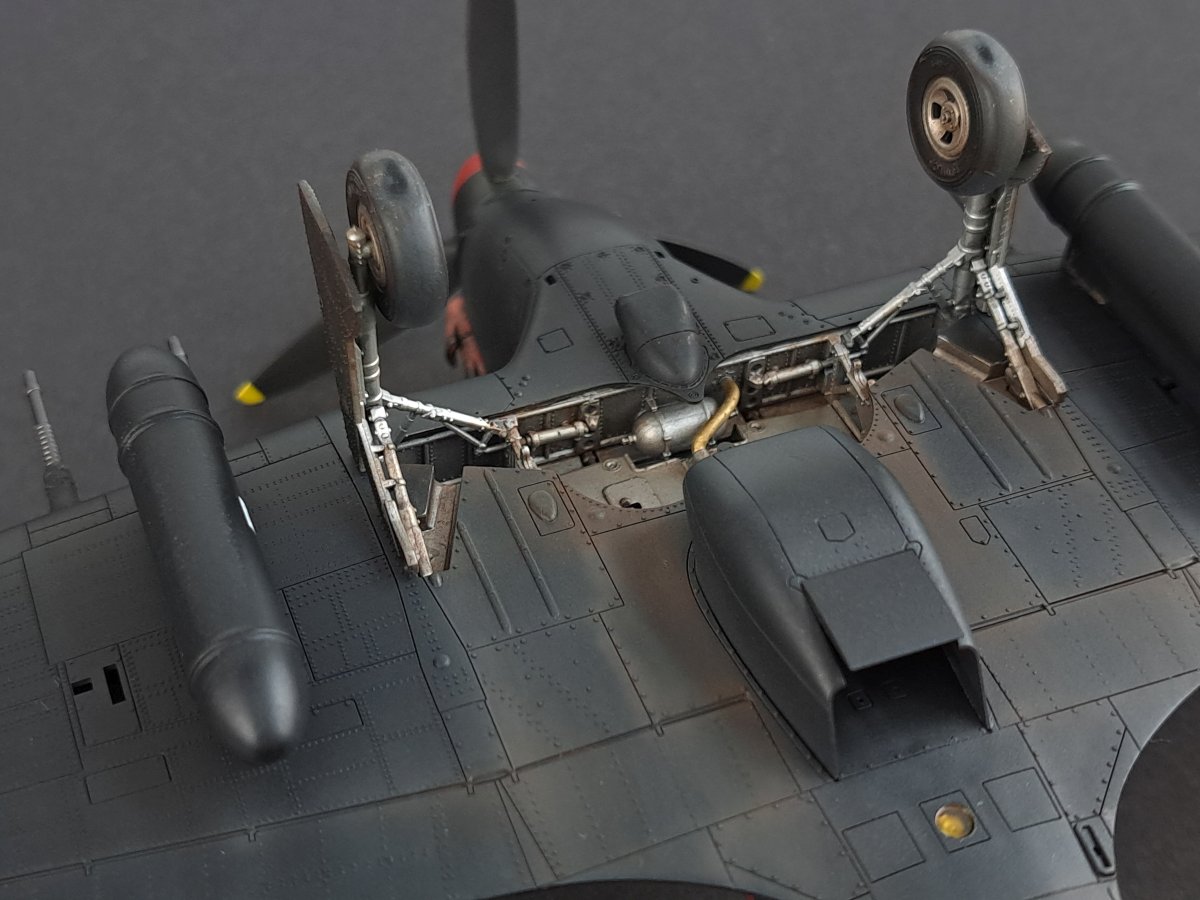
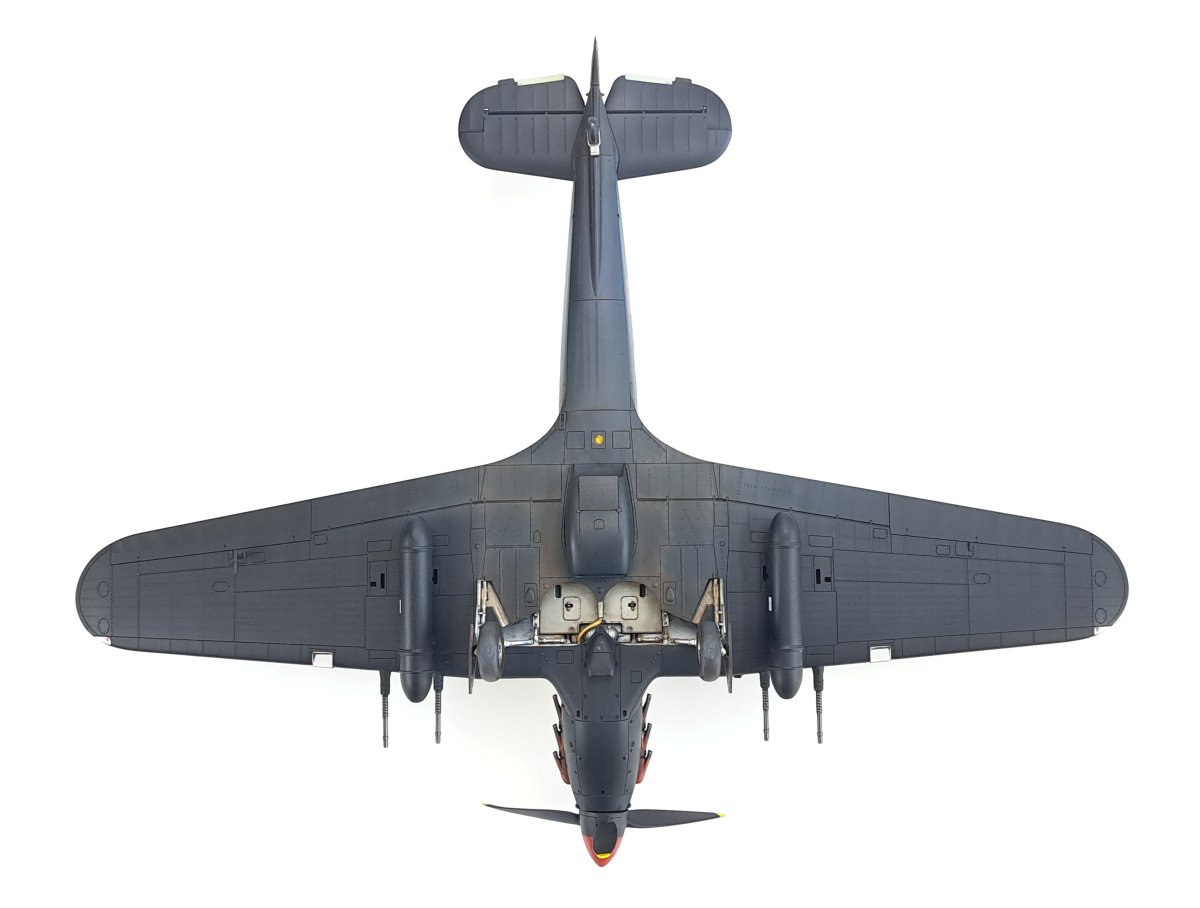
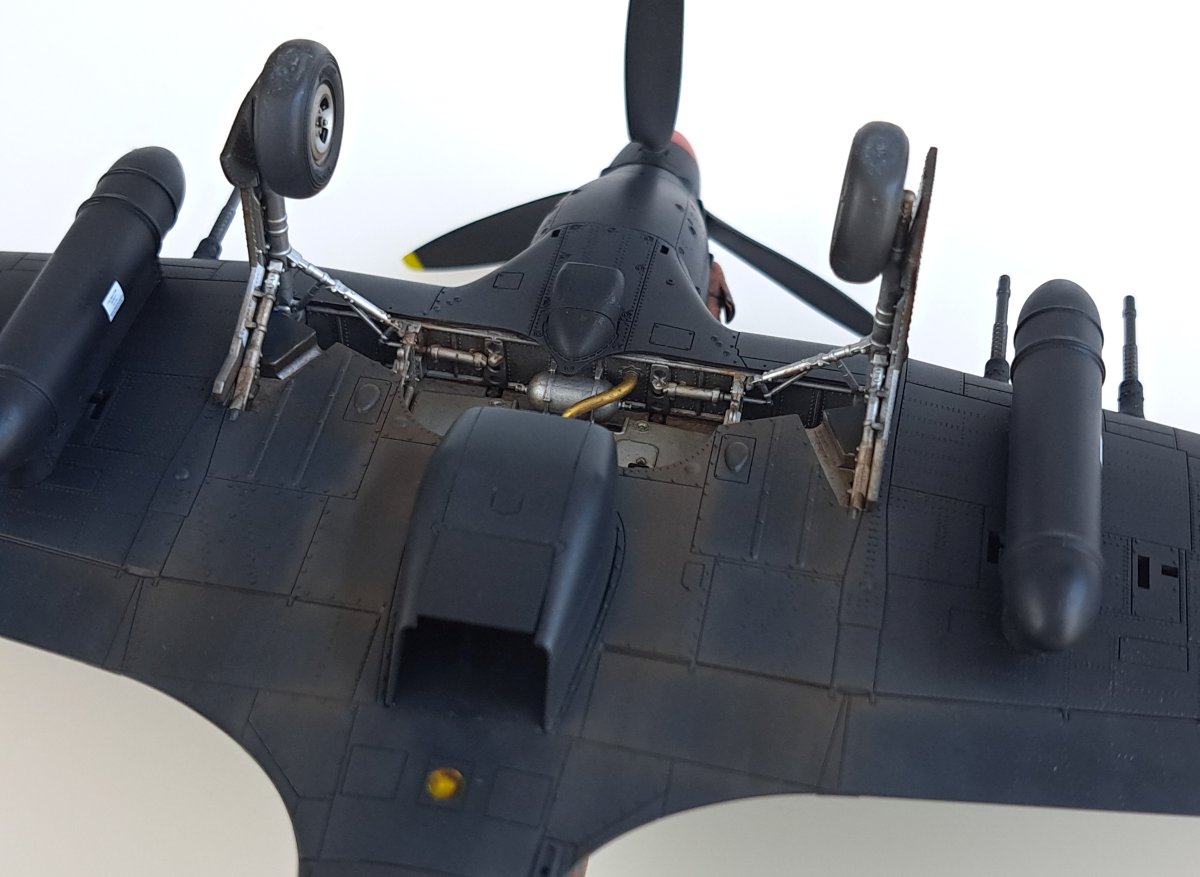
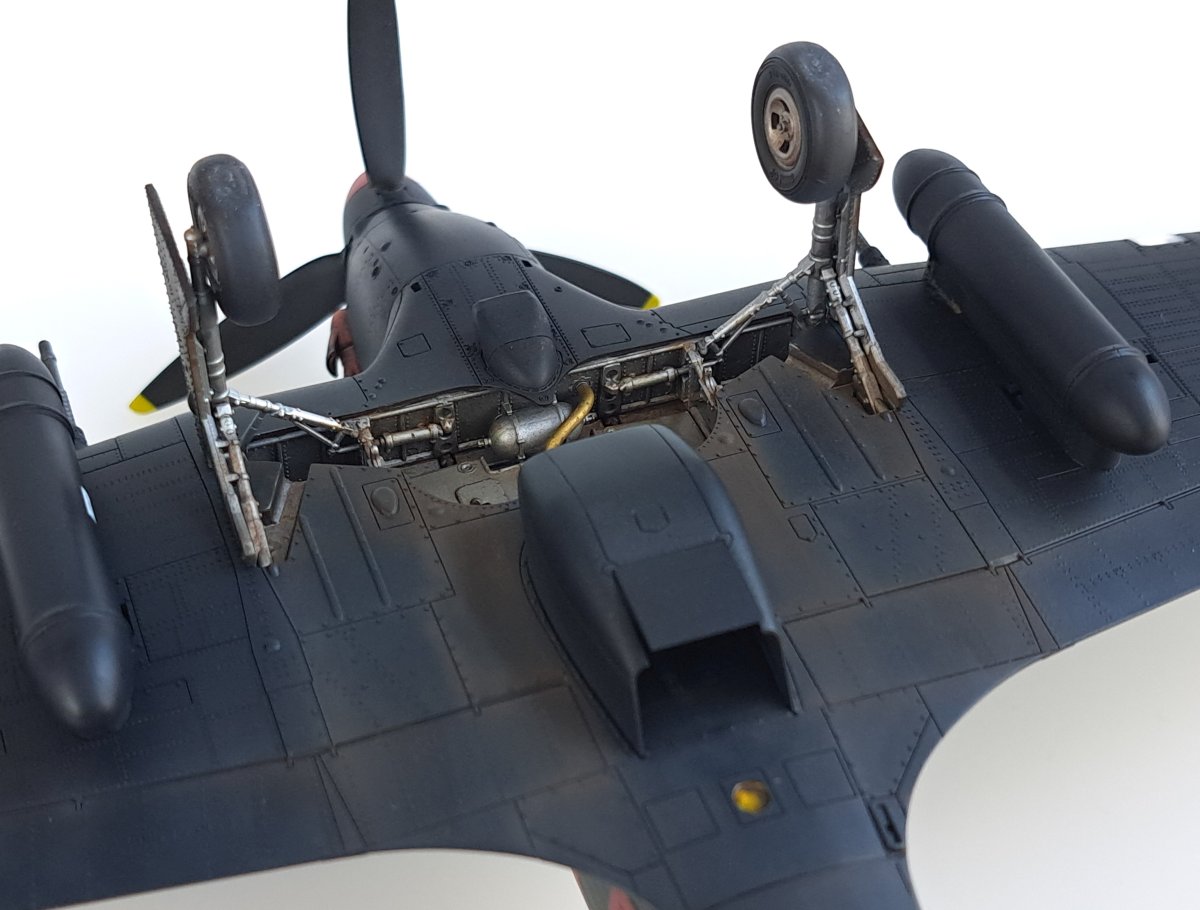
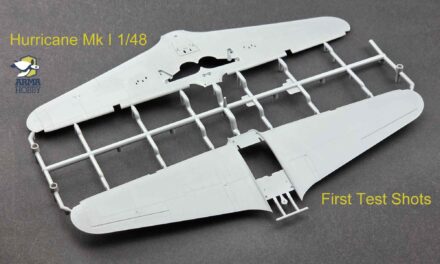
Our new Hurricane has already reached a lot of modellers. As I had access to the sprues earlier, I had already started building the first model. Unfortunately, my vacation interrupted my work at the initial stage. I managed to assemble and paint the wing with the interior of the landing gear and the cockpit. I also painted the insides of the fuselage halves and added all the small pieces. Before the holidays, I only checked the fit of the fuselage with the cockpit with the wing. It was more than satisfactory.

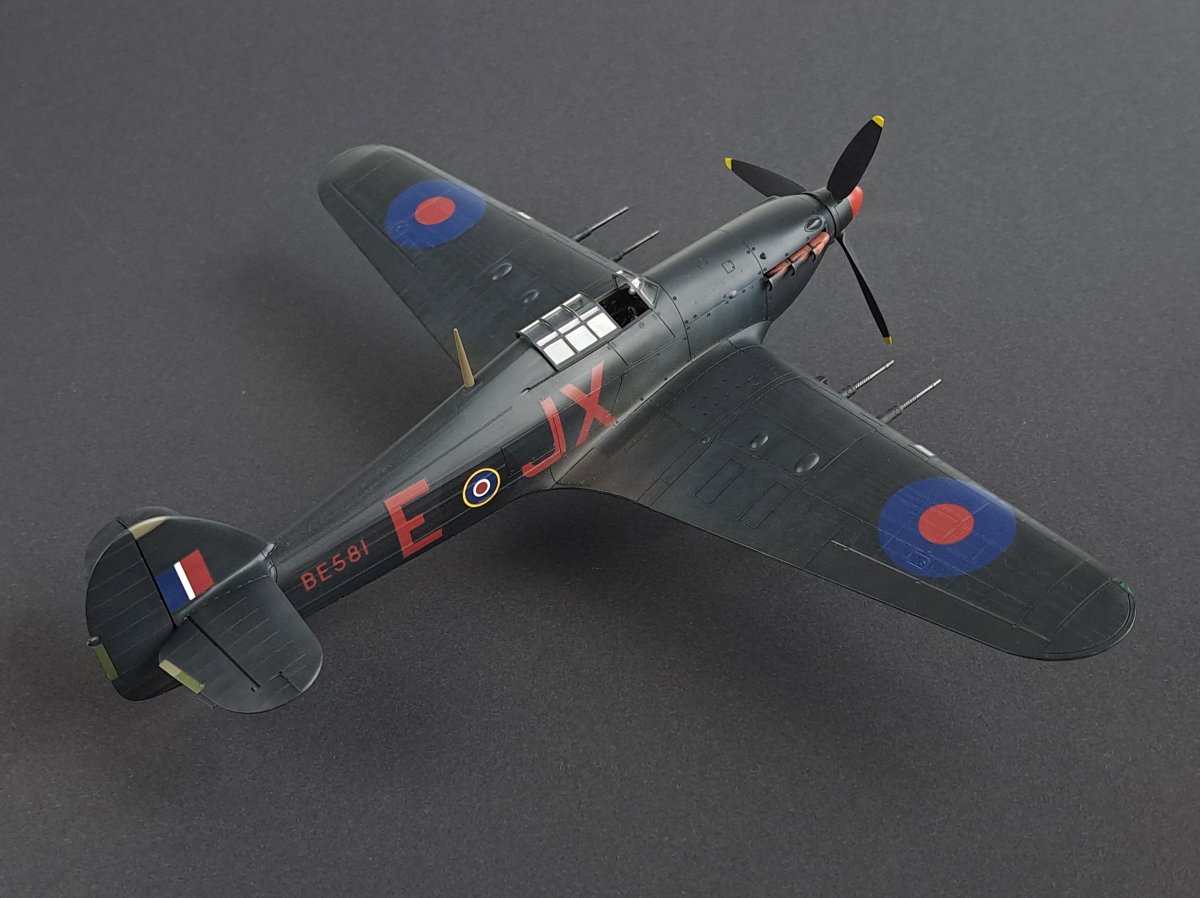
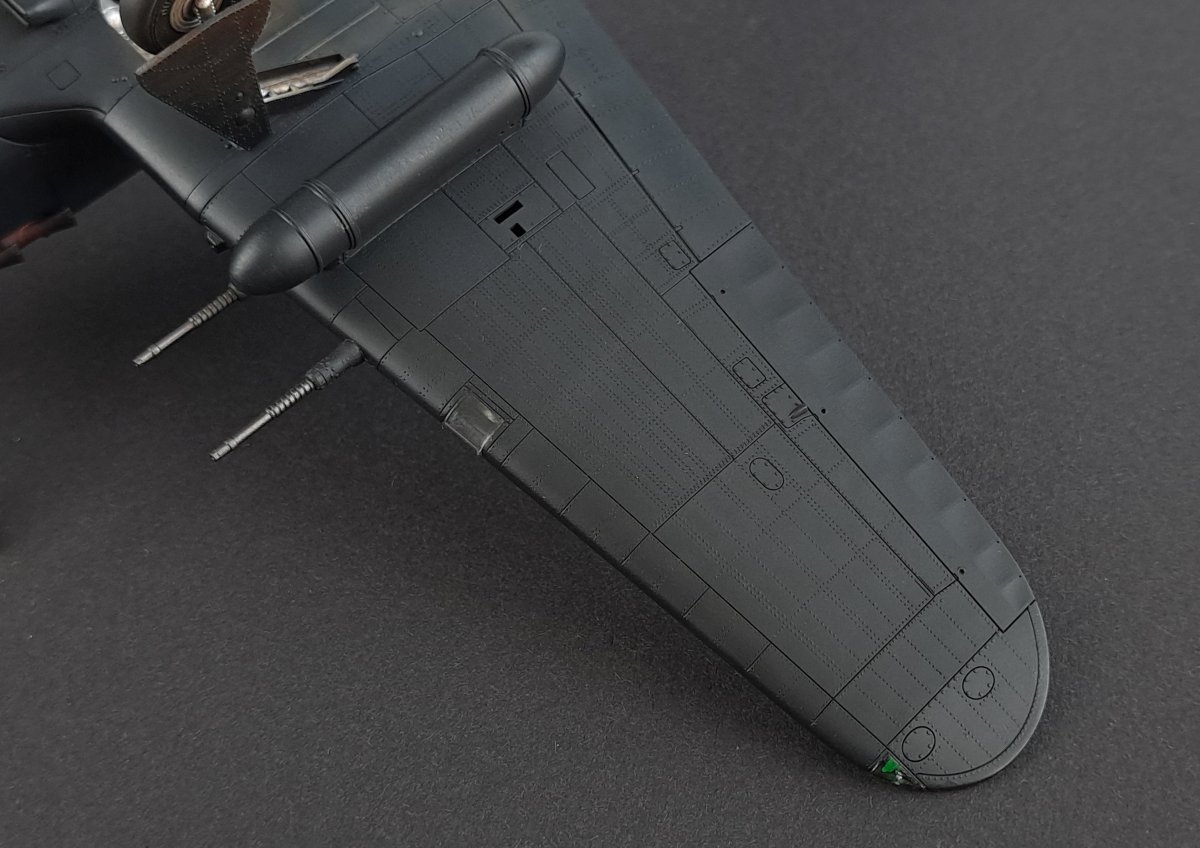
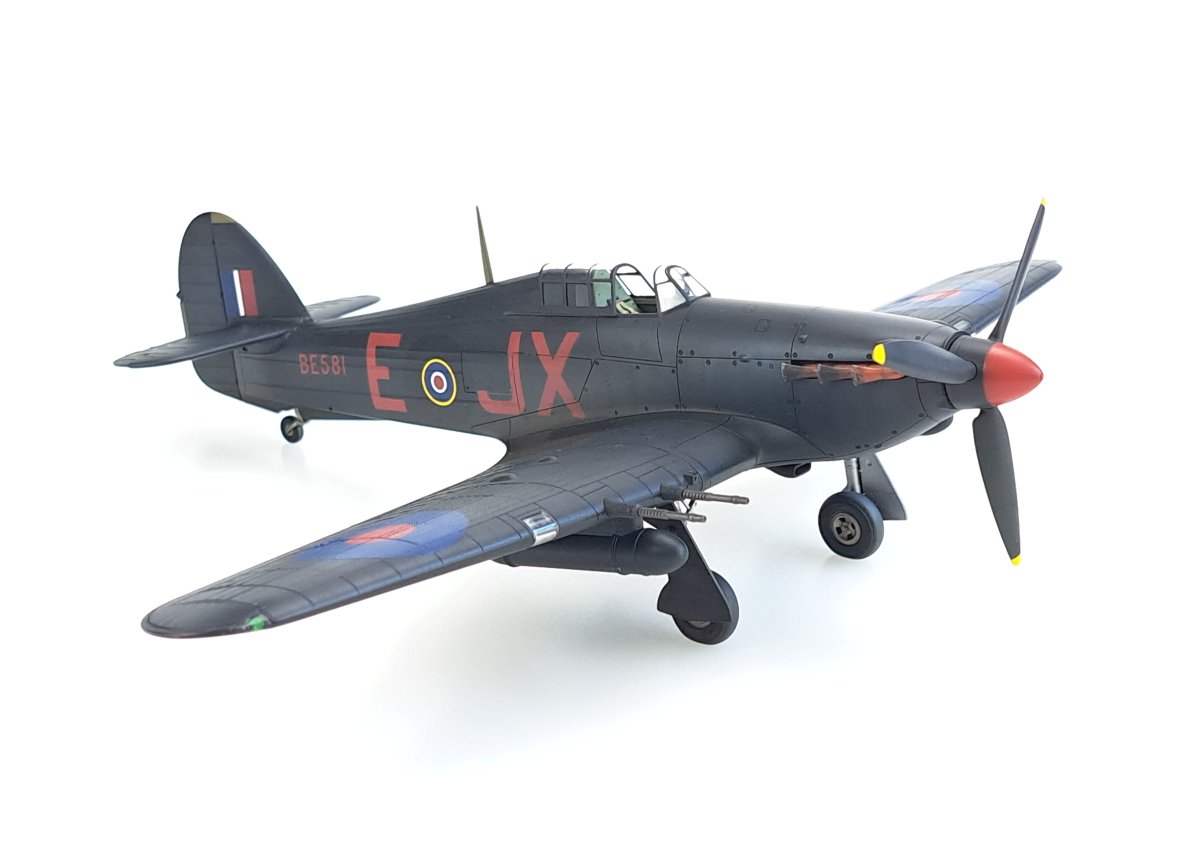
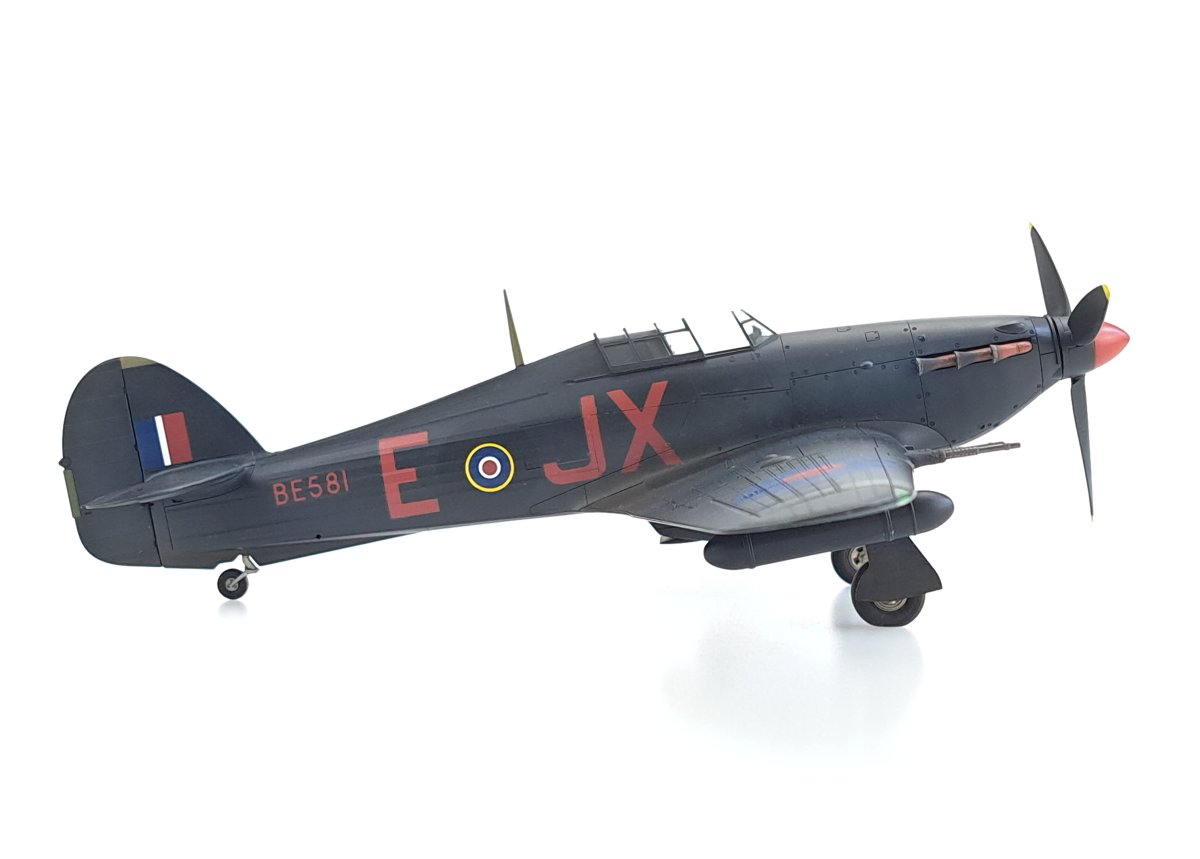
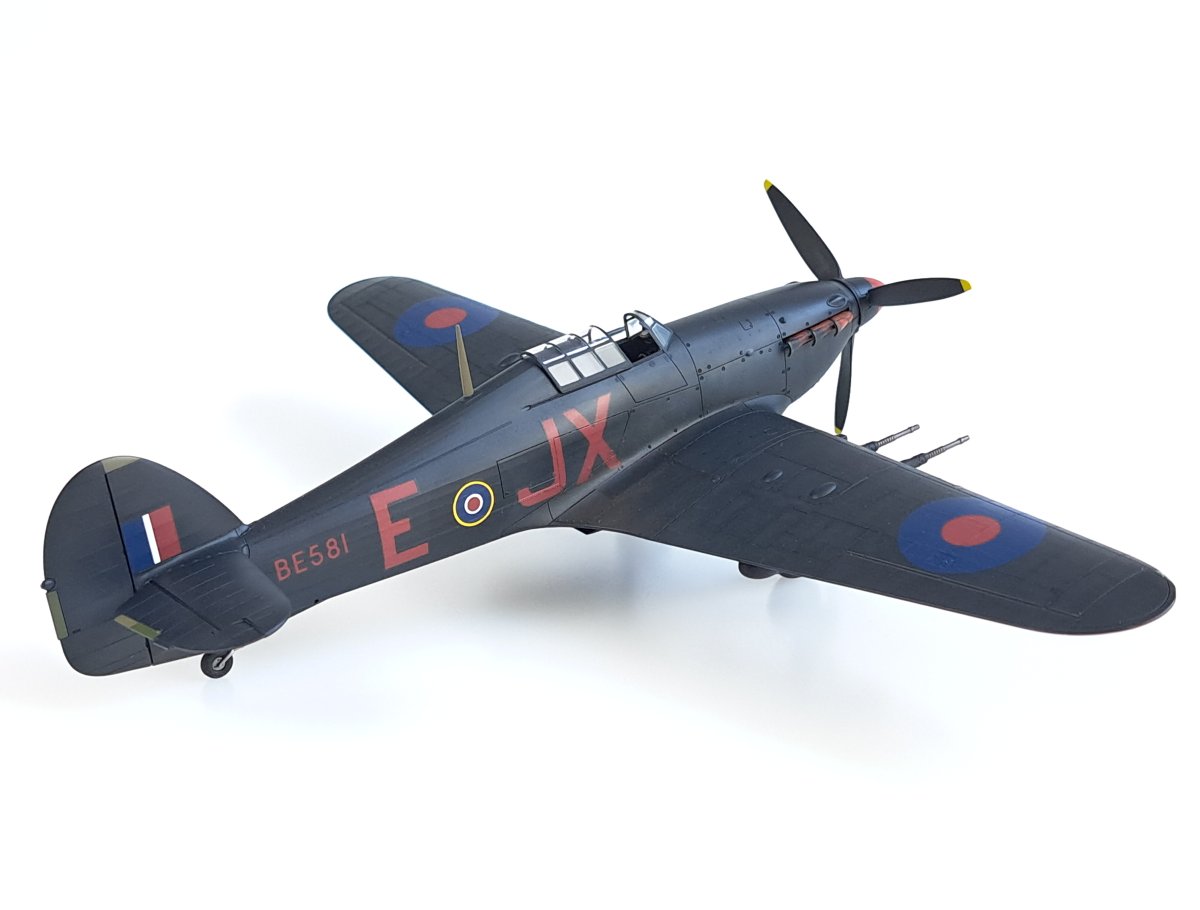
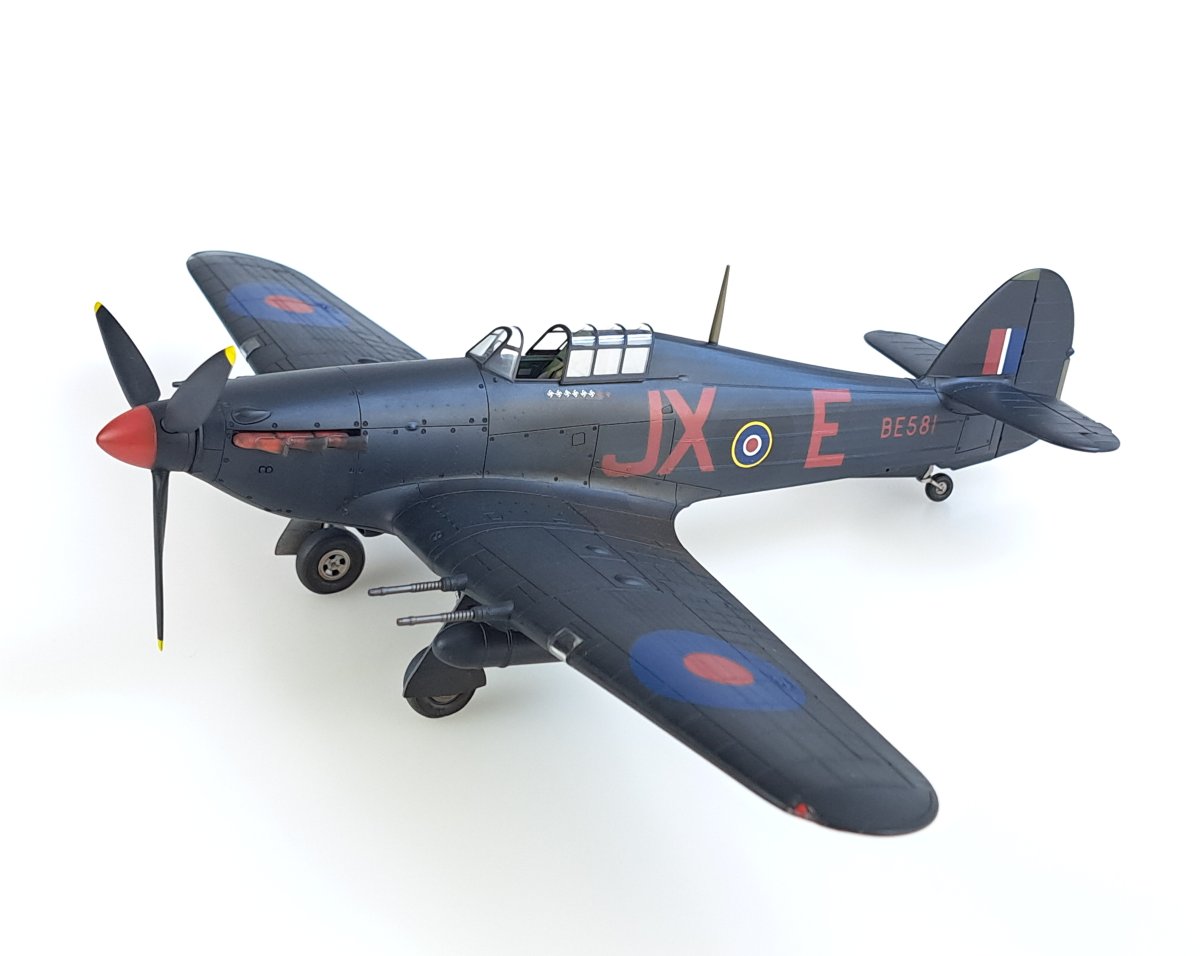
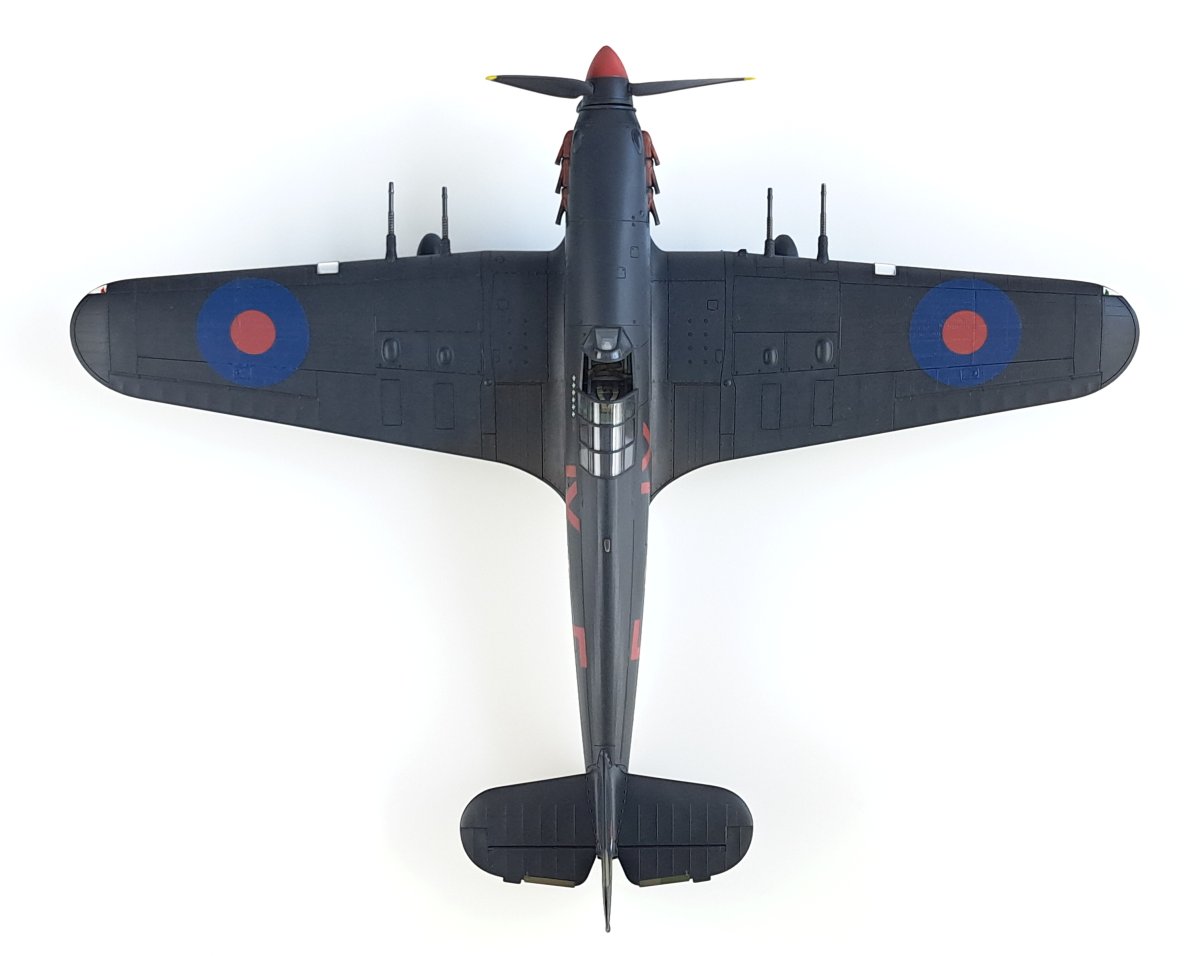
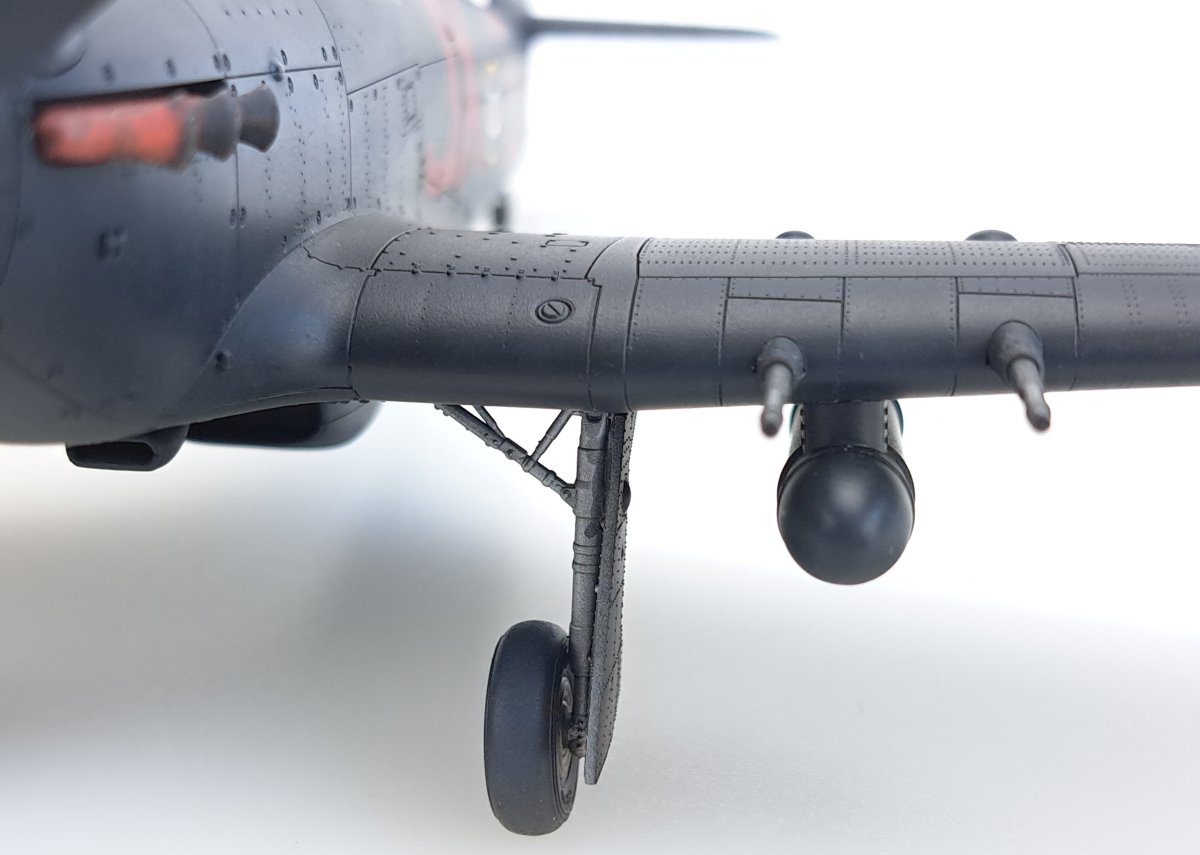
After returning from vacation I painted the instrument panel and glued it from the bottom to the already joined halves of the fuselage. The assembly of the wings and the fuselage was just a formality. After adding the fin, tailplane, and control surfaces, the fuselage bottom, the radiator, the carburettor intake, etc., I had a ready-made unit to be primed. Here are a few words about the choice of camouflage. I wanted to complete the model very quickly because I was supposed to send it to our distributor in the USA for the IPMS/USA Nationals in Texas (look for it at the LSG stand). That’s why I chose a boxart camouflage, all-black Hurricane JX-E. Anyway, I’ve already made a model in this camouflage in 1/72 scale.
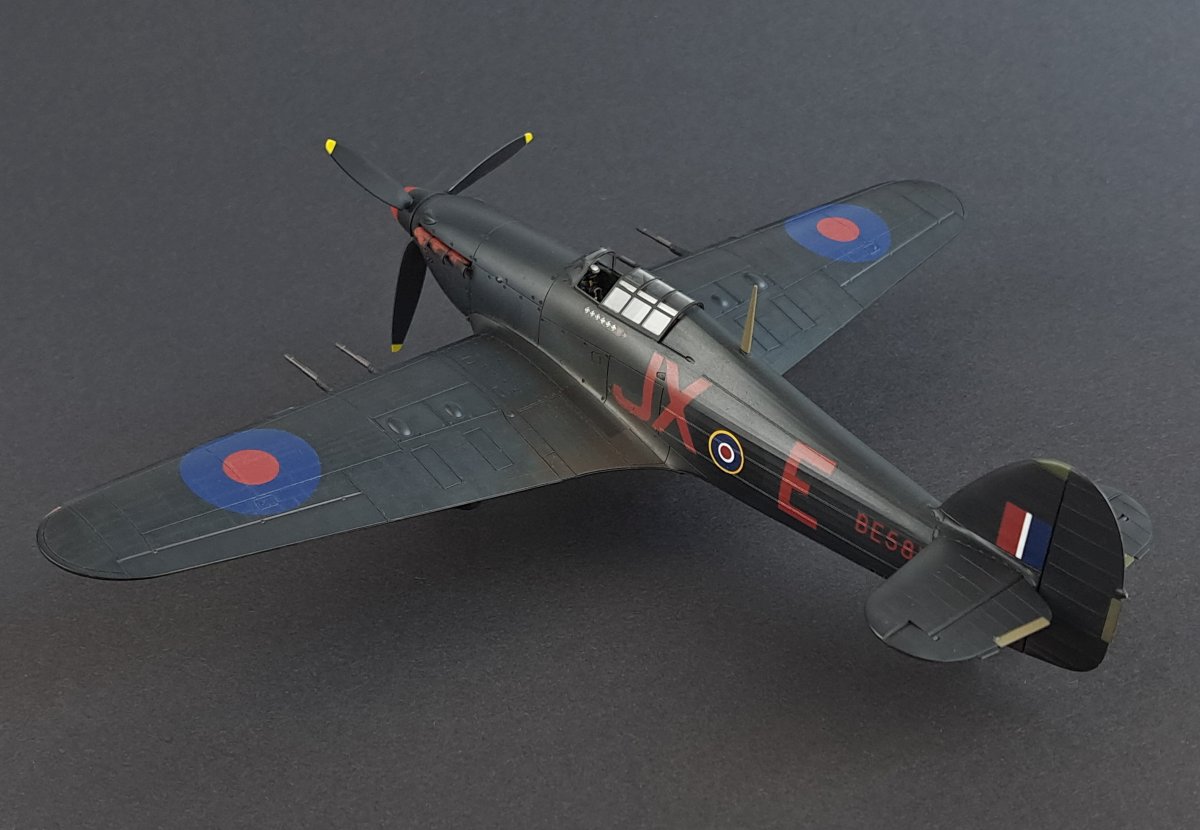


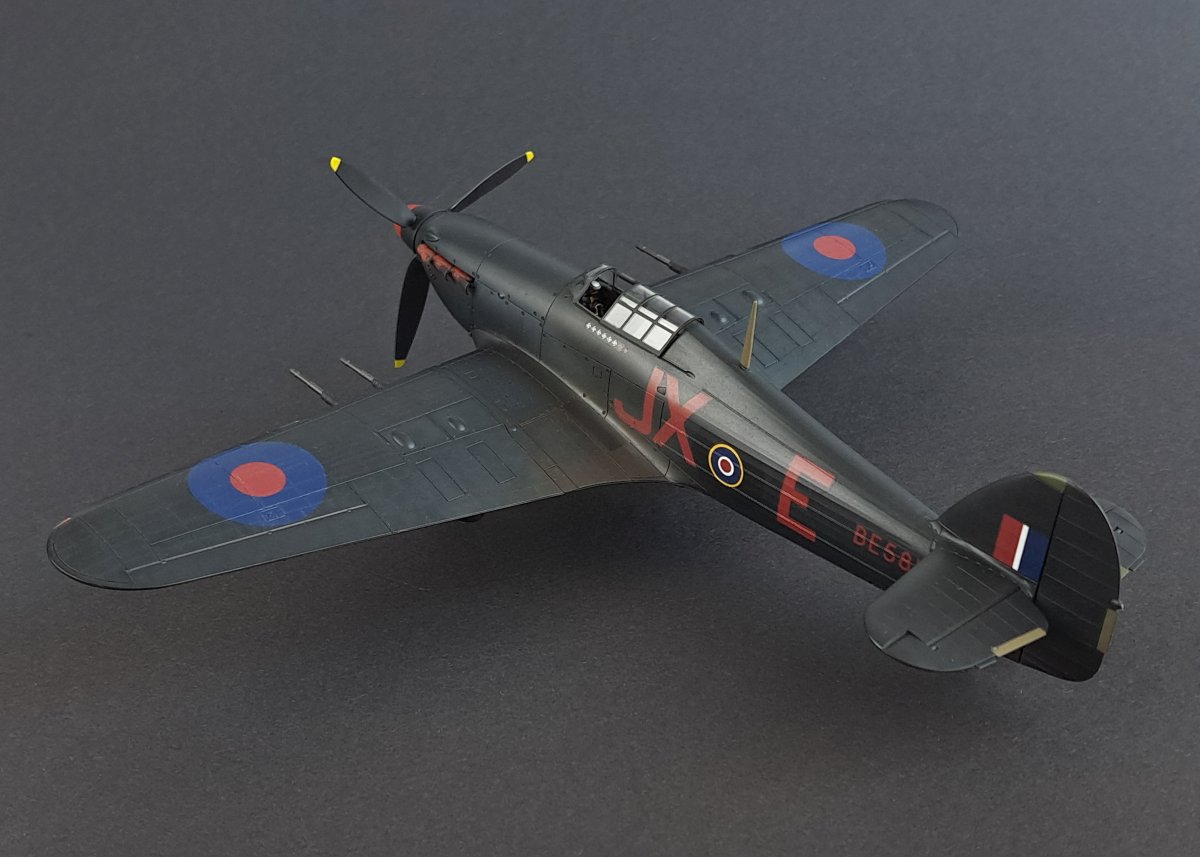
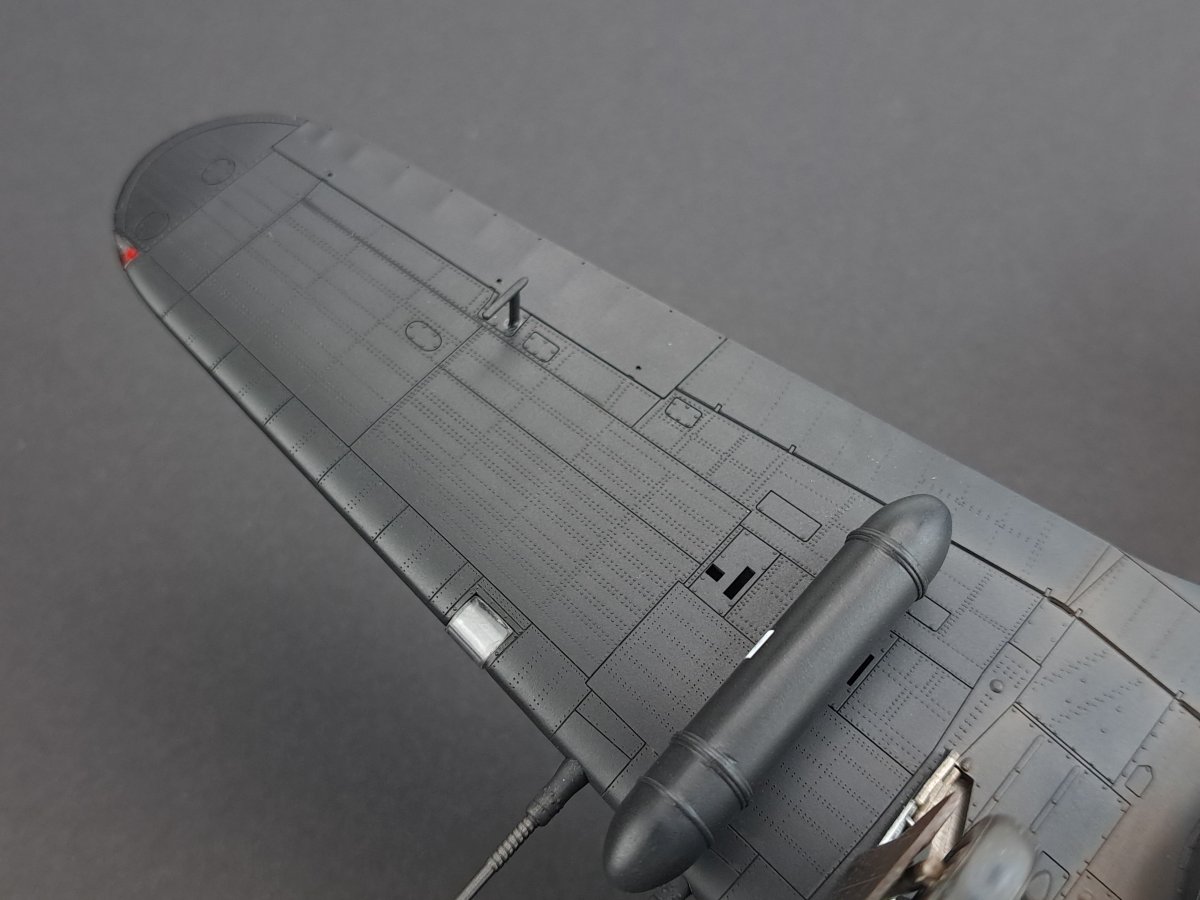
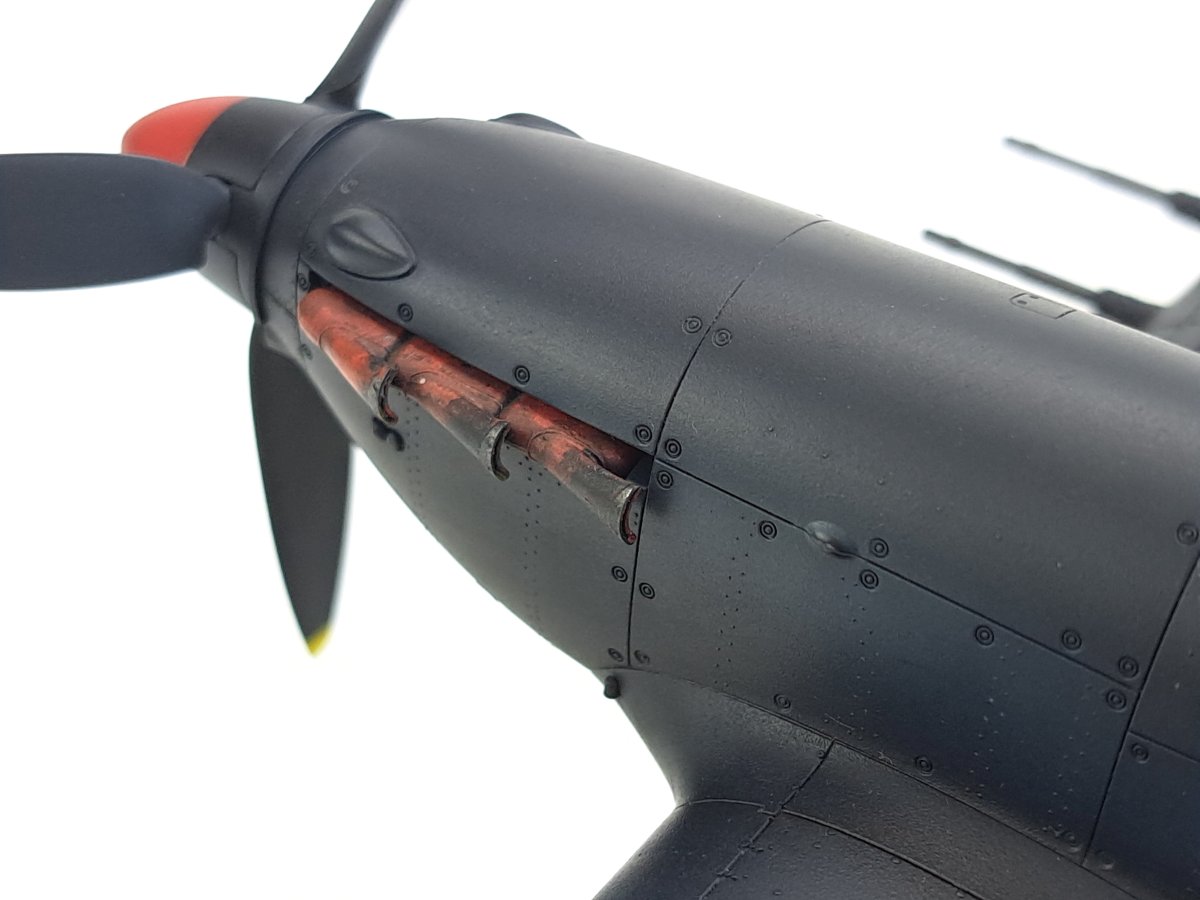
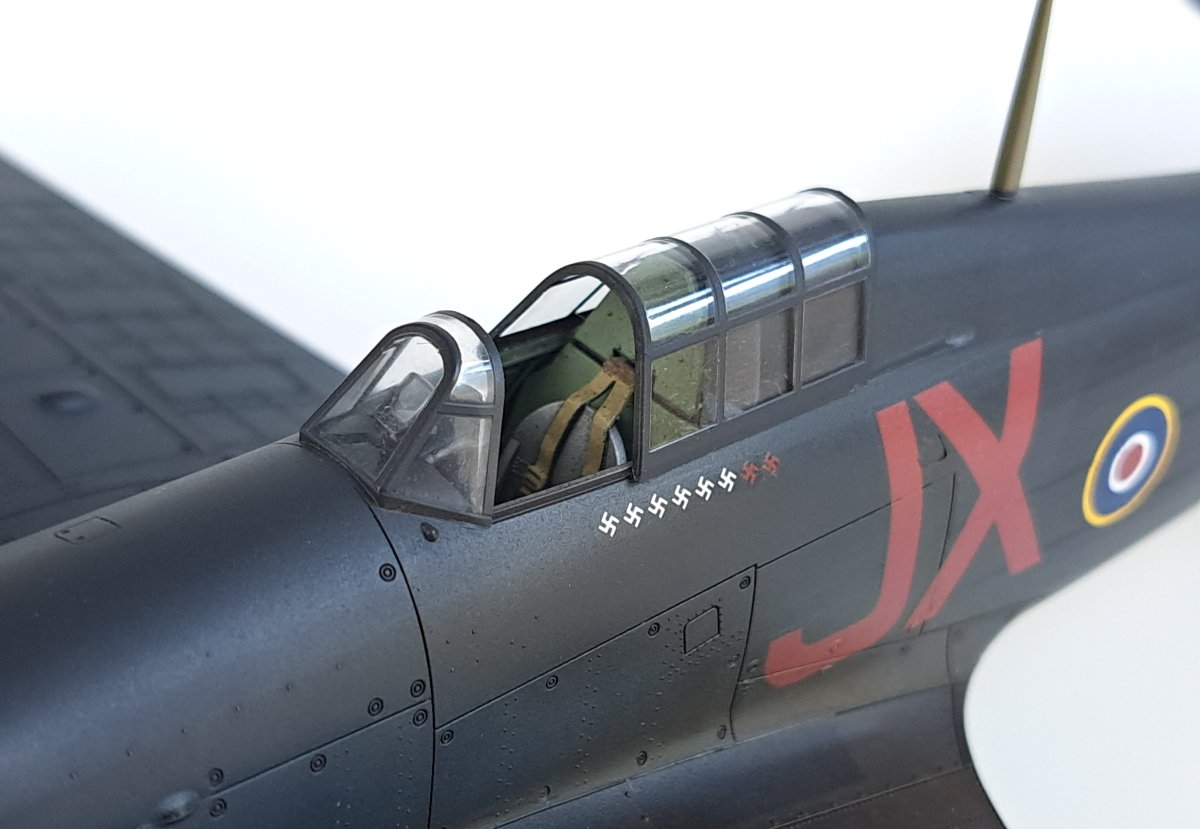
A single-colour, and in particular an all-black plane, is always a painting challenge. I primed the entire body with Gunze Surfacer, so I had a black base for further work. Using stencils with irregular openings/holes, I broke the solidity of the black colour. First I used gray and then added smaller amounts of stains both by stencils and by hand using other colours such as yellow, dark blue, green and others. Then I pre-shaded it again with black along the panel lines. Finally, I weakened the effect with a dark grey colour, slightly covering the whole thing. I painted the overpainted fuselage roundel in black with a bit of navy blue.
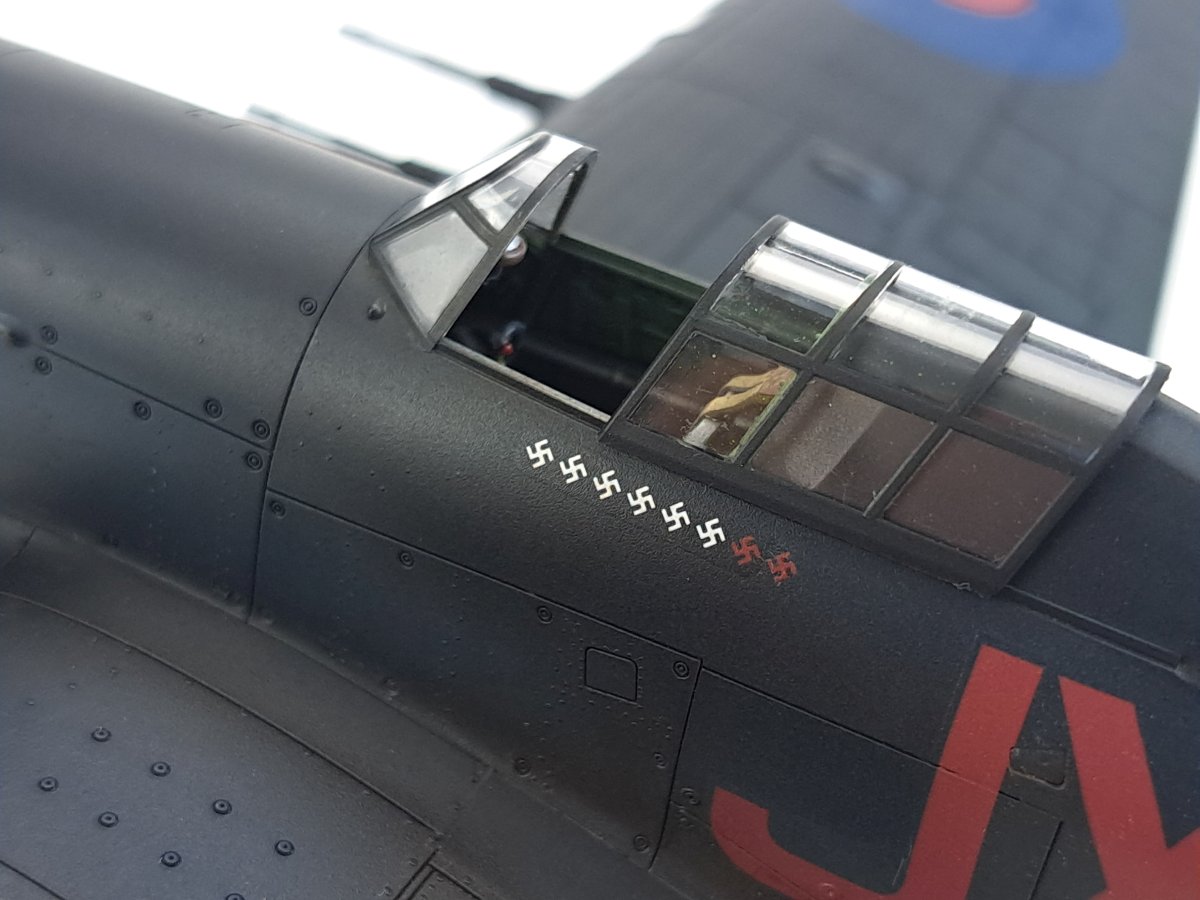
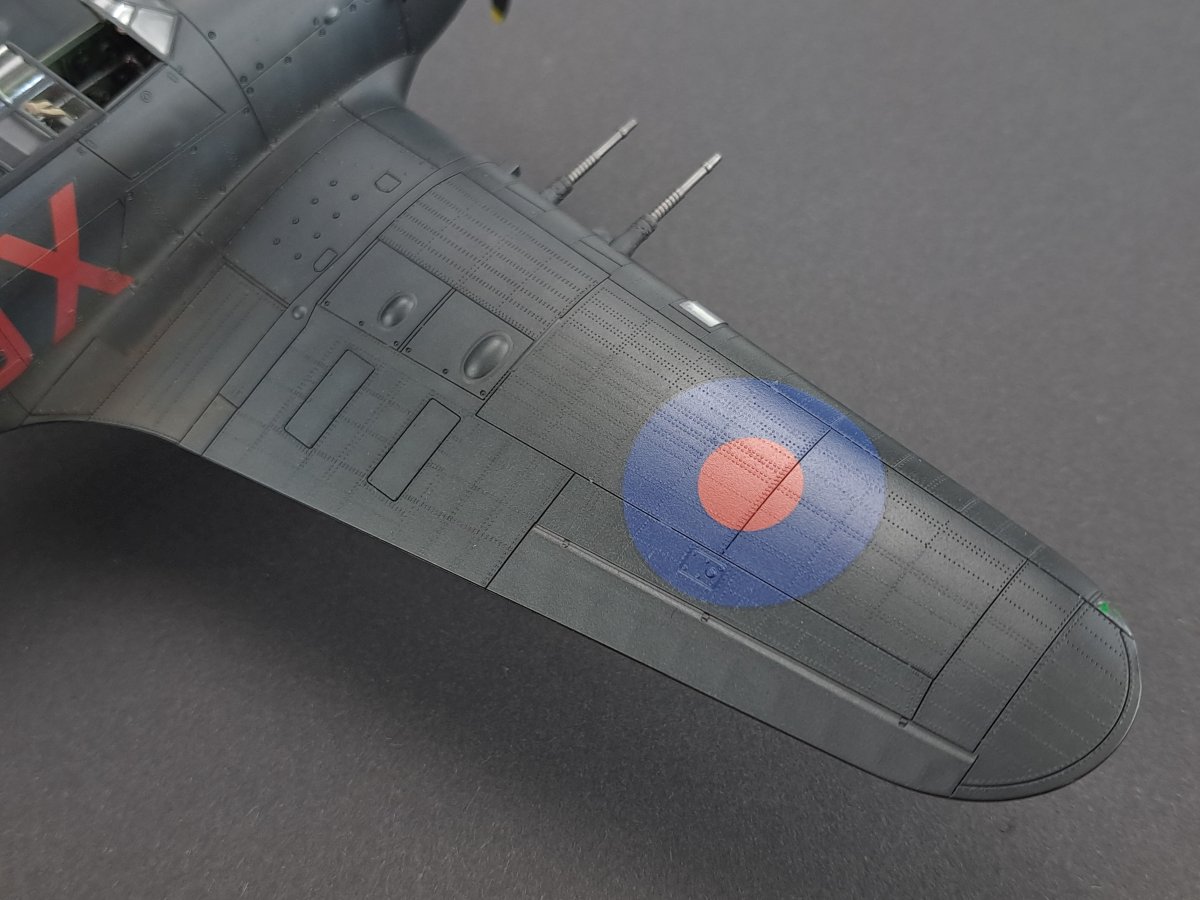

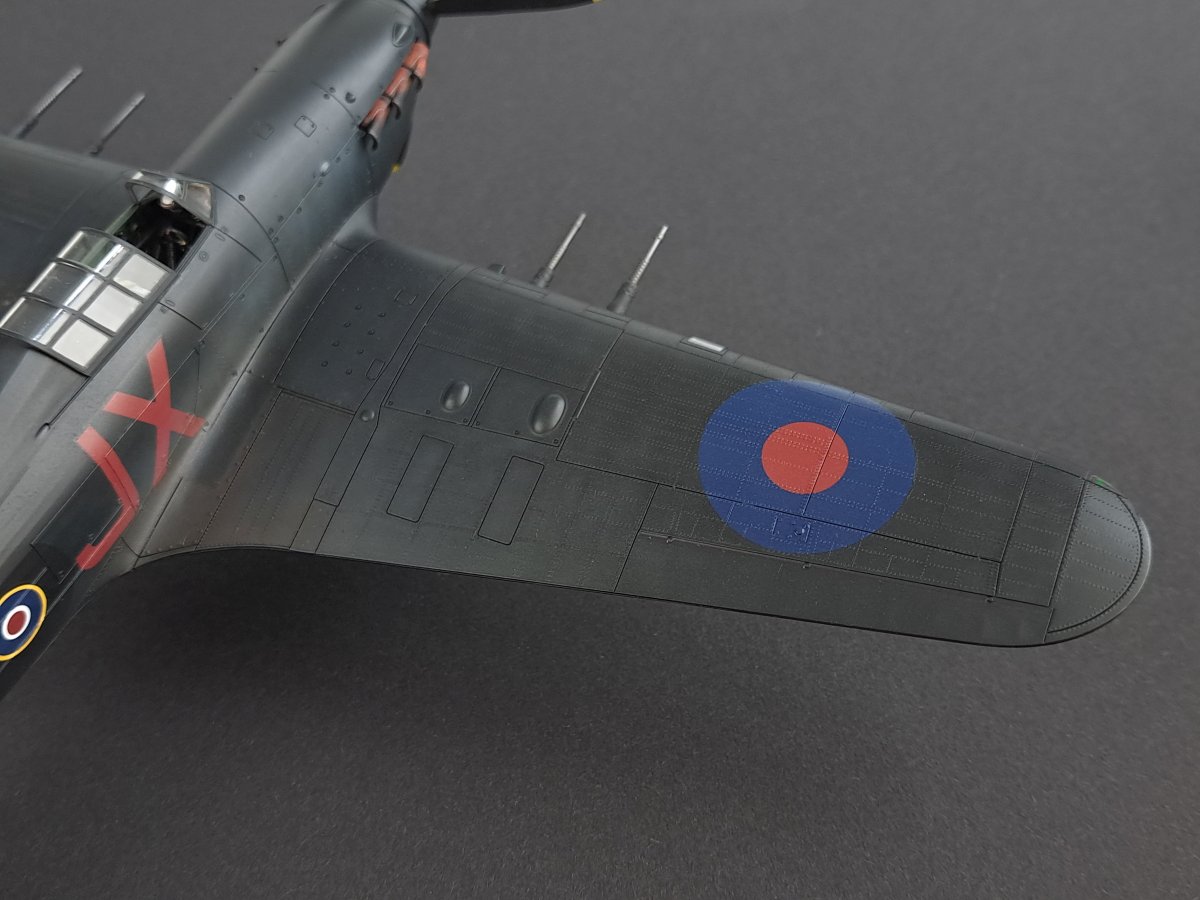
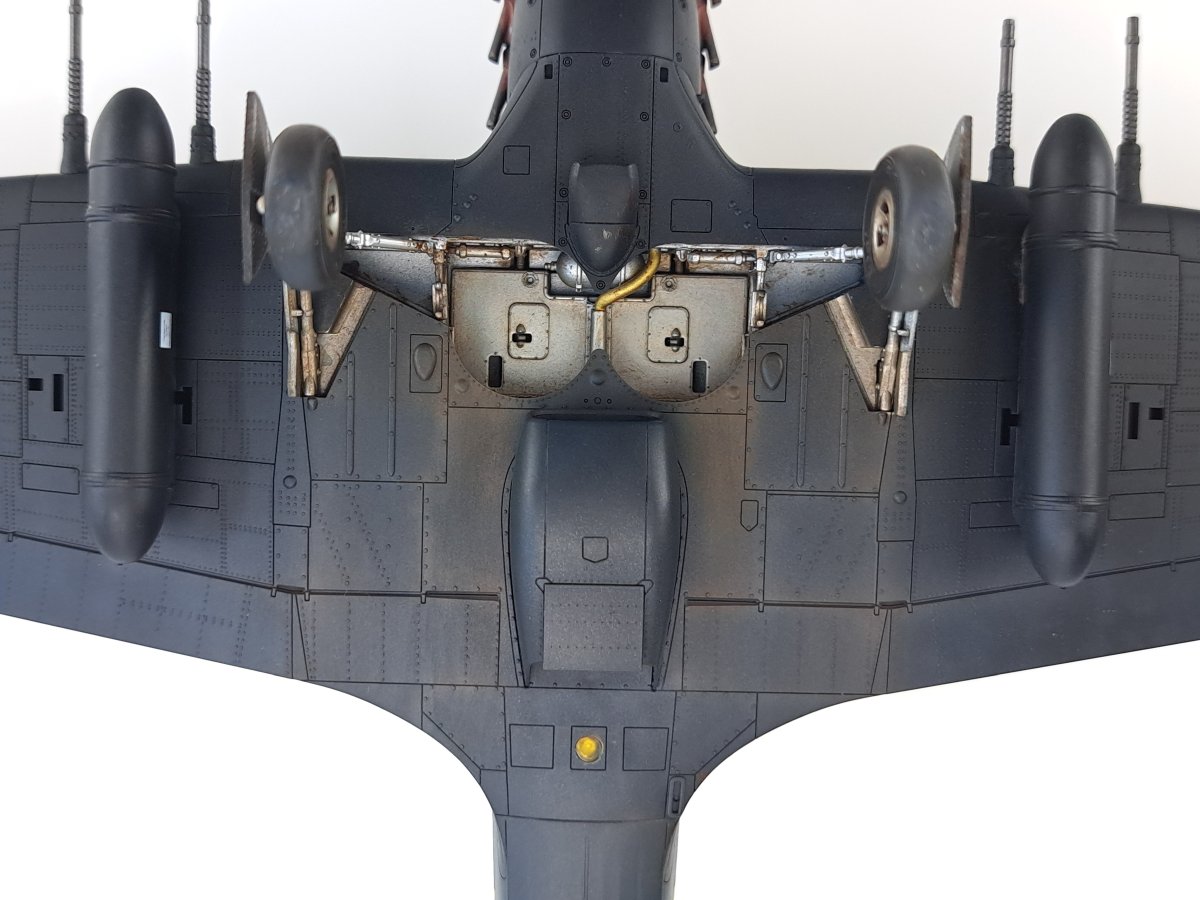
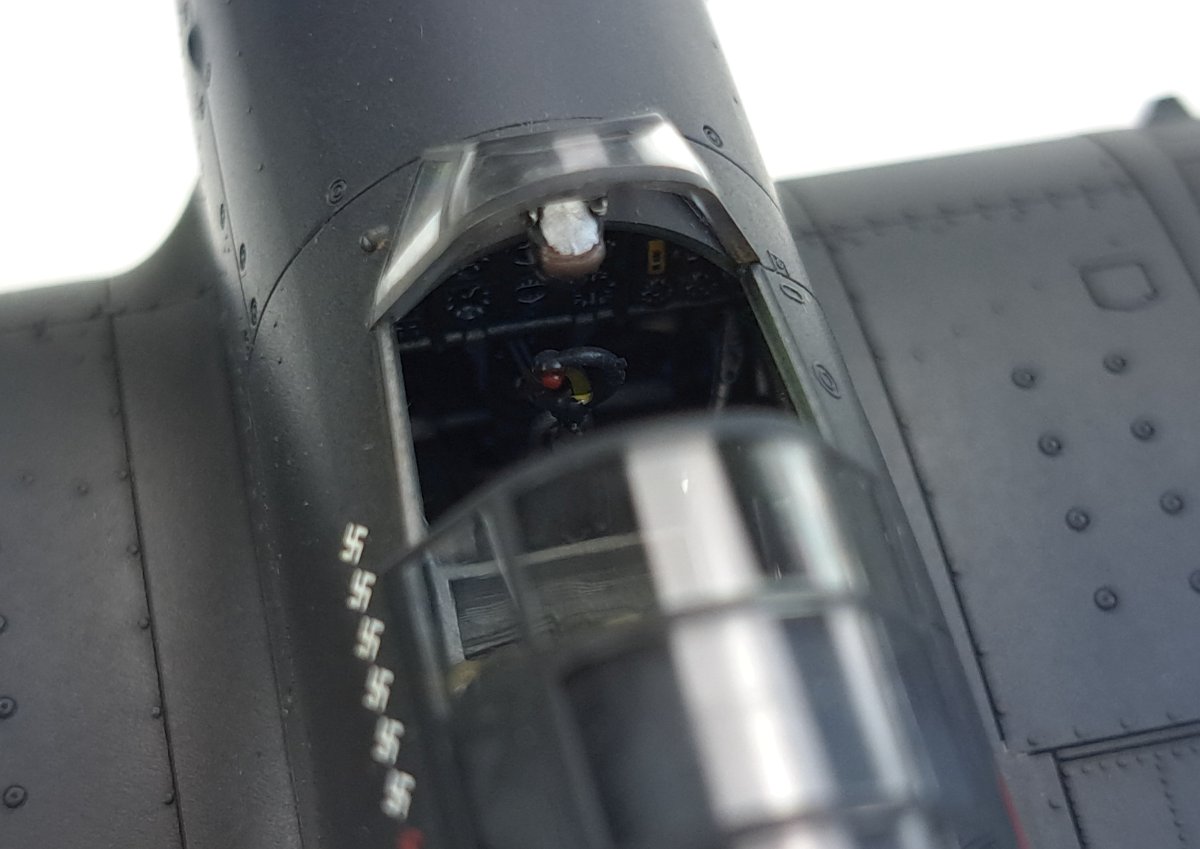
I applied the decals by ‘watering’ them with a lot of softener, and finally I cut all the panel lines on the decal with a sharp blade. Fortunately, this marking has no stencilling, which made the whole process faster. The last stage was to add exhaust marks with a light grey colour with a bit of navy blue and apply some dirt. I first used the brown colour with an airbrush on the dirt behind the landing gear compartment and near the cockpit. Then I corrected it with a brown oil wash. In the same places where there was too much brown in the lines, I carefully filled these lines with black with the help of Life Color liquid pigment.


After adding the propeller, landing gear, antennas, and other small parts, the model can be considered finished. If it weren’t for the vacation, I would have finished it in a week – taking into account a little more work on the weekend. I like such modelling 🙂


Check also:
Wanted to be Philanthropist, statesman and patron of the arts. Temporarily focused on developing scale model production in Poland. Co-founder of Arma Hobby. Designer of kits: TS-11 Iskra, PZL P.7a, Fokker E.V, PZL P.11c, Hawker Hurricane, Yak-1b, Wildcat, P-51B/C/D Mustang and 1/48 Hurricane.
This post is also available in:
 polski
