Today next part of FM-2 Wildcat model details and assembly solutions. This time focused on main wheels and their undercarriage bay in fuselage compartment before cockpit. So let’s see parts and how to paint and assembly them easily.
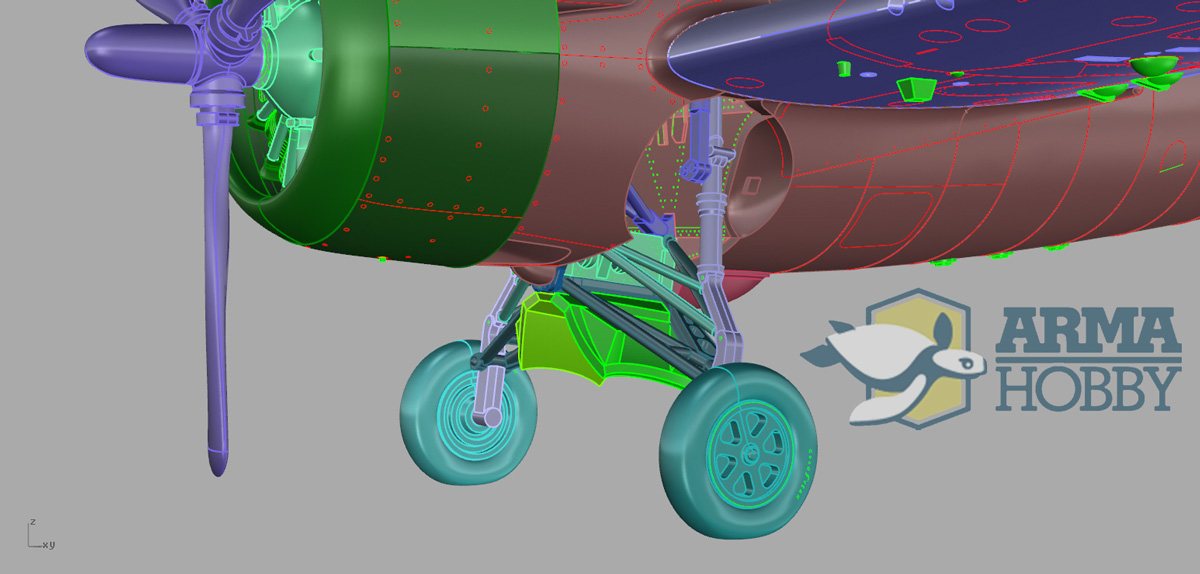
General arrangement and details of wheels and their legs are moulded as good as it was possible in 1/72 scale. What’s the main issue you can find when building any Wildcat kit? It is a complex and delicate structure of the undercarriage folding mechanism. It is hard to paint after assembly and hard to mask when painting the rest of aeroplane. Also, you can quickly break it during handling. So fitting of whole undercarriage legs system is designed for the last stages of assembly of Arma Hobby kit, just after painting. The final touch is to add a small rear-fairing to cover it.
A significant feature of wheel bay is its rear bulkhead. You can see a lot of details and rivets there in model. Legs folding chains are made from photo-etched parts for a lightweight look. Some engine mount tubing is visible in the lower part of this compartment (not all of them, but we would consider them in F4F-4). Actuators on wheel legs are moulded as separate parts. Catapult hook is visible between wheels covers on the bottom of the fuselage.
You may be interested in:
Models and accessories of the Wildcat in Arma Hobby webstore click
Wanted to be Philanthropist, statesman and patron of the arts. Temporarily focused on developing scale model production in Poland. Co-founder of Arma Hobby. Designer of kits: TS-11 Iskra, PZL P.7a, Fokker E.V, PZL P.11c, Hawker Hurricane, Yak-1b, FM-2 Wildcat, P-51B/C Mustang and 1/48 Hurricane.
This post is also available in:
 polski


