
How to make a realistic controls panel in the PZL P.11c kit from Arma Hobby? See a short step by step tutorial
Today I present my system of working with instrument panels, I showed it once on my blog (Polish text but clear photos, link), and because it worked well for me, I introduced it to the models I design. The trick is to apply decals. Techmod, their producer for Arma Hobby, offers the appropriate print quality that allows you to make a very nice instrument panel. Photos of the first Arma Hobby 1/48 scale kit plastic parts – are posted on armahobbynews:
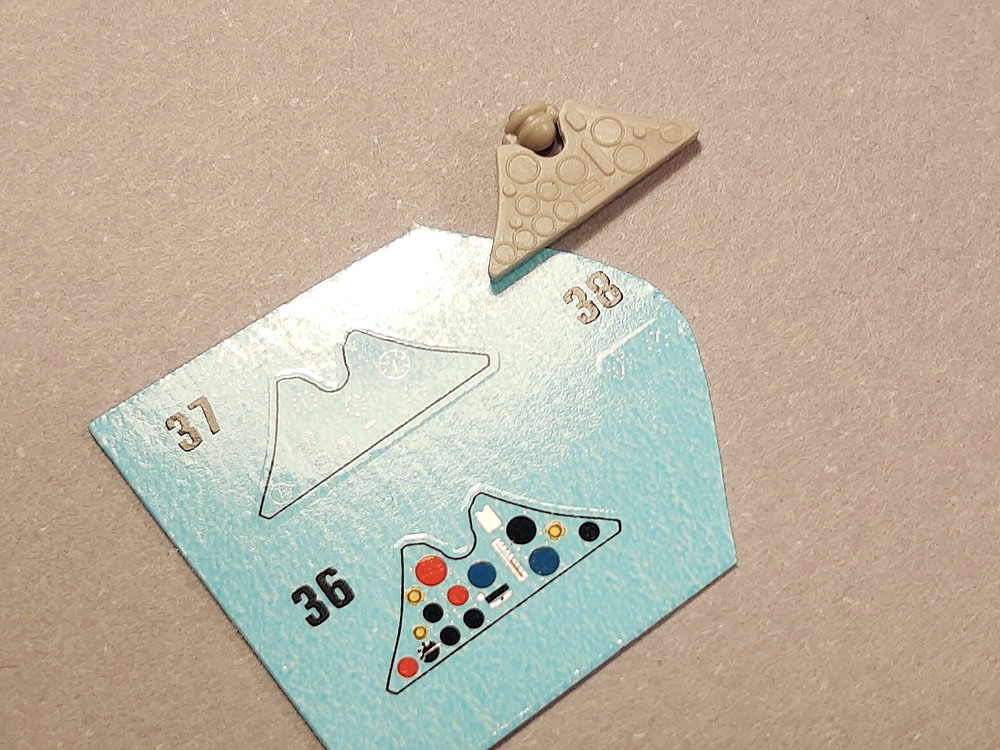
Let’s start with plastic part and kit decals.
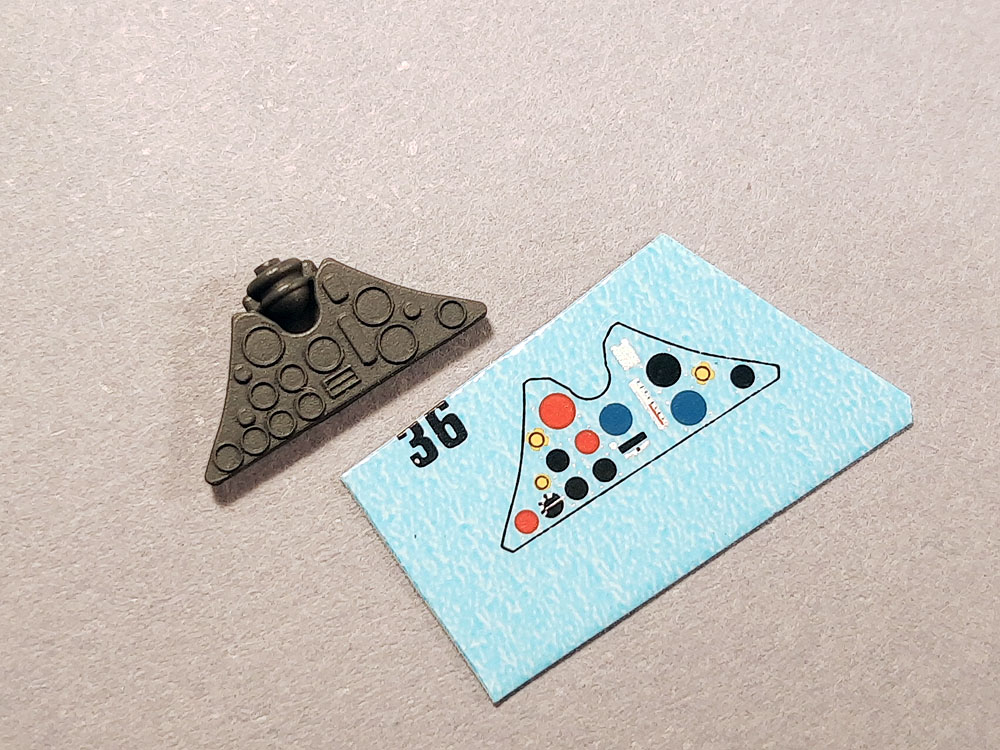
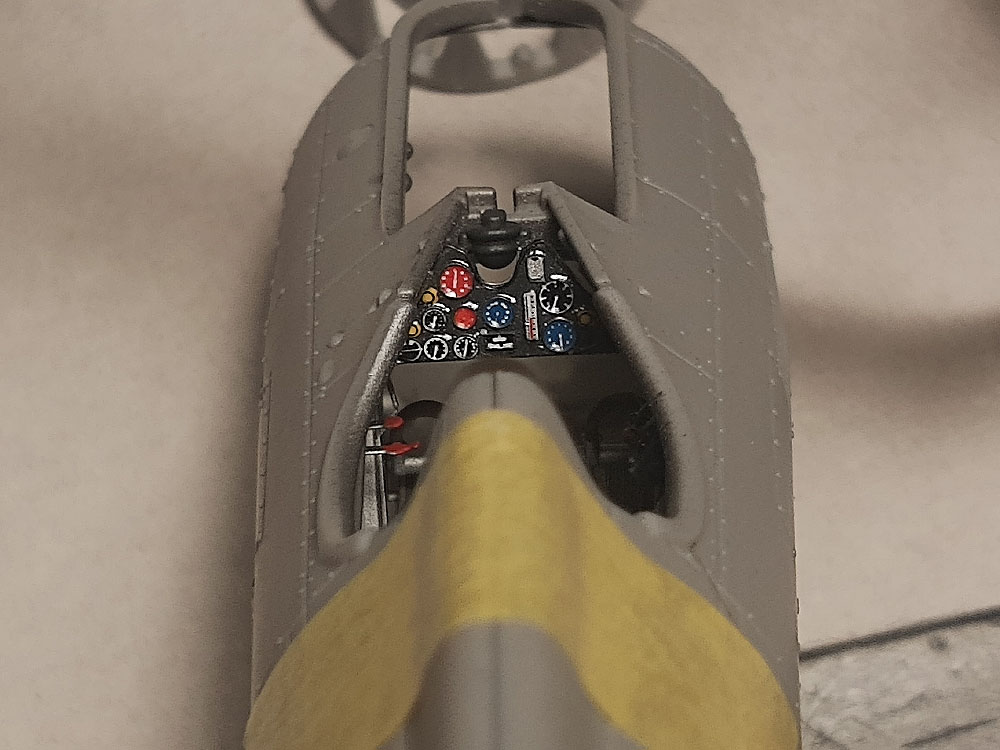
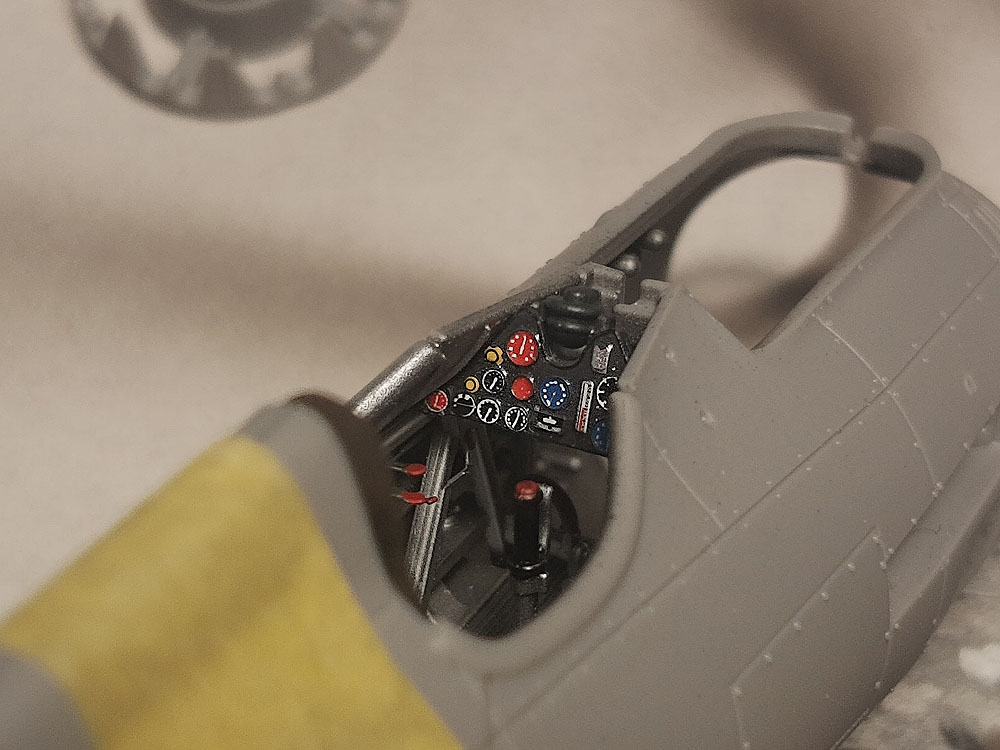
Controls panel is painted dark grey. It will make a nice contrast with black of controls tables. Then first decal is prepared.

First decal on its place. I recommend to use a lot of “sol” solution (or similar) and take your time until it dried well. Do not hurry and refer to solution manual.
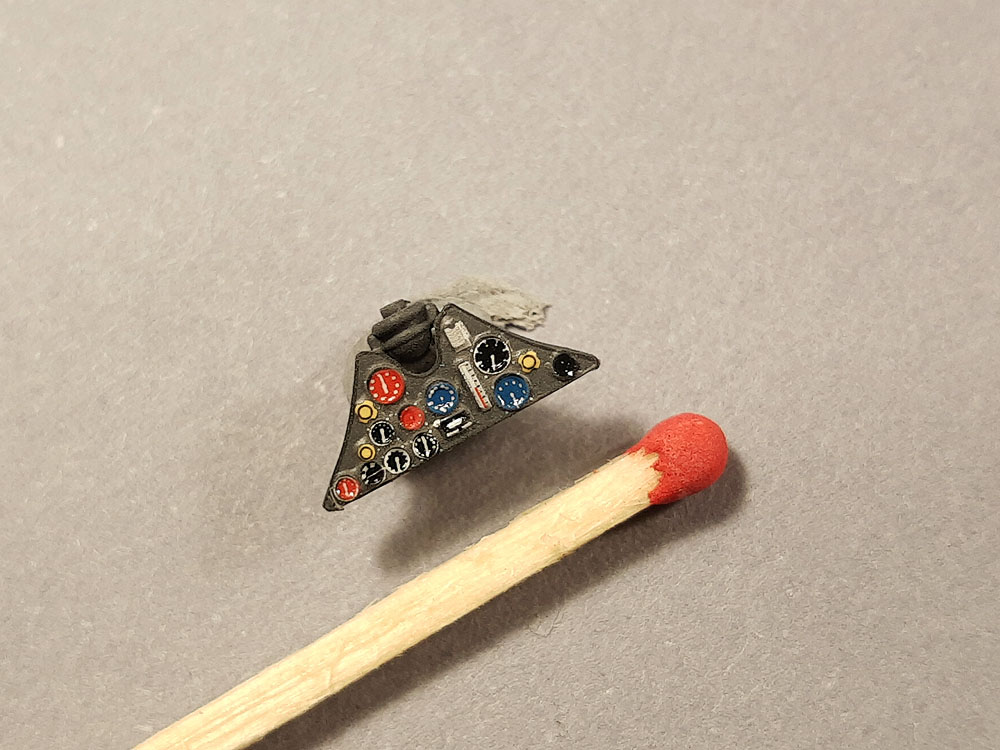
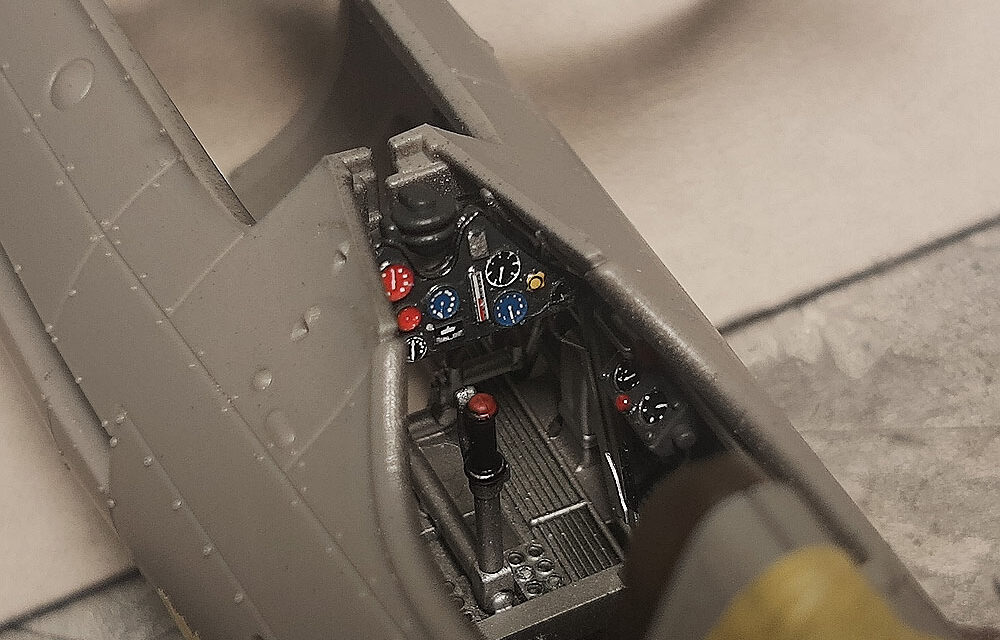
When dried completely I apply second decal and follow procedure described above again. When dried I paint it overall with matt varnish. Then controls receive a gloss varnish drop to imitate glasses. And voila! Your panel is ready to be used on model.

See also:


- Order the 40001 PZL P.11c Expert Set 1/48 and more in Arma Hobby online shop!
- More scale modelling tutorials
Wanted to be Philanthropist, statesman and patron of the arts. Temporarily focused on developing scale model production in Poland. Co-founder of Arma Hobby. Designer of kits: TS-11 Iskra, PZL P.7a, Fokker E.V, PZL P.11c, Hawker Hurricane, Yak-1b, FM-2 Wildcat, P-51B/C Mustang and 1/48 Hurricane.
This post is also available in:
 polski
looking great, when it is a pale plastic, you can also paint the dials in the respective color and then scribe the dials with a needle:
Very nice explanation and shows that you have made a very good job of design. Thank You.