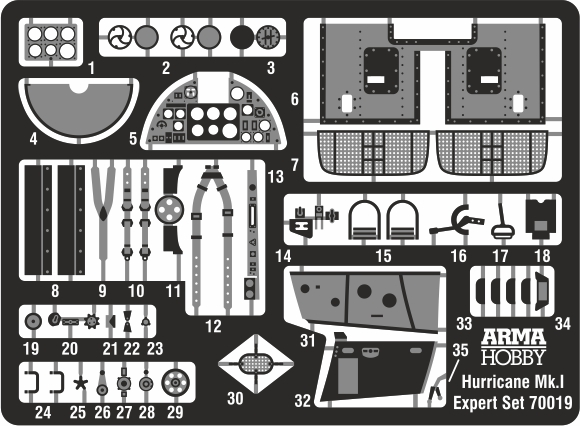
Hurricane Mk I Expert set model kit contains additional accessories for upgrading plastic parts: photo-etched parts sheet and canopy masks. Today we start to look closer at the model. And the accessories included are presented first.
The instrument panel and decal
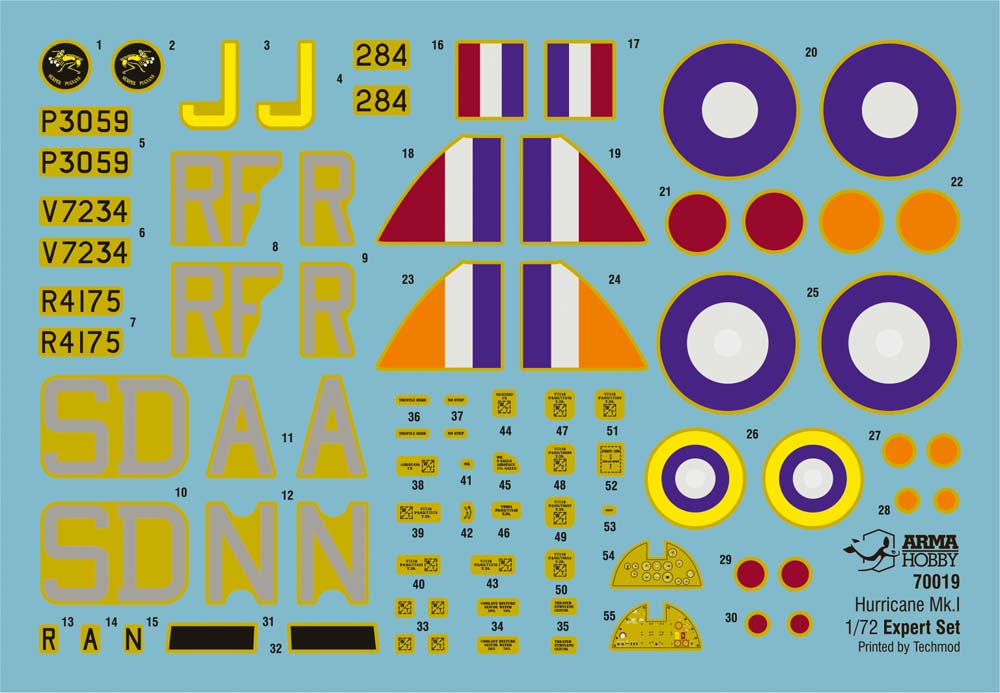
The decal contains four markings options that will be discussed one after another in the next articles on our blog. Decal is mentioned today, because it is an essential addition to the photoetched parts of the instrument panel.
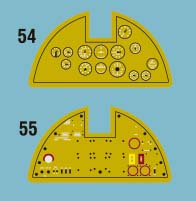
Two decals from this sheet are needed to finish it.
- The first one is with instrument “clocks” (#54), printed without a black background. We recommend to glue it on a black plastic plate.
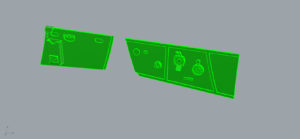
- Next, the photoetched instrument board (#5 and #1), preferably painted in a very dark grey semi-matt colour should be applied to the “clocks” decal. Best is to glue them with clear varnish (acrylic, so that it does not dissolve the decal).
- Then place the second decal (#55) on the instrument panel plate.
The contrast between the black, glossy surface of the clocks and the semi-matte lighter shade surface of the board will give it an extra depth. The decal itself has a better representation of the clocks than the film.
Details of the Expert Set photoetched sheet
1 and 5 control panel
2 spotlights
3 compass
4 oil separator behind the propeller
6 floor of the chassis recess
7 cooler
8 fire shields from exhaust pipes
9, 10, 12 belts
11 basis of the compass
13 left console
14 details on the frame
15 T-bar pedals
16 chair lever
17 step on the fuselage side
18 map case
19 knob
20 details on the frame
21 detail on the right wall
22 antenna detail
23 detail on the left wall
24 cab handles
25 T-bar knob
26 detail on the left wall
27, 28, 29 left wall
30 intake screen for the carburettor
31, 32 walls
33 vents
34 mirror
35 gas levers
Hurricane model kits with photoetched parts
See the Hurricane model kits in the Arma Hobby store
You are welcome to comment on photoetched parts and decals. Ask a question or share your opinion below please:
Modeller happy enough to work in his hobby. Seems to be a quiet Aspie but you were warned. Enjoys talking about modelling, conspiracy theories, Grand Duchy of Lithuania and internet marketing. Co-founder of Arma Hobby. Builds and paints figurines, aeroplane and armour kits, mostly Polish subject and naval aviation.
This post is also available in:
 polski






Good Morning,
Wojtek, you are doing a great job with this kit and I have to admit that I rarely saw anyone so much interested in details and new ideas.
The etched parts look excellent for this type, you only missed the port exterior handle for the slidsing hood. You have both interior handles, the third one should be added.
I like youur approach to the intrument panel. It certainly is worth a trial and an experienced modeller will do a lot out of this way. Let´s see and try the first kit then.
With regard to the decals you may open a can of worms….. however, please be aware about the origin of ther respective aircraft you want to show. In case it was a Gloster built aircraft, the colours of the roundels are brighter than the one of those built by Hawker. Gloster in the beginning used the so-calles “pre-war” blue and red which actually is brighter in hue than the blue and red used by Hawker.
Hope to see the finished product shortly!
Regards
Michael
Dear Srs at Arma Hobby, you are doing a great job with the Hurricane. These etched parts look terrífic !
Now we wiil have the “Hurri” with the different noses…..I can’t wait !
I think that your next project should be the “Fairey Battle” in 1/72.
Best wishes !